

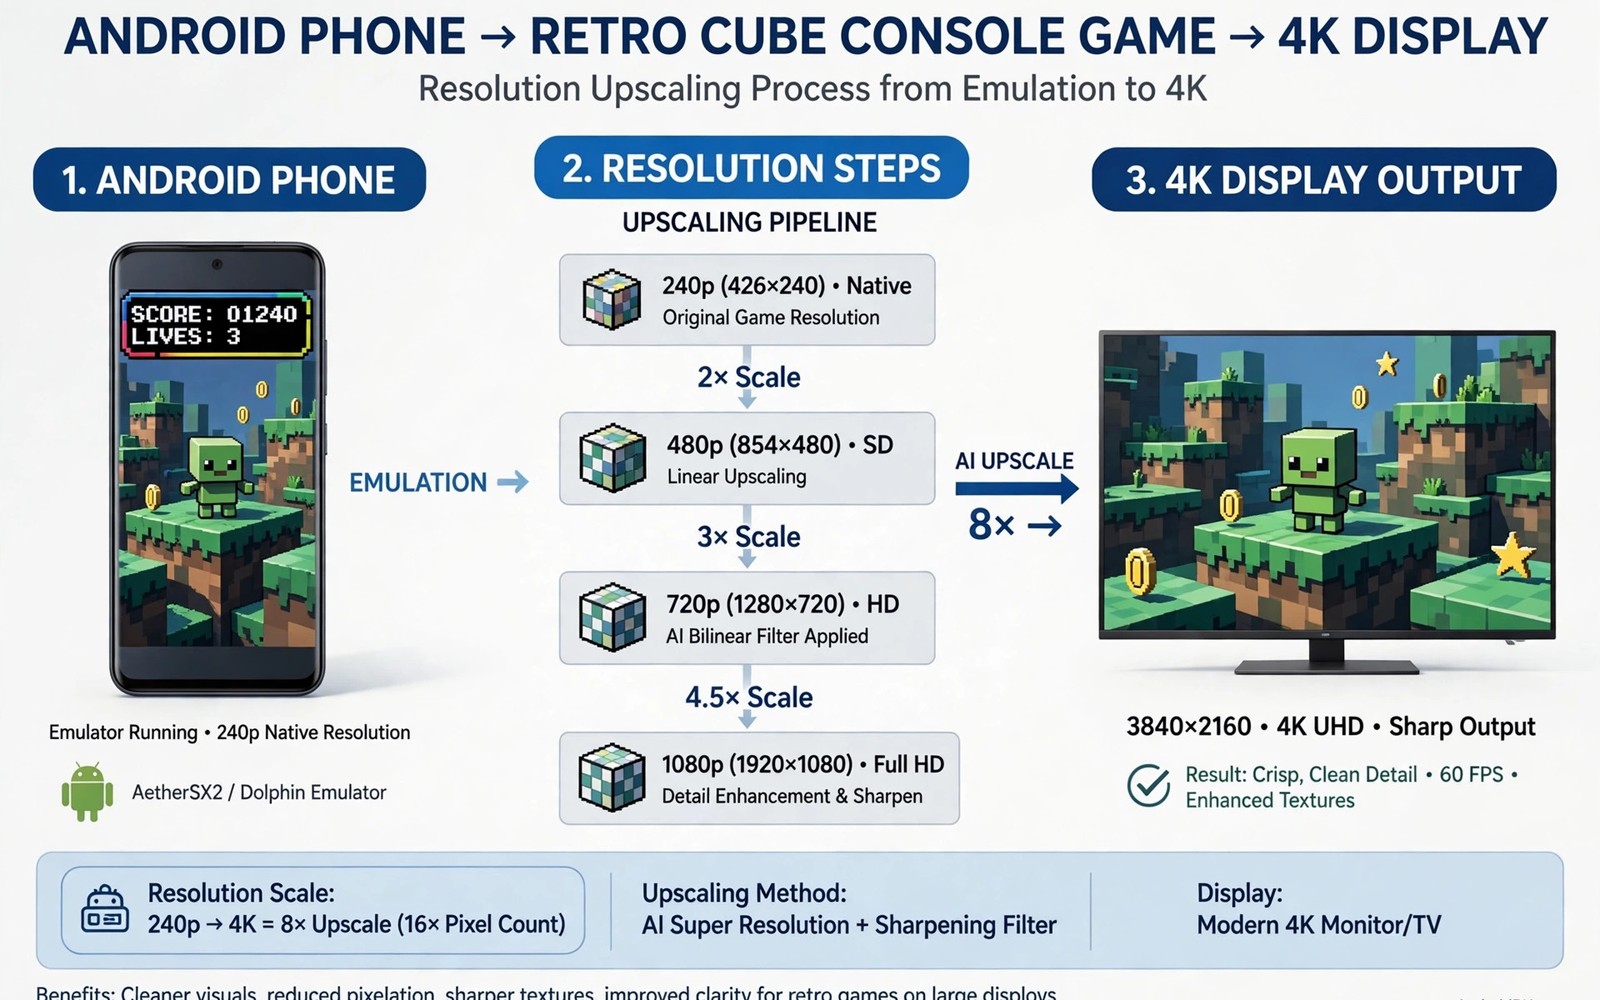
GameCube and Wii games can look stunning on a modern Android phone when the emulator upscales them to 4K. The original consoles rendered at a far lower resolution. An emulator can render the same 3D scene at a much higher resolution. Edges become sharper and textures become cleaner. The trick is to raise resolution in steps that your phone can actually sustain. A 4K target that stutters is worse than a sharp 1080p image that stays smooth.
Start with a clean baseline before you chase 4K. Set internal resolution to native and confirm the game runs without glitches. Test a busy scene with many characters and effects. A busy scene stresses the graphics chip more than a quiet menu. If the busy scene runs clean at native then raise resolution to two times native. Test the same scene again. Raise to three times and then to four times only if each step stays smooth. A step by step climb finds the true limit of your phone.
Use only games that you own and dumps that you made yourself or backups that you legally own. Emulation itself is a tool. Game files must come from your own collection. This guide focuses on settings and performance. It does not provide game files. A legal library also avoids fake files that can carry harmful code or broken data. A clean file is the foundation for a stable upscale test. Fixing texture glitches and crashing in PS2 emulators shows how a bad file can look like a graphics bug in another emulator.
Understand What 4K Upscaling Really Does
Internal resolution controls how many pixels the emulator renders for the 3D scene. It is not the same as the screen resolution of your phone. A phone with a 1080p screen can still benefit from a higher internal resolution. The emulator renders more detail and then scales the image down to fit the screen. That downscale can reduce jagged edges. The benefit is real but it costs graphics power. Each doubling of resolution roughly quadruples the pixel work. That cost explains why a phone can handle two times native but fail at four times.
Texture quality and anisotropic filtering add further cost. Anisotropic filtering sharpens textures viewed at an angle. It helps ground textures in racing and adventure games. It costs less than a full resolution jump. Try filtering before you jump to the next resolution step. A game at two times native with good filtering can look better than a game at three times native with poor filtering. Balance the two settings rather than maxing one alone.
Widescreen patches and high definition texture packs can also improve looks. A widescreen patch can stretch the view without distortion if the game supports it. A texture pack can replace low resolution art with sharper art. Test one enhancement at a time. A texture pack that looks great in screenshots can still cause stutter if it is too large for your phone memory. Keep a backup of the original setup before you add a pack.
Raise Resolution In Safe Steps
Set the graphics backend first. Vulkan can offer higher speed on newer chips. OpenGL can offer better compatibility for older titles. Test the same busy scene on both backends at native resolution. Keep the backend that runs the scene cleanly. Only then start raising resolution. A backend change after a resolution change can confuse the test. A clean order gives you a clear cause for each result.
Raise resolution one step and play for five minutes. Watch for frame drops during camera turns and explosions. A frame counter can help if your emulator shows one. A stable frame rate matters more than a resolution number. If the frame rate drops below the game target then step back one level. That level is your stable ceiling for that game. A different game may have a higher or lower ceiling. Save the ceiling per game.
Check heat during the climb. A phone that starts smooth can throttle after ten minutes at high resolution. Play a full level at the new resolution before you declare it stable. If heat causes a drop then use a lower resolution or a shorter session. A cooling break can restore speed but it is not a fix for a ceiling that is too high. A honest ceiling gives you smooth play for a whole session.
Tune Shaders And Effects For 4K
backend = vulkan
internal_resolution = 3
anisotropic_filtering = 4
widescreen = on
shaders = off
vsync = on
The snippet above is an original example written for this guide. It shows generic settings that you can adapt to your own device. It does not copy code from any outside source.
Use the settings above as a balanced starting point for a strong phone. It uses three times native resolution and moderate filtering. It leaves custom shaders off during the stability test. Add a shader only after the base image runs clean. A shader can add a film look or a sharpening pass. It can also hide detail if it is too strong. Test shaders in a busy scene and compare screenshots before and after. Keep the shader that improves the image without hurting speed.
Fix Common 4K Problems
Black textures at high resolution often point to a backend or a texture option. Switch backends and test at native resolution first. If the texture returns then the high resolution exposed a backend weakness. Keep the working backend even if it is slower. A correct image at a lower resolution beats a broken image at 4K. Missing shadows can point to a shader or a lighting option. Disable custom shaders and test again.
Audio crackle during high resolution play often means the processor is overloaded. Graphics work can starve the audio thread. Lower resolution one step and test audio again. A clean audio track is a sign that the system has headroom. A crackling track is a warning that the phone is at its limit. Do not ignore audio warnings. They often appear before a full crash. Boosting PPSSPP graphics to ultra high definition covers a similar balance for handheld emulation.
Save states can help you test the same scene repeatedly. Create a save state just before a busy scene. Load it after each settings change. A repeatable test scene removes guesswork. Do not rely only on save states for progress. Keep normal in game saves as well. A save state from one emulator version may not load in a newer version. Normal saves are more portable across updates.
Compare Upscaling Across Different Games
A racing game and a role playing game respond differently to upscaling. A racing game has fast camera movement and distant road detail. Upscaling can sharpen distant road markings. A role playing game has detailed character models and slow camera movement. Upscaling can sharpen faces and clothing. Test each genre separately. A setting that shines in one genre may waste power in another. Save a profile per genre as well as per game when settings differ.
Check text readability at each resolution step. Small menu text can look blurry at native resolution on a high density screen. Upscaling can sharpen that text. A game with tiny text may benefit more from upscaling than a game with large icons. Read a menu at each step and note the step where text becomes clear. That step may be lower than the maximum step. A clear menu at a moderate resolution is a good result.
Test cutscenes separately from gameplay. A cutscene uses pre rendered video or a scripted camera. It may not benefit from internal resolution in the same way as gameplay. A cutscene that stutters at high resolution may need a lower setting even when gameplay runs smooth. If your emulator allows per scene settings then use them. If not then choose a setting that keeps both gameplay and cutscenes stable. A stable cutscene matters for story games.
Keep notes on resolution ceilings for your phone model. A note with game names and stable resolutions helps friends with the same phone. It also helps you after a reset. A reset erases profiles but a note survives in a cloud document or a paper notebook. A short note can save hours of retesting after a phone change.
Save a screenshot at each resolution step for comparison. A screenshot at native and a screenshot at your stable ceiling show the gain clearly. Compare the screenshots on a large screen if possible. A large screen reveals edge sharpness that a phone screen can hide. A clear comparison helps you decide if a higher step is worth its cost.
Common Mistakes
One mistake is to set 4K on the first launch. A first launch should test stability at native resolution. Another mistake is to copy settings from a flagship phone to a midrange phone. A chip difference can turn a smooth setup into a stuttering setup. A third mistake is to enable every enhancement at once. Enhancements interact in ways that hide the true cause of a glitch. Change one setting at a time and test the same scene.
Do not chase a resolution number for screenshots alone. A game that runs smooth at a lower resolution will feel better during play than a game that stutters at 4K. Adding custom graphic shaders to mobile emulators shows how shaders can improve looks without a huge resolution jump. A smart combination often beats a single extreme setting.
Frequently Asked Questions
Can any Android phone run GameCube games at 4K?
No a phone needs a strong graphics chip and good cooling for high internal resolution. Midrange phones can still play many titles well at lower resolutions. Test in steps from native upward. Keep the highest resolution that stays smooth for a full level.
Does 4K upscaling change the original game art?
Upscaling renders the same 3D scene at more pixels. It sharpens edges and it can reveal texture detail. It does not remake the art. Texture packs can replace art but they are a separate enhancement. Test packs separately from resolution changes.
Why does my game stutter only at 4K?
Higher resolution quadruples pixel work with each major step. A phone can handle a lower step but fail at a higher step. Heat can also cause a drop after several minutes. Step back one level and test a full level. A stable lower resolution beats a stuttering 4K target.
Conclusion
Load a game you own today and set internal resolution to native first. Test a busy scene and then raise resolution one step at a time. Save the highest stable step as a per game profile. That profile is your personal 4K setup for that title.

