

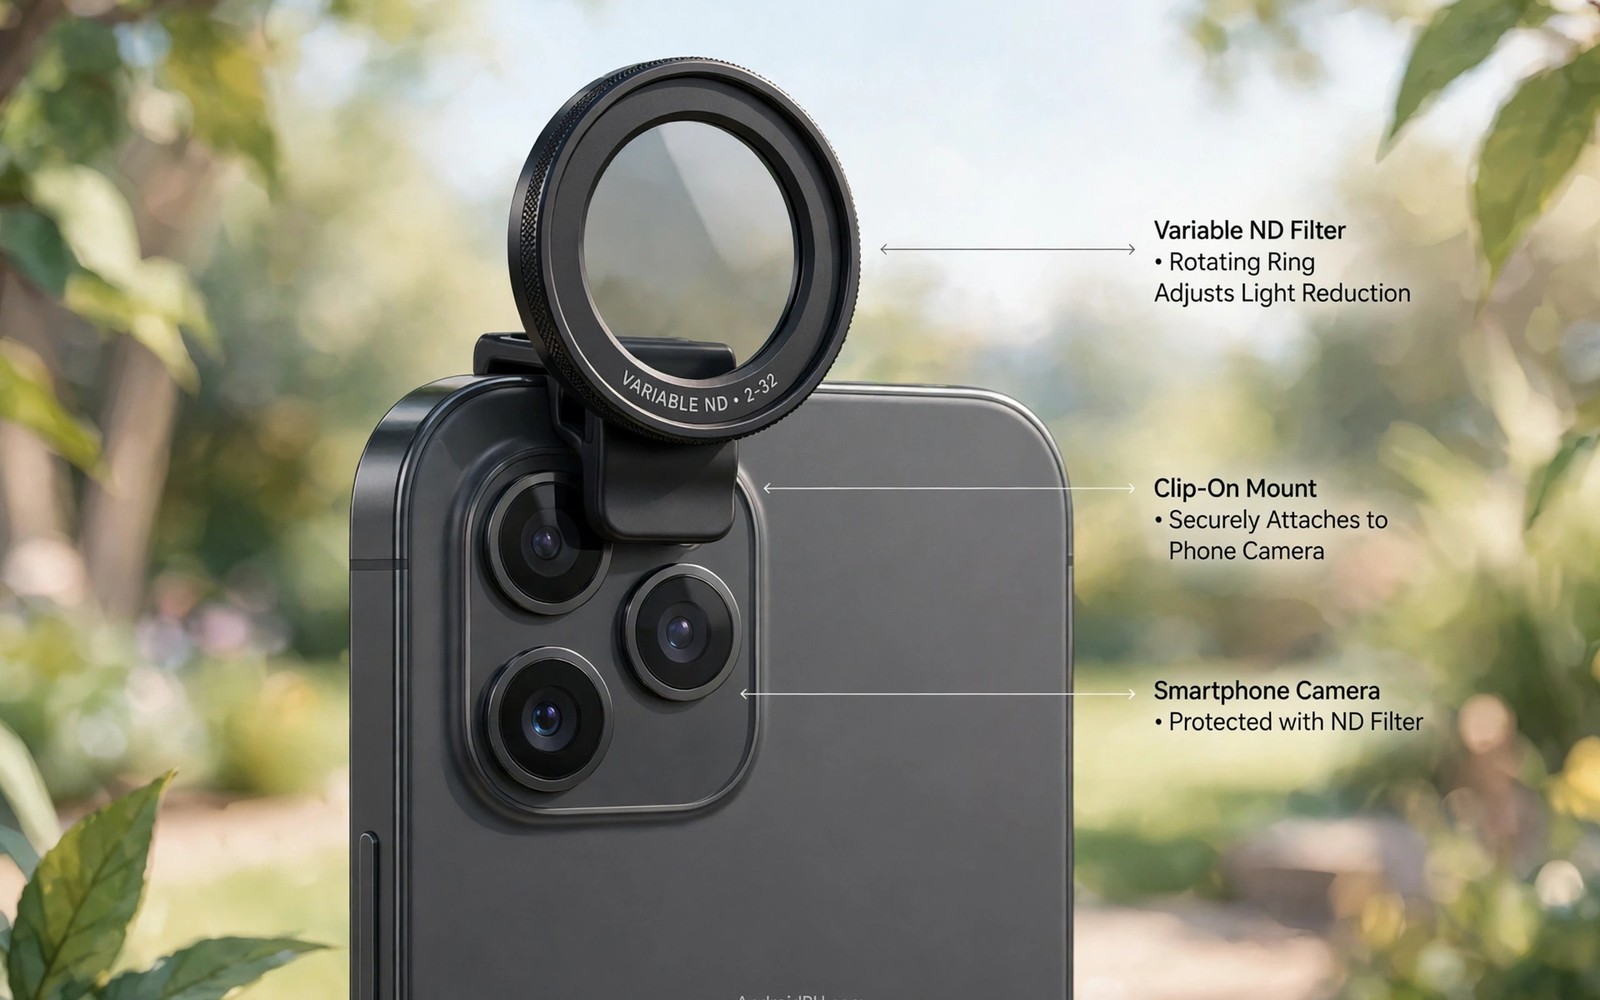
Bright sun breaks phone video in a specific way. The phone shortens exposure to cope and motion turns choppy and harsh. Water looks frozen instead of flowing and walking looks jittery. A neutral density filter fixes this by cutting light before it reaches the sensor.
A variable ND filter lets you dial the amount of light cut with a twist. Turn one way for a small cut and the other way for a deep cut. The same filter covers dawn light and midday sun without swapping glass. That flexibility suits outdoor shooters who face changing light all day.
This guide explains how ND strength works and how to pick the right strength for video. It covers colour shift and sharpness and mounting on phones. It also covers the exposure habits that turn filtered footage into smooth professional motion.
Why Phone Video Needs ND Outdoors
Video looks natural when each frame blurs motion slightly. A common rule sets shutter speed near twice the frame rate for smooth motion. At thirty frames per second that means a shutter near one sixtieth of a second. Bright sun forces far faster shutters without a filter.
Fast shutters freeze each frame sharply and motion turns staccato. A walking person looks like a series of still poses rather than a fluid stride. Cars jump across the frame instead of gliding. Viewers feel the harshness even when they cannot name the cause.
A phone cannot narrow its aperture much because the lens aperture is mostly fixed. Exposure control relies on shutter speed and sensitivity. Sensitivity already sits at its lowest in bright sun. Only a filter can cut light further without harming quality.
ND filters also help stills in bright light when long exposures are wanted. Flowing water and moving clouds blur beautifully with a slow shutter. A phone without a filter cannot hold a slow shutter in daylight. A variable ND opens that creative door.
How Variable ND Strength Works
ND strength is measured in stops of light reduction. One stop halves the light reaching the sensor. Three stops cut light to one eighth of the original level. Six stops cut light to one sixty-fourth and allow slow shutters in strong sun.
A variable ND stacks two polarising layers that rotate against each other. Twisting the front ring changes how much light passes through the pair. Markings on the ring show minimum and maximum positions. The range typically spans about two to eight stops on phone filters.
At the extreme end of the range a cross pattern can appear. Dark X-shaped bands cross the frame when the two layers approach full opposition. Avoid the last part of the range to keep the frame even. A filter that avoids the cross effect at its maximum costs more but saves footage.
Fixed ND filters avoid the cross problem entirely because they use one fixed strength. They force a swap when light changes. Variable filters trade a small risk of unevenness for fast adjustment. Most phone videographers accept that trade for outdoor work.
Choosing Strength for Video
For thirty frames per second video in bright sun a cut of three to five stops usually lands shutter speed near the natural target. Start near the middle of the filter range and check the shutter reading in your camera app. Adjust in small twists until motion looks smooth.
For sixty frames per second video the target shutter is faster so less ND is needed. Two to four stops often suffice in the same light. Higher frame rates always need less filtering because their natural shutter is already faster. Match the filter to the frame rate you chose.
Overcast light needs far less ND than midday sun. One to three stops may be enough on a cloudy day. Dawn and dusk may need no filter at all. Carry the variable filter mounted but dialled to minimum so adjustment takes one twist.
Judge strength by motion rather than by brightness alone. The preview brightness can mislead because the phone compensates exposure. Watch moving subjects in the preview for smooth blur. Smooth walking and flowing water confirm the strength is right.
Colour Shift and Sharpness
Cheap variable ND filters add a colour cast to footage. Warm brown or cool blue tints appear across the whole frame. The cast grows stronger at high ND settings. White balance correction in editing can fix mild casts but strong casts cost colour quality.
Test any new filter on a white wall and a skin tone before a real shoot. Compare filtered and unfiltered frames of the same scene. A mild cast that corrects cleanly is acceptable. A strong cast that stains shadows is a reason to upgrade.
Sharpness loss comes from extra glass in front of the lens. Good coatings and clean glass keep the loss small. Dirty or scratched filter glass softens detail visibly. Clean the filter with a microfibre cloth before every outdoor session.
Vignetting can appear when a thick filter mount narrows the lens view. Test the filter on a plain sky and inspect the corners. A filter that darkens corners on your phone needs a thinner mount or a larger diameter. Corner darkening is hard to fix convincingly in editing.
- Dial ND strength until moving subjects show smooth natural blur in the preview.
- Avoid the extreme end of a variable filter range to prevent cross pattern bands.
- Test colour cast on a white wall before trusting a new filter on a real shoot.
- Clean filter glass before every session because dirt softens detail fast.
- Check corners on a plain sky for vignetting from a thick filter mount.
Mounting ND Filters on Phones
Phone ND filters mount with a clip or a case thread or a magnetic ring. Clip mounts suit occasional use across phones. Case mounts suit dedicated video phones with a fixed rig. Magnetic mounts suit fast swaps between filters during a shoot.
Alignment matters as with any front filter. Centre the filter over the main camera and check the preview for even coverage. A shifted filter darkens one side of the frame. Lock the mount firmly because wind and handling shift loose clips.
Stacking a variable ND with a polariser adds creative control but also adds glass. Two filters together increase flare risk and vignetting. Use a single variable ND when possible and add a polariser only for reflections that truly need it.
Store the filter in a hard case between shoots. A scratched variable ND is hard to repair and its damage shows in every frame. Keep the case in the camera bag so the filter travels with the phone rig. A protected filter lasts years of outdoor use.
OUTDOOR ND VIDEO CHECK
1 Frame rate chosen and target shutter known
2 Filter mounted and centred over main camera
3 Strength dialled until motion blur looks smooth
4 Cross pattern checked at chosen strength
5 Colour cast tested on white wall
6 Corners checked on plain sky
7 Filter glass clean and case packed
ND Filters for Stills and Long Exposure
Long exposure stills turn moving water into silk and clouds into streaks. A variable ND allows slow shutters in daylight that no phone manages alone. Dial the filter until the shutter reaches several seconds. A tripod is essential because handholding seconds-long exposures blurs everything.
Start with a modest long exposure of one second and review the result. Increase exposure time gradually until motion renders as desired. Water needs different times than clouds because water moves faster. Experiment with several times on the same scene.
A remote shutter prevents touch shake at the start of long exposures. Combine the ND filter with a tripod and a remote for the cleanest results. Wind still shakes light tripods during long exposures. Shield the tripod or wait for calm air.
Stacking ND with Other Filters
Stacking a variable ND over a polariser combines light control with reflection control. The stack adds glass thickness and flare risk. Test the stack on a bright scene before trusting it. Vignetting often appears first at the frame corners.
Stack order matters for handling and for optical quality. Mount the polariser closest to the lens when the design allows rotation. The variable ND on the outside stays easy to adjust. Check that both filters stay centred over the camera.
Avoid stacking three filters on a phone under any normal circumstance. Each added layer costs sharpness and adds flare paths. A single well-chosen filter beats a tall stack in nearly every case. Simplify the front glass whenever possible.
Exposure Apps and Manual Control
Manual camera apps reveal shutter speed and sensitivity while shooting video. These readings guide ND adjustment far better than preview brightness alone. Set frame rate first and then dial ND until shutter speed lands near the target. Manual readings turn guesswork into control.
Lock exposure after setting ND strength to prevent drift during a take. Auto exposure changes brightness as the scene changes and creates flicker. Locked exposure keeps brightness consistent across the clip. Unlock only when the light changes fundamentally.
Histogram displays in manual apps show whether highlights clip or shadows crush. Check the histogram after dialling ND strength. A histogram bunched at one end signals wrong exposure. Adjust ND or sensitivity until the histogram spreads sensibly.
ND Filters for Waterfalls and Rivers
Waterfalls suit ND filters because moving water blurs beautifully with slow shutters. A variable ND dialled to several stops allows exposures of a second or more in daylight. Flowing water turns silky while rocks stay sharp. The contrast between silk water and sharp rock defines the classic waterfall look. A tripod is mandatory because seconds-long exposures blur everything when handheld.
Rivers need shorter exposures than waterfalls because their motion is gentler. Half a second often suffices for river silk while waterfalls need one to two seconds. Test several exposure times on the same river scene. Shorter times preserve some water texture while longer times smooth it completely. The best time depends on water speed and personal taste.
Spray from waterfalls coats filter glass quickly and creates soft spots. Wipe the filter between shots on waterfall shoots. A lens hood helps shield the filter from direct spray. Check the filter for droplets before every frame because spray spots ruin otherwise perfect long exposures. Carry a dry cloth dedicated to spray wiping.
Choosing Filter Quality Tiers
Budget ND filters suit beginners learning exposure control. They teach ND technique without a large investment. Colour casts and softness appear more often at budget tiers. Beginners should expect to upgrade after learning what matters. Budget filters are a learning tool rather than a lifetime purchase.
Mid-range ND filters balance price with reliable colour and sharpness. Most serious phone videographers settle at this tier permanently. Colour casts stay mild and correct easily in editing. Sharpness holds well for sharing and moderate prints. Mid-range filters offer the best value for regular outdoor shooters.
Premium ND filters use better glass and coatings for minimal colour shift and maximum sharpness. Professionals who publish commercially justify the cost through consistent results. Premium filters also resist the cross pattern better at high settings. Buy premium only when regular work demands the last margin of quality. Hobby shooters rarely need it.
For reflection control outdoors, see lens hoods and polarizer filters that eliminate reflections and pair polarising with ND wisely.
For creative front glass options, see clip-on lenses for macro and wide-angle and anamorphic looks which change framing rather than light.
For longer reach in bright scenes, see telephoto auxiliary lenses that enhance optical zoom on mobile cameras and combine reach with exposure control.
The steps above follow the approach described in the official developer documentation and standard manufacturer guidance for camera filters and mobile video exposure. The strength advice and test routines reflect common practice for outdoor phone videography. Use them as a baseline and adapt the settings to your phone model and your light conditions.

