

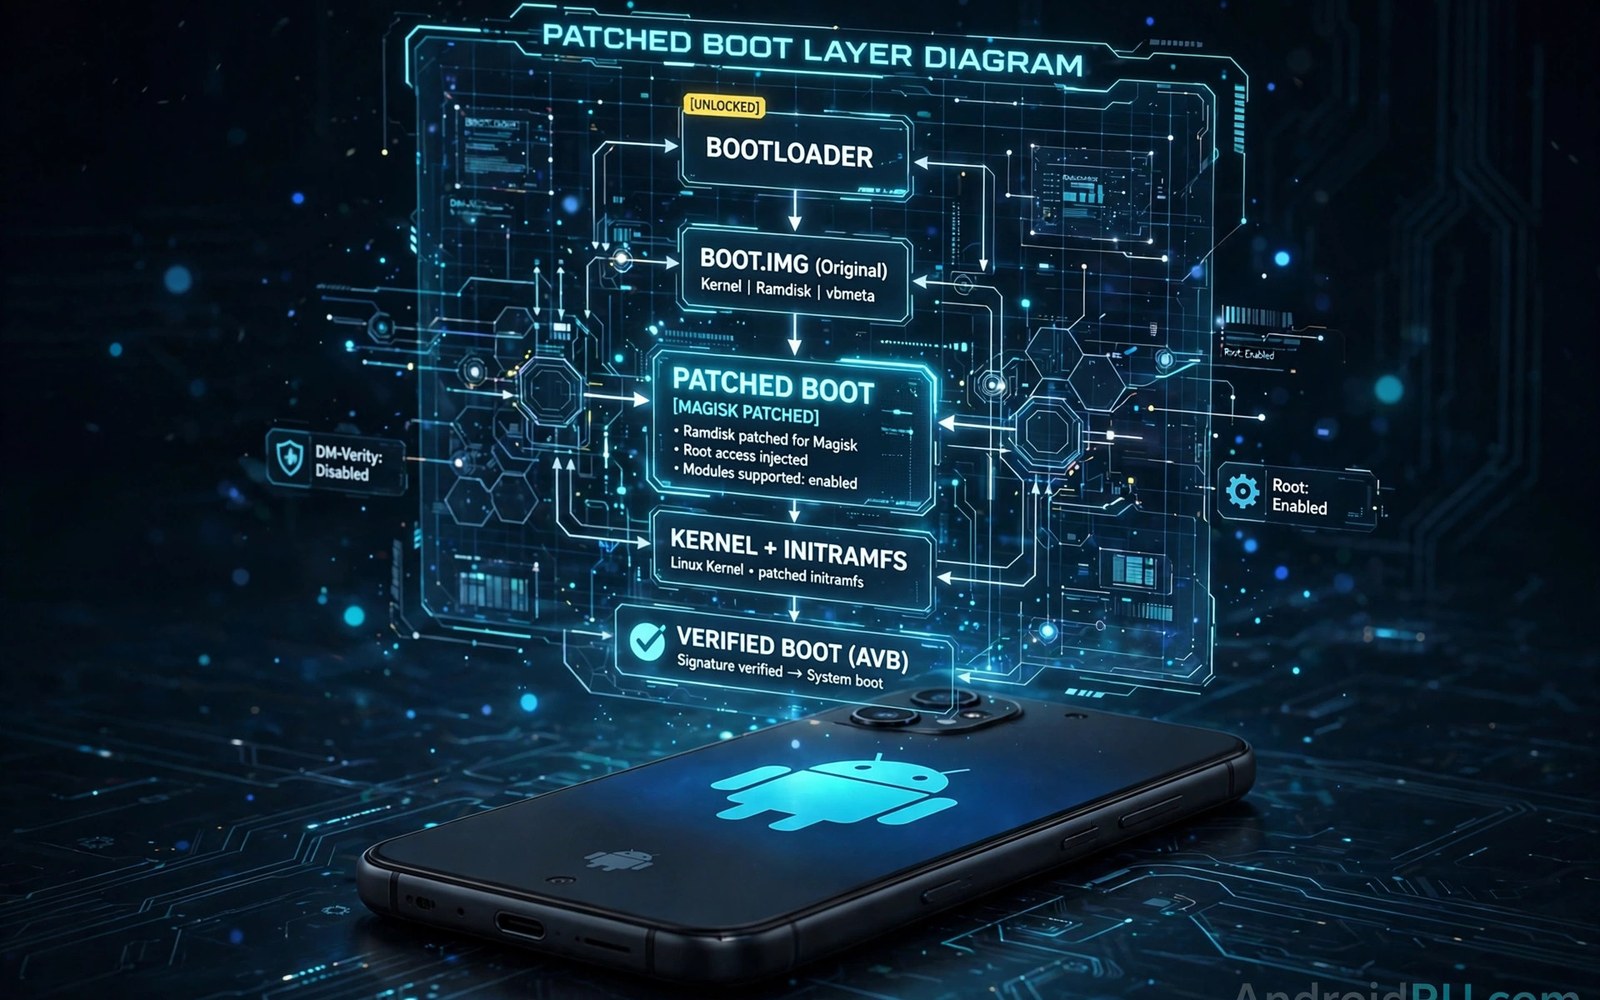
Patching a boot image is the core step in many modern root installs. The boot image holds the kernel and the early boot filesystem. Patching adds root code to that image without editing the system partition. The patched image then boots the phone with root ready. Understanding the patch makes the whole install less mysterious.
The process starts with a stock boot image from your phone. You extract that image from firmware or from the device itself. The root tool reads the image structure and adds its payload. It then writes a new patched image file for flashing. Flashing replaces the boot slot content with the patched version.
Patching sounds technical but the steps follow a clear order. Extract the correct stock image first and verify its build. Run the patch tool and check the output file size. Flash the patched image to the correct slot only. Reboot and verify root through the manager app. Each step has a check that catches common errors early.
Boot patching is the practical side of systemless root. Review how Magisk achieves systemless root without system edits for the design behind the patch. Also review how to check whether your bootloader can be unlocked safely since unlocking usually precedes flashing. Those topics together cover the full chain.
What Lives Inside A Boot Image
A boot image contains a header with size and address data. It contains the kernel binary that manages hardware directly. It contains a ramdisk with early boot scripts and binaries. Newer formats may split ramdisk parts across related images. The patch tool must understand the exact format for your device.
The kernel version inside the image must match system expectations. A kernel from another build may boot but break drivers. Display or camera or modem features may fail silently. Matching the stock image build prevents those driver mismatches. Never patch an image from a different model or build.
Ramdisk contents vary by Android version and maker customisation. Some ramdisk scripts mount partitions in a maker specific order. Patch tools preserve those scripts while adding root early code. Preserving maker scripts matters for stable boot. A patch that overwrites scripts carelessly causes boot faults.
Extracting The Correct Stock Image
Firmware packages from the maker contain boot images for each build. Extracting from firmware needs a tool that handles the package format. Some firmware uses payload files that need a dedicated extractor. Others use simple zip archives with image files inside. Follow a model specific extraction guide for your firmware type.
Some phones allow dumping the boot image directly from the device. That dump requires fastboot or a rooted shell depending on method. A dumped image matches the running build exactly which is ideal. Dumping also avoids firmware download size and region confusion. Keep the dumped file labelled with build and date.
Verify the extracted image before patching it further. Check file size against expected values from the guide. Check the build number embedded in related firmware metadata. A wrong image patched and flashed wastes time at best. At worst it causes a bootloop that needs stock recovery.
How The Patch Tool Works
The patch tool unpacks the boot image into its parts. It adds a root daemon binary to the ramdisk area. It modifies early init scripts to start that daemon at boot. It may also add module overlay handling for later use. It then repacks all parts into a valid boot image again.
Patch tools handle device differences through format detection. They detect ramdisk compression and header version automatically. They adjust for A and B slot layouts when present. They also handle vendor boot splits on newer devices. Automatic detection reduces manual error but does not remove build matching duty.
Patch output should be checked before flashing every time. A patched file far smaller than stock suggests a failed patch. A patched file with zero size is clearly broken and must not be flashed. Re-run the patch with the correct stock image when output looks wrong. Checking output takes seconds and prevents boot faults.
Flashing And Verifying Root
Flashing writes the patched image to the boot slot through fastboot. Use the correct slot name when your phone uses slots. Flashing to the wrong slot leaves the phone booting the old image. The result looks like root failed when only the slot was wrong. Confirm the active slot before flashing to avoid that confusion.
After flashing reboot the phone and wait for full boot. Open the manager app and check the installed status display. The manager should report root as active and show a version. Grant a test request to a trusted tool and confirm the prompt works. A working prompt proves root more reliably than a status label alone.
If boot fails after flashing then restore the stock image promptly. Fastboot restore overwrites the patched image with stock content. That restore usually returns the phone to a bootable state. Do not flash random images while troubleshooting a failed patch. Return to stock first and diagnose the patch step calmly.
Common Patching Mistakes To Avoid
Using a boot image from a beta build on a stable system causes mismatch faults. Beta kernels may expect system files that stable builds lack. The phone may boot with broken features or crash often. Stay within the same release channel for image and system. Beta experiments belong on a spare device rather than a daily phone.
Patching an already patched image can double apply root code. The result may boot but behave oddly or fail module loading. Always start patching from a clean stock image. Keep stock and patched files in separate clearly labelled folders. Clear separation prevents accidental double patching.
Unrooting reverses the patch cleanly when needed. Learn how to unroot fully and restore a factory setup before you rely on a patched boot daily. Knowing the reverse path makes the forward patch safer. It also helps when an update or warranty need requires stock boot again.
Boot Image Formats Across Makers
Boot image formats differ in header version and compression style. Older formats use a simple header with fixed fields. Newer formats add vendor ramdisk descriptors and extra metadata. Patch tools must parse the exact format correctly. A tool that misreads a header can produce a corrupt patched image.
Compression affects ramdisk size and patch handling significantly. Common compression methods include gzip and lz4 formats. The patch tool must decompress and recompress with the same method. Wrong compression can cause boot failure even when content is correct. Format detection handles this detail when the tool supports the device.
Signature checks add another format layer on some makers. Signed boot images carry a signature that patching invalidates. Unlocked bootloaders accept unsigned images despite that invalidation. Locked bootloaders reject patched images outright. That rejection explains why unlocking precedes patching on most phones.
Vendor boot images split ramdisk content on newer Android versions. Part of the ramdisk lives in boot and part in vendor boot. Patch tools must update the correct part for the device. Mixing vendor boot files across builds breaks early boot scripts. Build matching applies to vendor boot just as strictly as boot.
Verifying A Patch Before Flashing
Compare patched and stock file sizes as a first sanity check. Patched files usually grow modestly from added root code. A patched file much smaller than stock signals a patch failure. A patched file identical in size may mean no code was added. Size alone does not prove success but it catches gross failures.
Check patch tool logs for errors or warnings before flashing. Logs often state which ramdisk parts were modified. They may warn about unsupported format features plainly. Ignored warnings become boot faults after flashing. Read logs fully even when the tool reports success.
Keep the patch tool updated to the latest stable release. New releases add support for new boot formats and devices. Old tools may mishandle new header versions silently. A stale tool is a common cause of mysterious patch failures. Update the tool before blaming the phone or the image.
Test the patched image on a spare device when one exists. A spare device removes risk from the daily phone entirely. When no spare exists then keep stock restore ready. A ready restore makes testing on the daily phone less stressful. Never test without a restore path in place.
Patching And Future Updates
Each system update brings a new stock boot image to patch. Old patched images do not work on new system builds reliably. Patch the new stock image after each update arrives. Keep old patched images labelled rather than deleting them at once. Old images help diagnose whether a new patch caused a fault.
Patch tool updates may lag behind major Android releases. A new Android version can change boot format details. Tool makers need time to add support for those changes. Waiting for tool support before updating avoids a rootless gap. Patience after major releases pays off for patch users.
Module overlays depend on patch success at boot time. A failed patch breaks module loading even when modules are correct. Diagnose patch faults before blaming modules for failures. A clean patched boot without modules proves the patch works. Add modules only after that proof exists.
Document each patch with build and tool version and date. That record helps future updates and troubleshooting greatly. It also helps community helpers understand your setup quickly. Patch notes turn a fragile process into a repeatable routine. Repeatability is the goal for long term root use.
Keep a simple patch diary for every boot image you patch. Note the stock build and tool version and patch date. Note the flash outcome and any boot fault observed. That diary makes future patches repeatable and safer. It also helps helpers diagnose patch faults quickly.
adb pull /dev/block/bootdevice/by-name/boot stock_boot.img
# Patch stock image in manager app
fastboot flash boot patched_boot.img
The steps above follow the approach described in the official developer documentation and reflect common practice for this topic. They explain boot image structure and patching in plain terms. Readers should use stock images for their exact model and build. When a patch output looks wrong it is safer to rebuild than to flash.

