

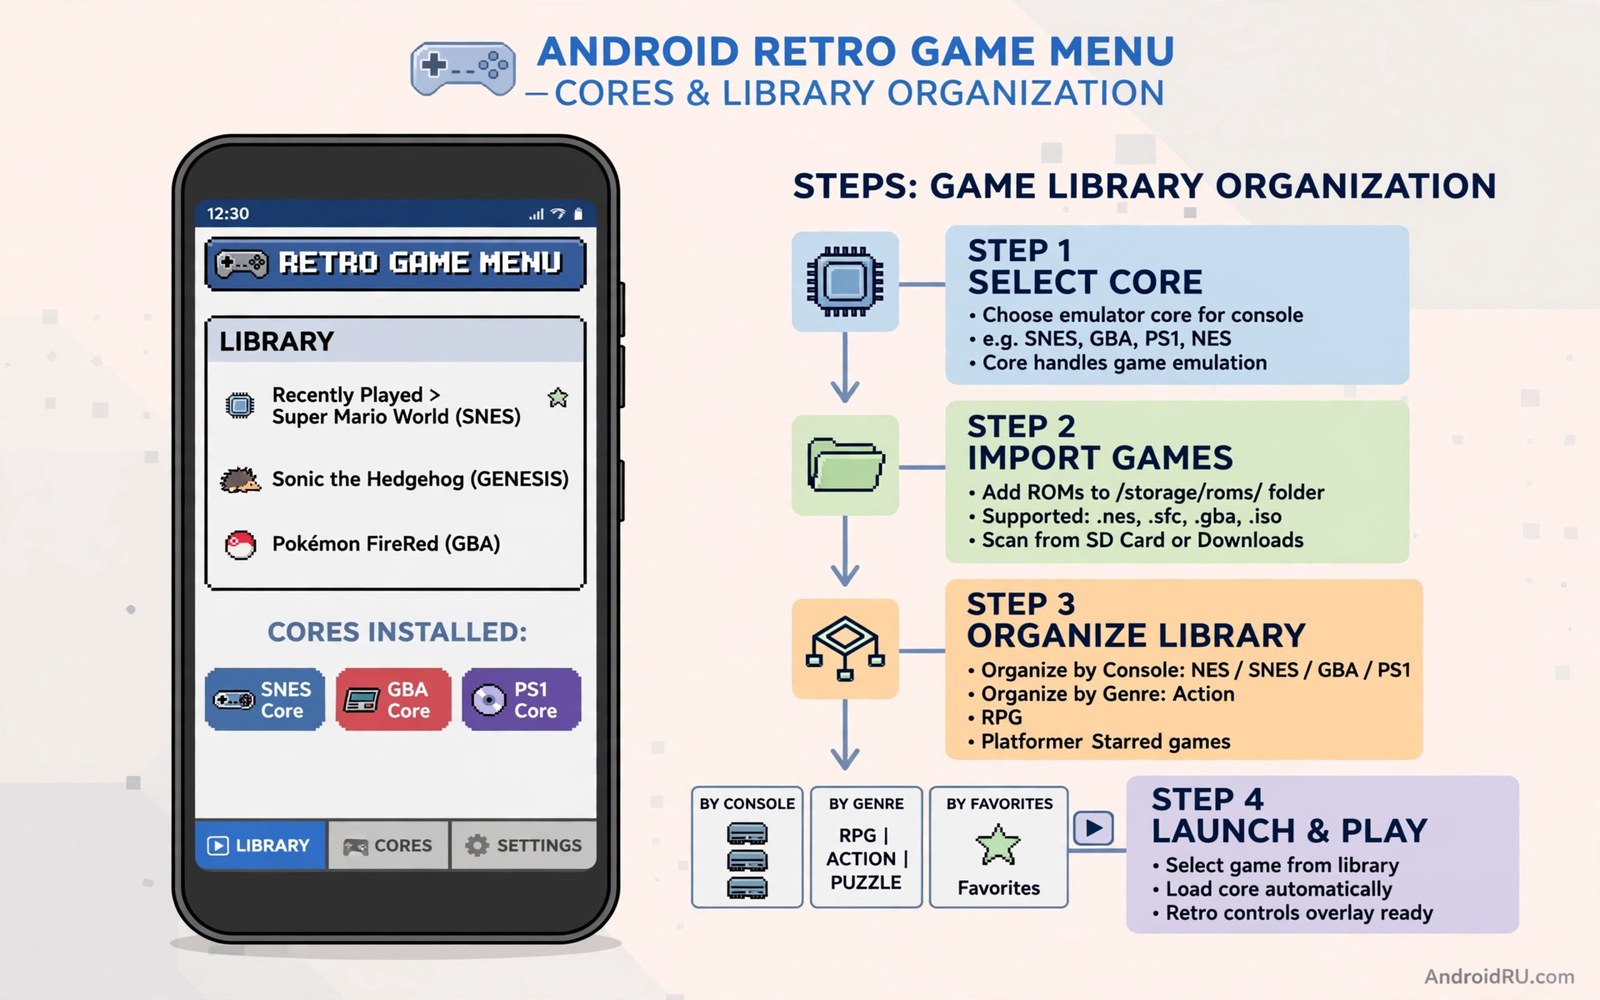
RetroArch looks intimidating on first launch. The menu is dense and the terms are unfamiliar. Cores and playlists and shaders all appear at once. That first impression hides a simple truth. RetroArch is one app that runs many classic systems through small plugins called cores. Learn the core idea once and the whole app becomes clear.
A core is an emulator for one system or one family of systems. RetroArch itself does not emulate games. It provides the interface and the controls and the save system. A core provides the actual system emulation. You download a core for each system you want. You then load a game file with that core. That separation is why one app can cover dozens of systems.
Start with one system only. Pick a system you know well and a game you own legally. Set up that one system fully before you add a second system. A single system setup teaches cores and folders and controls without confusion. If you want a light single system alternative first then read five retro game emulators that work on low-end devices for dedicated app options.
Download the right core for your system
Open RetroArch and go to the online updater section. Choose core downloader and find the core for your system. Core names often include the system name and a version tag. Pick a core with a stable reputation for your system rather than the newest experimental core. A stable core gives fewer crashes during a first setup.
Download only the cores you need right now. A long core list makes the menu harder to navigate. It also makes updates slower later. Add a new core only when you add a new system. That discipline keeps the app fast and the menu clean.
Update cores only when you have a reason. A core update can fix a bug in a specific game. It can also change a setting that worked before. Update one core at a time and test its game after the update. Keep a note of the working core version for your favourite games.
Organise game folders and playlists
Create one folder per system on your phone storage. Place game files for that system inside its own folder. Keep BIOS files in the system folder that RetroArch settings point to. A clean layout makes scanning fast and avoids mixed system errors. Name folders clearly such as snes and gba and nes.
Scan a folder to build a playlist for that system. A playlist shows game titles with box art when available. Scanning reads file names and matches them to a database. A file with a strange name may fail to match. Rename a failed file to a clear title and scan again. Do not scan a folder that mixes systems. Mixed scans create a messy playlist that is hard to clean.
Test one game from the new playlist right away. Load it with the correct core and play for five minutes. Check controls and sound and save states in that test. A working test proves the folder and core and playlist all work together. Import more games only after that proof.
Use a real RetroArch configuration snippet
RetroArch stores settings in a plain text configuration file. The snippet below shows a small set of common settings in that file format. It sets a video driver and an audio driver and a save state folder. Adjust the paths to match your phone storage. The snippet is only a starting point rather than a full configuration.
video_driver = "gl"
audio_driver = "opensl"
savestate_directory = "/storage/emulated/0/retro/saves"
savefile_directory = "/storage/emulated/0/retro/saves"
input_driver = "android"
video_fullscreen = "true"
The code above was written for this guide as a short configuration example. Back up your original configuration file before you edit it by hand. A bad edit can stop RetroArch from launching. Restore the backup if the app fails to start after a manual change.
Map controls and save states properly
Map controls in the input settings before a long session. Touch controls work for slow games but a controller works better for action games. Pair a controller and map each button once. Save the controller profile with a clear name. A saved profile prevents remapping every time you launch a game.
Learn the save state system early. A save state freezes the game at an exact moment. You can load it later even if the game has no built in save feature. Use save states for testing and for tough sections. Use in game saves for long term progress when the game supports them. Both systems together give the safest progress.
Set an auto save interval only if you want it. Auto saves protect against a crash during a long session. They can also cause a brief pause on weak phones. Test auto save in a short session first. Turn it off if the pause breaks fast gameplay. For shader looks after a stable setup read how to add custom graphic shaders to mobile emulators and add only one shader at a time.
Grow RetroArch one system at a time
Growing RetroArch slowly beats a rushed full setup. Finish one system completely before adding the next. A finished system means a working core and a clean playlist and saved controls. That completeness gives confidence for the next system. A half finished library confuses every later step.
Schedule system additions across weeks rather than days. Add a new system each weekend and test it thoroughly. A weekly pace leaves time to fix BIOS and control issues. It also leaves time to actually play the new system. A rushed setup often ends with a library nobody plays.
Keep a RetroArch journal with one page per system. Record the core version and the BIOS location and the control profile. Add the first game you tested and the result. That journal rebuilds RetroArch fast after a reinstall. It also tracks which systems need updates later.
Prune playlists that no longer match your folders. A playlist entry for a deleted game wastes menu space and causes errors. Rescan a folder after deleting games from it. A clean playlist loads faster and looks better. Regular pruning keeps a large library pleasant.
Teach one friend the RetroArch setup with your journal. Teaching forces you to explain cores and playlists clearly. A friend who understands the setup can help test new systems. Shared knowledge makes a hobby more fun and more resilient. A journal plus a friend beats a lone expert setup.
Fix RetroArch playlist problems
A playlist problem often starts with a file name that the database cannot match. A strange file name may scan as an unknown entry or not at all. Rename the file to a clear title that matches the database. Rescan the folder after renaming and check the new entry. A clean name fixes most playlist mysteries quickly.
A playlist may also duplicate entries after a folder move. Old entries point to a deleted path while new entries point to the new path. Delete the playlist and rescan the folder from scratch when duplicates appear. A fresh scan removes stale entries in one step. Manual deletion of duplicates takes far longer and risks errors.
A playlist that shows no box art may need a thumbnail download. Open the online updater and download thumbnails for the playlist system. A slow network can interrupt thumbnail downloads and leave gaps. Retry the download on a stable connection when art stays missing. Box art is cosmetic but it makes a large library pleasant to browse.
RetroArch rewards a player who keeps one backup of the configuration file in a safe folder. A backup restores a working setup after a bad manual edit in seconds. Copy the configuration file before any hand edit and label the copy with the date. That single habit prevents most RetroArch startup failures. A player with a backup can experiment freely without fear of losing a working menu layout and control profile.
Common mistakes
The biggest mistake is downloading every core at once. A huge core list confuses the first setup and slows updates. Download one core and finish one system first. That order builds confidence fast.
- Players mix game files across systems and then build a broken playlist.
- Players skip BIOS files and then blame the core for a black screen.
- Players edit the configuration file without a backup and then cannot launch the app.
- Players map controls per game without saving a profile and then remap every session.
- Players rely only on save states and then lose progress when a state file corrupts.
Another mistake is judging RetroArch from the default touch layout. The default layout suits few games well. A controller or a custom touch layout transforms the experience. Spend ten minutes on controls before you judge a game inside RetroArch.
FAQ
Is RetroArch free to use?
Yes RetroArch is free and open source. Cores are also free in most cases. You still need legal game files for the systems you play. RetroArch does not provide commercial games. Use your own dumps or free homebrew titles.
RetroArch is free and open source software. Its cores are also free in most cases. Commercial game files still require legal ownership. RetroArch provides no commercial games itself. Use your own dumps or free homebrew titles.
Why does a game fail to load with one core?
A core may need a BIOS file or a specific game format. Check the core documentation inside the app for requirements. Try a different core for the same system when one core fails. A game that fails on one core may run perfectly on another core for the same system.
A game may fail with one core due to a missing BIOS or format. Check core requirements inside the app for that system. Try a different core for the same system when one fails. A game that fails on one core may run perfectly on another.
Can I play multiplayer games in RetroArch?
Yes RetroArch supports local multiplayer and network play for many cores. Local multiplayer works with multiple controllers on one device. Network play needs a stable connection and matching cores on both sides. For local multiplayer setup read the secret hack to play local multiplayer emulated games on mobile before your first shared session.
RetroArch supports local multiplayer and network play for many cores. Local play works with multiple controllers on one device. Network play needs matching cores and a stable connection. Test network play with a short match first.
Conclusion
RetroArch becomes simple once you learn the core idea. One core per system and one clean folder per system and a saved control profile cover most of the setup. Save states and in game saves together protect progress. A patient first system setup makes every later system faster.
Your concrete next step is to download one core for one system tonight. Scan one clean folder and play one game for fifteen minutes. Map your controller and save the profile. Add a second system only after that first setup runs without errors.

