

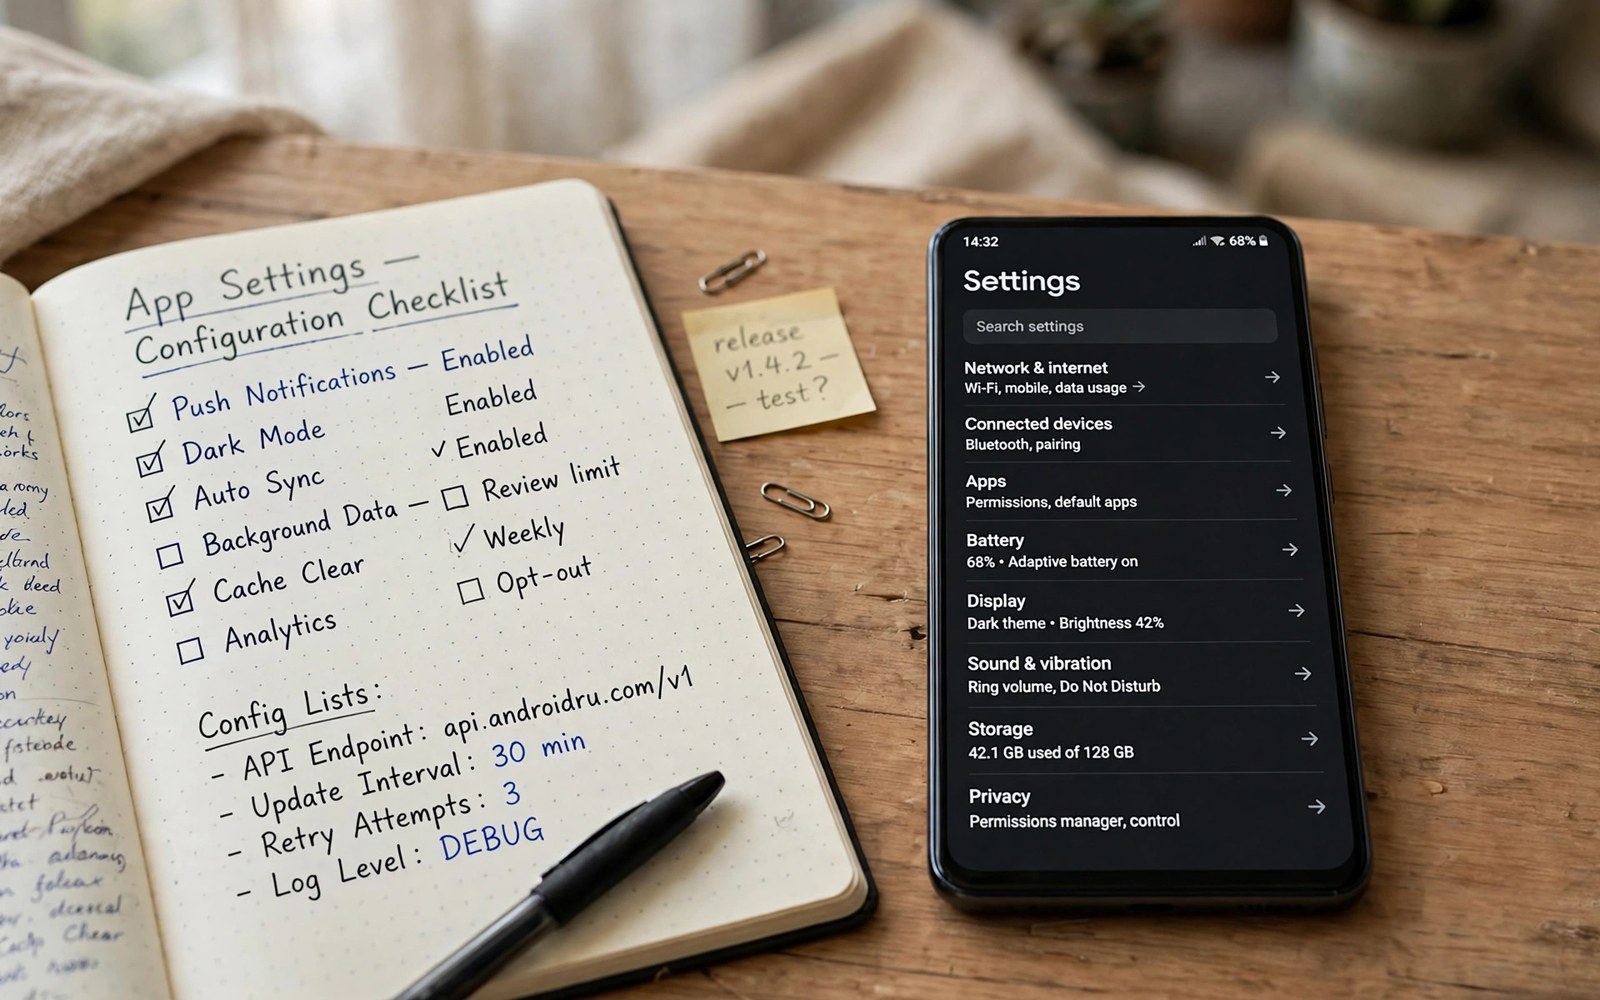
Backup Solutions for Custom App Data and Configurations
Losing a phone should not mean losing everything stored on it. Photos can be re-downloaded from a cloud album, and apps can be reinstalled from the store in minutes. What cannot be reinstalled is the custom data inside those apps: the chat history in a messenger, the layouts in a launcher, the rules in an automation app, the notes in a journal, the game progress that took months to build. That data lives in private folders most backup tools never touch.
I learned that the hard way after a phone died on a trip. The cloud restore brought back my contacts and my photos, and it brought back the apps themselves. It did not bring back the settings inside them. My launcher looked like a fresh install, my automation rules were gone, and a notes app I relied on daily opened empty. The restore had worked exactly as designed. It had simply never been designed to save that data.
This guide fixes that gap with named tools and real steps. You will see what standard backups leave out, then compare the tools that actually save app data: Swift Backup, Neo Backup, Titanium Backup, SeedVault, ADB backup, and the export features built into individual apps. Each one gets honest pros and cons, the steps to use it, and the situation it fits best. At the end you will have a routine you can test, not a vague hope that a cloud restore will cover everything.
What Counts as Custom App Data and Why Google Backup Skips It
Custom app data is everything an app stores for you beyond the app itself: settings, accounts, databases, downloaded content, layouts, rules, and history. On Android, each app keeps that data in a private directory under /data/data, and other apps cannot read it. That privacy is good for security, and it is the reason a generic backup cannot simply copy it. Only the app itself, the system backup service, or a tool with root access can reach it.
Google backup, the one built into Android, backs up a limited set of data for apps that opt in to it. Many apps opt out, or back up only a small part of their data. A launcher may back up its layout or may not. A messenger may back up messages to its own cloud or may not. A game may store progress on its own server or may keep it only on the phone. The result is inconsistent by design: the system asks each app what to back up, and each app answers differently.
The practical test is simple. If you have ever restored a phone and found an app opened as if it had never been used, that app data was not in the backup. The fix is not to hope the next restore is better. The fix is to use a tool that saves the data directly, and to test the restore before you need it.
The private folders where apps keep your settings and history
Every installed app gets a private folder named after its package, for example com.example.notes, inside the data partition. Inside that folder are databases, shared preferences files that hold settings, cache files, and any files the app saved for you. The settings file for a launcher might be a few kilobytes. The database for a messenger might be hundreds of megabytes. Both live in the same protected area, and both are invisible to a file manager without root access.
Some apps also store data on shared storage, in folders you can see and copy, such as a documents folder or a dedicated app folder on the internal storage. That data is easier to back up, and a simple file copy covers it. The hard part is always the private folder, and that is where the tools in this guide earn their place.
How to check what your current backup actually covers
Open Settings, then System, then Backup on your phone, and look at what is listed. You will usually see app data, call history, device settings, and SMS. That list tells you the categories, not the apps. To find out which apps are actually included, you need to test: back up, restore on a second device or after a reset, and open the apps you care about. The ones that open fresh were not covered, and those are the ones this guide is for.
Three signs your backup is missing app data
The first sign is a fresh-looking app after a restore: no account, no settings, no history. The second is a backup file that is far too small for the data you know the app holds. The third is an app that warns you itself, with a message that its data is stored only on the device. Any one of those signs means you need a dedicated tool for that app, and the sooner you set it up, the less you stand to lose.
Why a file copy alone is not enough for most apps
Copying the visible folders from internal storage saves your photos, downloads, and documents. It does not save the private app folders, because those are not visible to a normal file copy. It also does not save app settings stored in databases that need the app itself to read them. A file copy is a useful layer of a backup plan, and it should be part of yours, but on its own it leaves the most valuable data behind.
Swift Backup: The Rooted All-Rounder for App Data and Settings
Swift Backup is the tool I recommend first to anyone with a rooted phone, because it covers the most ground with the least friction. It backs up apps together with their data, including the private folders, and it can also back up SMS, call logs, and wallpapers. It stores backups locally, on cloud storage, or both, and it can schedule automatic backups so the routine runs without you remembering it.
The interface is straightforward: pick the apps you care about, choose whether to back up the app, its data, or both, and run the backup. Restoring is the same list in reverse. On a new phone, install Swift Backup, point it at the backup folder, pick the apps, and restore. The apps come back with their settings and history intact, which is exactly the result the standard restore failed to give me years ago.
Swift Backup comes in a free version and a paid premium version. The free version covers the core backup and restore work. The premium version adds scheduled backups, cloud storage integration, and batch operations without limits. If you are backing up a dozen apps once, the free version is enough. If you want a nightly schedule that runs while the phone charges, the premium version is worth the price.
How to set up Swift Backup and run your first backup
Install Swift Backup from the Play Store, grant it root access when it asks, and choose a backup location: a folder on internal storage, an SD card, or a cloud account. Then open the app list, tap the apps whose data matters to you, and choose backup with data. Run the first backup manually and watch for errors. When it finishes, check the backup folder and confirm the files are there, with today date and sensible sizes. That check takes a minute and it is the step most people skip.
Swift Backup pros, cons, and who it fits best
The strengths are coverage, speed, and a restore that actually works across phones. It handles app data, it handles batch operations, and the scheduled backup means the routine keeps running after you forget about it. The trade-off is that full app data backup needs root access, and restoring app data across very different Android versions can occasionally fail for a single app. It also needs storage space: a backup of twenty apps with data can run to several gigabytes, so plan the destination accordingly.
Swift Backup fits best if you have a rooted phone, you want one tool for most apps, and you are willing to pay a small amount for scheduled cloud backups. It is the closest thing to a set-and-forget solution for custom app data on a rooted phone.
Setting up a nightly schedule that runs while you charge
In the premium version, open the schedule settings, pick the apps, choose a time when the phone is normally charging, and set the destination to cloud storage or a local folder. A nightly run while charging avoids battery worries and mobile data use, and it means the newest backup is never more than a day old. Check the schedule once a week for the first month, because a schedule that fails quietly is worse than no schedule at all.
Neo Backup: The Open-Source Successor for Rooted Phones
Neo Backup, previously known as OAndBackupX, is the open-source option in this list, and it is the one I point people to when they want full control over their backups. It is free, its code is public, and it backs up apps with their data, including the private folders, without any cloud account or subscription. Backups are stored as files you can see, copy, and move yourself.
The interface is more plain than Swift Backup, and that is a fair description rather than a complaint. You pick apps, choose what to back up, and run the job. It supports scheduled backups, encryption of backup files, and backup of special data such as SMS and call logs. It also lets you back up the app APK together with its data, which matters when an app version disappears from the store and you want to restore the exact version you had.
Neo Backup needs root access for full app data backup, like Swift Backup. It is maintained by volunteers, so new Android versions can take a little longer to support than in a commercial app. In return you get a tool with no ads, no account, and backup files in an open format that you control completely.
How to use Neo Backup for a full app and data backup
Install Neo Backup from F-Droid, grant it root access, and set a backup folder on internal storage or an SD card. Select the apps you want, enable backup of the APK and the data, and run the job. When it finishes, copy the backup folder to a computer or a second drive. That copy is the part that protects you if the phone is lost, because a backup stored only on the phone disappears with the phone.
Neo Backup pros, cons, and who it fits best
The strengths are openness, no cost, encryption support, and backup files you own outright. The weaknesses are a plainer interface, slower support for brand-new Android versions, and a restore that can need a little patience for apps with split APKs. It fits best if you use F-Droid, you prefer open-source tools, and you are comfortable managing your own backup files instead of relying on a cloud service.
Encrypting Neo Backup files before you copy them off the phone
Turn on encryption in Neo Backup settings and set a passphrase you will remember. Encrypted backups protect your app data if the backup drive is lost or stolen, which matters because app data can include messages, tokens, and account details. Store the passphrase apart from the backup itself, in a password manager or a written note kept separately, because an encrypted backup without its passphrase cannot be restored.
Titanium Backup: The Old Giant That Still Works
Titanium Backup is the oldest name in Android app backup, and many long-time root users still swear by it. It backs up apps with their data, it can freeze or uninstall system apps, it can back up to cloud storage, and it has a scheduling system that has been refined over more than a decade. If you have a rooted phone running an older Android version, it remains a capable tool.
That said, Titanium Backup shows its age. Its interface looks dated, it has not kept pace with newer Android versions as quickly as Swift Backup or Neo Backup, and restoring app data on Android 12 and later can fail for some apps. The free version is limited, and the paid Pro key unlocks batch operations and the features most people actually want. I still mention it here because it is the tool many readers already own, and because on the right phone it still does the job well.
Use Titanium Backup if you already have the Pro key and your phone runs an Android version it supports well. If you are starting fresh on a new phone, Swift Backup or Neo Backup is the better first choice. Do not buy Titanium Backup today expecting it to be the most current tool in this list, because that is no longer its position.
How to run a Titanium Backup batch job safely
Open Titanium Backup, grant root access, tap the batch actions menu, and choose backup all user apps with data. Run it on Wi-Fi while the phone is charging, because a full batch can take a long time and use a lot of storage. When it finishes, check the backup folder for the apps you care about, then copy the folder to a computer. A backup that stays only on the phone is not a backup against loss or theft.
Titanium Backup pros, cons, and who it fits best
The strengths are a huge feature set, batch operations, freezing system apps, and years of history. The weaknesses are an outdated interface, slower updates for new Android versions, and restore problems on newer releases. It fits best if you already own it, your phone runs an older Android version, and you want its extra tools for managing system apps alongside backup.
SeedVault: Built-In Encrypted Backup Without Google
SeedVault is a backup service built into some custom ROMs, including LineageOS and GrapheneOS, and it is the most interesting option in this list for people who do not want to use Google backup. It backs up app data, and it encrypts the backup with a key you control. You can store the backup on a USB drive, on a local network drive, or on a cloud service of your choice.
The key difference from Google backup is control. SeedVault does not send your data to a company account. The backup is encrypted before it leaves the phone, and the restore key is a set of words you write down. If you lose those words, you cannot restore, so treat them like a password for your whole digital life. That trade-off is the point: nobody else holds the key, and nobody else can open the backup.
SeedVault depends on the ROM and on each app cooperating with the backup service. Some apps opt out, and some data will still be missing after a restore. It is a strong layer in a backup plan, and it is the best built-in option on the ROMs that include it, but it is not a complete replacement for a root backup tool if you need every app covered.
How to enable SeedVault and store its restore key safely
On a supported ROM, open Settings, then System, then Backup, and choose SeedVault as the backup provider. Turn it on, choose a storage location, and write down the restore key words exactly as shown. Store those words on paper in a safe place, separate from the phone. Then run a backup manually and check that it completes. The restore key is the single most important part of this setup, and it is the part people lose most often.
SeedVault pros, cons, and who it fits best
The strengths are built-in support, encryption with a key you control, and no Google account needed. The weaknesses are limited ROM support, dependence on apps cooperating, and a restore key that cannot be recovered if lost. It fits best if you run LineageOS or GrapheneOS, you want a private backup without Google, and you are willing to keep the restore key safe.
What SeedVault covers and what it still misses
SeedVault covers app data for apps that allow backup, plus device settings. It does not cover apps that opt out of the backup service, and it does not cover data an app stores outside the backup framework. Check the apps you care about after a test restore, and use a root backup tool for the ones SeedVault misses.
ADB Backup and App-Specific Export: The No-Root Fallbacks
If your phone is not rooted, you still have options, and they are better than nothing. ADB backup is a command-line tool that comes with the Android developer tools. It can back up the data of apps that allow backup, through a USB connection to a computer. It is slow, it is fiddly, and it is deprecated on newer Android versions, but for an app that allows it, it can save data that no other no-root method reaches.
The more reliable no-root method is app-specific export, and it is the one I recommend first to anyone without root. Many apps have their own export or backup feature built in: messengers export chats, note apps export notes, launchers export layouts, password managers export vaults, automation apps export rules. That export is made by the app itself, so it knows exactly what to save, and the file it produces is usually easy to restore on a new phone.
The work here is manual and per-app, which is why people put it off. Make a list of the ten apps whose data matters most to you, open each one, find its export or backup setting, and save the file to a folder you will copy to a computer. That afternoon of work is the difference between a restore that brings your phone back and a restore that brings back a shell.
How to run an ADB backup from your computer
Enable developer options on the phone, turn on USB debugging, and connect the phone to a computer with the Android platform tools installed. Run adb backup with the package name of the app you want, confirm the backup on the phone screen, and wait for it to finish. The command creates a .ab file on the computer. Restoring uses adb restore with the same file. Not every app allows this, and on newer Android versions the tool is limited, so test it on one app before relying on it for the rest.
Finding the export feature inside the apps you actually use
Open the app, go to its settings, and look for words like export, backup, or backup and restore. A messenger usually puts chat backup under chats or storage. A launcher puts layout export under its home screen settings. A notes app puts export under its backup or sync settings. Save the exported file with the app name and the date in the filename, and copy it off the phone the same day. An export file sitting only on the phone is lost with the phone.
When ADB backup fails and what to try instead
ADB backup fails when an app sets its backup flag to false, which many apps do. It also fails on newer Android versions where the tool is restricted. When it fails, do not keep retrying the same command. Use the app own export feature instead, or accept that the app needs a root backup tool. A failed ADB attempt costs nothing but time, and the export feature is usually the faster route anyway.
Nandroid Backups and Recovery Images for Full-System Safety
A Nandroid backup is a complete image of the phone partitions, made from a custom recovery such as TWRP. It copies the system, data, and boot partitions as they are, so restoring it brings the phone back to the exact state it was in when the backup was made, including every app and every setting. It is the most complete backup in this guide, and also the heaviest.
That completeness has a cost. A Nandroid backup can be many gigabytes, it needs a custom recovery installed, and it is tied to the phone and the ROM it was made on. It is not a good way to move to a new phone, because the image belongs to the old one. It is an excellent safety net before a risky change on the same phone: a ROM update, a major module install, or a system modification. Make the backup, try the change, and restore the image if it goes wrong.
For most readers, a Nandroid backup is a monthly safety net, not a daily routine. Keep one recent image on a computer or an external drive, labelled with the date and the ROM version. Delete older images when storage runs low, but always keep the newest one until you have made the next.
How to make a Nandroid backup before a risky change
Boot into your custom recovery, choose Backup, select the boot, system, and data partitions, and choose a storage location with enough free space, usually an SD card or an external drive. Start the backup and wait for it to finish without touching the phone. When it is done, copy the backup folder to a computer before you make the risky change. The copy off the phone is what turns a recovery image into a real safety net.
Nandroid pros, cons, and who it fits best
The strengths are completeness and a restore that returns the phone to an exact state. The weaknesses are size, the need for a custom recovery, and the fact that the image cannot move to a different phone. It fits best if you already use a custom recovery, you are about to make a risky change, and you want the strongest possible way back.
Readers who want the full recovery picture should also look at creating a full system backup image, and learn about fixing a phone that will not boot before they need it. Knowing what standard system backups leave out will also help you see why a Nandroid image and a root app backup cover different gaps.
Building a Backup Routine That Actually Survives a Lost Phone
A backup plan is only as good as its routine. A single backup made once and forgotten will be months out of date when you need it, and a routine that depends on you remembering to run it will fail on the week you are busiest. The routine that works is the one that runs on its own, stores a copy off the phone, and gets tested on a schedule you can keep.
My own routine has three layers. The first is a nightly automatic backup of app data with a root tool, stored to cloud storage. The second is a monthly manual export of the apps that need their own export step, copied to a computer the same day. The third is a Nandroid image before any risky change, kept until the next one is made. None of those layers is complicated on its own. Together they cover the gaps the others leave.
Keep at least one copy apart from the phone at all times. A backup stored only on the phone is lost with the phone, which is the most common reason people need a backup in the first place. A computer folder, an external drive, or a cloud account all count. Label each copy with the date and the device name, because a folder full of backups with no labels is almost as useless as no backup at all.
A weekly routine you can keep for months
Once a week, check the date of your newest backup, open one restored file or setting to prove the copy works, and copy the newest backup folder to a computer if it is not already there. That check takes ten minutes. Once a month, do a fuller test: restore one app on a second device, or restore one export file and confirm the data matches. Write the result down with the date, so you can see the routine working over time.
What to do when a backup fails or a restore misses data
When a backup fails, check storage space first, then the connection, then the permission for the app involved. Fix one cause at a time and retry. When a restore misses data, that data was probably never in the backup, so find the app own export step for it and add that step to your routine. A failed test is useful: it shows you the gap while the original data is still there to save.
Keeping passphrases and restore keys apart from the backup
Store backup passphrases, encryption keys, and restore words in a password manager or on paper kept separately from the backup drive. If the passphrase is stored in the same folder as the backup, anyone who finds the folder has both. If the passphrase is lost, an encrypted backup cannot be restored. Keep the two apart, and keep a second copy of the passphrase in a different place.
How much storage to plan for app data backups
Plan for more than you expect. A phone with twenty apps can easily produce a backup of five to ten gigabytes once app data is included, and a messenger with years of media can add several gigabytes on its own. Keep at least twice that amount free on the destination, and delete older backups only after the newest one is verified. Storage is cheap. Lost data is not.
Frequently Asked Questions About Backing Up App Data
What is the best backup app for custom app data on a rooted phone?
Swift Backup is the best starting point for most rooted users because it covers app data, schedules, and cloud storage in one tool. Neo Backup is the best open-source alternative, with encryption and backup files you control. Try Swift Backup first, and switch to Neo Backup if you prefer open-source tools and managing your own files.
How can I back up app data without root access?
Use the export feature inside each app, which is made by the app itself and needs no root. SeedVault covers some apps on supported custom ROMs, and ADB backup covers apps that allow it. No single no-root method covers every app, so combine app exports with SeedVault or ADB for the best result.
Why did my Google backup restore leave apps empty?
Google backup only saves data for apps that opt in, and many apps opt out or save only part of their data. An app that opens fresh after a restore was not included, or its data was stored only in a private folder the system backup did not copy. Use a root backup tool or the app own export for those apps.
How often should I back up custom app data?
Daily automatic backups suit data that changes every day, such as messages and notes. Weekly backups suit settings and layouts that change slowly. Choose a rhythm you can sustain for months, and test a restore at least once a month so a silent failure does not go unnoticed.
Is Titanium Backup still worth using in 2026?
It can still work on older Android versions, especially if you already own the Pro key, but it has not kept pace with newer releases as well as Swift Backup or Neo Backup. If you are starting fresh on a new phone, choose Swift Backup or Neo Backup first and keep Titanium Backup only for the phones where it already works well.
A Simple Plan You Can Start Today
Start with the ten apps whose data matters most. Write their names down, then check each one: does it have its own export feature, and does your current backup actually cover it? For the apps with an export, run it today and copy the file to a computer. For the rest, install Swift Backup or Neo Backup if your phone is rooted, or enable SeedVault if your ROM supports it, and run the first backup tonight.
Then set the routine: a nightly automatic backup while the phone charges, a weekly check of the newest backup date, and a monthly restore test on one app. That is the whole plan. It takes an afternoon to set up and ten minutes a week to keep alive, and it is the difference between losing a phone and losing everything on it. Start with the ten apps, and let the routine grow from there.

