

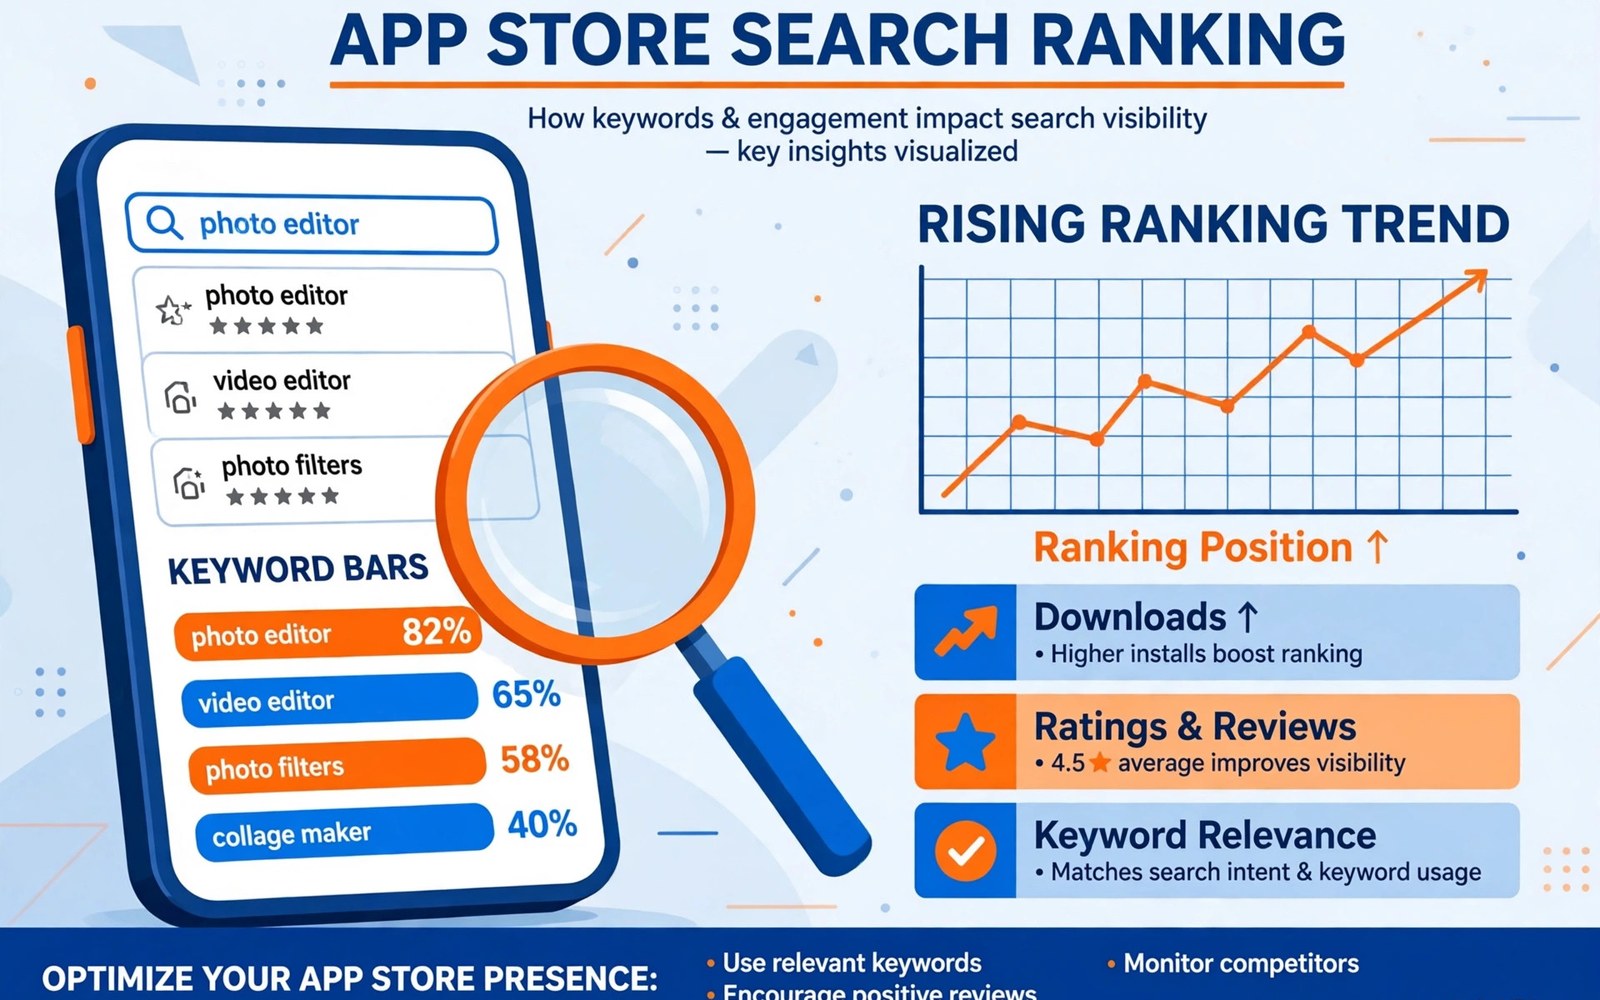
Optimizing App Store Listing (ASO) for Higher Keyword Rankings
I once shipped a solid timer app and watched it sit on page six for its own core keyword, while a weaker app with a clearer listing held the top three. The weaker app did not have better features. It had a better title, a sharper first screenshot, and a description that matched the words real people typed. That week taught me what app store optimization really is: not a trick, but the discipline of matching your listing to the language of the people who need your app, and then proving the match with installs, ratings, and retention.
This guide walks through that discipline step by step. You will learn how to research keywords by intent, how to write a title that fits the 30-character limit, how to use the short and long description properly, how to test icons and screenshots, how to handle ratings, and how to run A/B tests that give you a real answer instead of a guess. The examples use Google Play throughout, because that is where most Android developers publish, and the same thinking applies to any marketplace listing where search decides who gets seen.
Who is this for? Independent developers launching a first app, small teams trying to lift a listing that has stalled, and marketers who inherited a listing full of keyword stuffing and need a clean rebuild. You do not need a paid tool to follow this guide. A spreadsheet, your Play Console data, and a few hours of honest research will do.
What App Store Optimization Is and How Keyword Rankings Actually Work
App store optimization, usually shortened to ASO, is the work of making your listing easy to find and easy to choose. Search rankings decide the first part: when a person types “focus timer” or “offline maps”, the marketplace returns a ranked list, and most installs come from the first few results. Conversion decides the second part: of the people who see your listing, how many tap install. A listing can rank well and still fail if the icon is confusing or the screenshots do not explain the app in five seconds.
Ranking itself rests on three signals. Relevance is the strongest: does your title, short description, and long description contain the searched words, used naturally, and does the app actually do what those words promise? Behaviour is the second: do people who find you install, keep the app, and open it again, or do they uninstall within a day? Ratings and reviews are the third: a 4.6-star app with recent, specific reviews earns more trust from the ranking system and from human visitors than a 3.4-star app with the same keywords. That said, no single signal carries the day. A keyword-perfect listing with a 3.2-star rating will lose to a slightly less perfect listing with a 4.7-star rating, because the marketplace has learned that users keep the second app.
How Google Play Reads Your Title, Short Description, and Long Description
Google Play gives the most weight to the title, then to the short description, then to the long description. The title holds 30 characters, which is brutally short: “Focus Timer – Pomodoro” is 23 characters and it already uses the two words that matter. The short description holds 80 characters and appears under the title in search results, so it is your one-sentence pitch. The long description holds up to 4,000 characters and is where you explain features, limits, and ideal users in plain language. Keywords in the long description count, but only when they appear in natural sentences that describe real features.
One practical consequence follows: put your single most important keyword in the title, your main benefit in the short description, and your supporting keywords in the long description where they fit the feature they describe. Do not repeat the same keyword ten times in the long description. Play’s system is good at spotting stuffing, and human readers are even better at it.
Why Installs, Retention, and Ratings Matter as Much as Keywords
Think of ranking as a loop. A relevant listing earns impressions. A clear listing turns impressions into installs. A good app turns installs into retained users who leave strong ratings. Those ratings and retention numbers then feed back into ranking, so the app earns more impressions next month. A listing that promises a feature the app lacks breaks the loop at the second step: installs rise for a week, uninstalls spike, ratings fall, and ranking drops further than where it started. Honest ASO grows slower at first and holds its gains far longer, because every part of the loop supports the next one.
Step 1: Research Keywords That Match Real Search Intent
Keyword research starts with the user, not with a tool. Imagine the problem that sends a person to search. A student who cannot concentrate does not type “productivity suite with gamified streaks”. She types “focus timer” or “study timer” or “pomodoro app”. A driver who needs maps without a signal types “offline maps” or “maps without internet”. Write down the plain words a real person would use, in their own language, before you open any tool. That list is your seed list, and every good keyword you find later will be a variation of one of those seeds.
Next, group every candidate keyword by intent, not by volume alone. Informational intent means the person is learning: “how to focus better” or “what is pomodoro”. Transactional intent means the person wants a tool right now: “focus timer app” or “download focus timer”. Comparison intent means the person is choosing: “best focus timer” or “focus timer vs forest app”. A keyword with huge volume and the wrong intent will bring installs that uninstall within a day, and those uninstalls hurt your ranking more than the installs helped it. A smaller keyword with exact intent brings users who stay, and staying users are the ones who lift ranking over time.
Building a Seed List from User Language and Support Messages
Your best keyword source is already in your inbox. Read your support emails, your reviews, and your social media mentions, and write down the exact words users use to describe what your app does for them. If five users write “it helps me stop checking my phone while studying”, then “stop phone distraction” and “study without phone” belong on your list, even if no keyword tool suggested them. Check the search bar autocomplete in Google Play too: type your seed word and read the suggestions, because those suggestions reflect what real people actually typed recently. Write each suggestion down with a note of its intent before you judge its volume.
Scoring Keywords by Relevance, Volume, and Competition
Score every candidate on three columns in a spreadsheet: relevance from 1 to 5, search volume as high, medium, or low, and competition as the strength of the apps already ranking for it. A keyword that scores 5 on relevance, medium on volume, and low on competition is a better target than a keyword that scores 3 on relevance, high on volume, and brutal competition. As a rule, a small app should target two or three medium-volume, high-relevance phrases first, win those, and only then reach for the big generic terms. For a focus timer, “pomodoro timer offline” is a realistic first target, while “productivity” is a term owned by apps with millions of installs and a marketing budget you do not have.
A Worked Example: Scoring Keywords for a Focus Timer App
Take a real example. The seed is “focus timer”. Candidates include “pomodoro timer” with high volume and high competition, “focus timer for studying” with medium volume and medium competition, “pomodoro timer offline” with medium volume and low competition, and “study timer with white noise” with low volume and very low competition. The smart play is to put “focus timer” in the title, use “pomodoro timer offline” in the short description, and cover “study timer with white noise” in the long description as a real feature, if the app genuinely offers white noise. That combination targets one realistic win, one medium contest, and one niche phrase where the app can rank first within weeks.
Checking Competitor Listings Without Copying Them
Open the top five apps for your target keyword and read their listings like a researcher, not a copier. Note which words appear in their titles, what benefit their short description promises, and which screenshots they put first. Note what they do not say: a gap in their listing is your opening. If none of the top five mentions offline use, and your app works offline, that gap is worth a sentence in your description and a screenshot. Never copy their wording or their images, even with small changes. Users notice imitation, it weakens your brand, and it can create disputes you do not need.
Step 2: Write a Title Within 30 Characters That Carries Your Core Keyword
The title is the highest-weight field you control, and it holds only 30 characters on Google Play, so every character has to earn its place. Put the most important keyword near the start, because the start is what appears in search results and what the ranking system weighs most. Then add your brand name or a differentiator only if characters remain. “Focus Timer – Pomodoro” works because it leads with the searched phrase and adds the method name people also search for. “MyApp: Focus, Study, Pomodoro, Tasks, Habits” fails, because it stuffs five keywords into a space that fits one idea, and it reads like spam to the human who sees it.
Test the title on real screens before you publish it. A title that fits on a large phone may truncate on a small one, and truncation cuts the words that matter most. Open the Play listing preview in Play Console, check it on a 5-inch and a 6.5-inch preview, and read it aloud. If it sounds like a sentence a person would say, it is probably right. If it sounds like a bag of keywords, rewrite it until it sounds human. Brand names are allowed in titles, and a short brand plus a keyword, such as “Tide – Sleep Sounds”, is a proven pattern that many successful apps use.
Title Patterns That Work and Title Mistakes That Cost Rankings
Three patterns work reliably. Brand plus keyword, such as “Forest – Focus Timer”, tells the searcher what the app is and who made it. Keyword plus differentiator, such as “Offline Maps – GPS Nav”, tells the searcher the one thing that sets the app apart. Keyword plus method, such as “Pomodoro Timer – Focus”, captures two related searches at once. The mistakes are just as consistent: stuffing three or four keywords into 30 characters, using a clever brand name with no keyword at all, and promising a feature in the title that the app does not deliver. That last mistake is the most expensive, because it buys installs that uninstall and leave poor ratings behind.
Counting Characters Correctly Before You Publish
Count characters, not words, and count spaces and hyphens too, because Play counts them. “Focus Timer – Pomodoro” is 23 characters including spaces and the hyphen, which leaves room to add a word later if a test supports it. Write your title in a character counter, not in your head, and check the count again after every edit. A title that is 31 characters will be rejected or truncated, and a truncated title in search results looks broken to the person deciding whether to tap.
Step 3: Write a Short Description and Long Description That Convert
The short description is 80 characters, and it is the only description most searchers will ever read. It must state the main benefit in one clear sentence, using the core keyword once if it fits naturally. “Stay focused with a simple Pomodoro timer that works offline.” That is 66 characters, it names the benefit, it names the method, and it names the differentiator. A short description that says “The best app for all your needs” says nothing at all, and it wastes the one sentence that could have won the install.
The long description is up to 4,000 characters, and it is where you earn the install from the visitor who tapped through. Open with the problem and the promise in the first two lines, because Play shows only the first few lines before the “read more” cut, and many visitors never expand it. Follow with a feature list written as benefits, not as a spec sheet: instead of “custom intervals”, write “set work and break lengths that match your rhythm, from 5-minute sprints to 90-minute deep work”. Include the limits honestly: if the free version limits sessions per day, say so, because a visitor who discovers the limit after installing leaves a one-star review, while a visitor who knew in advance installs with the right expectations. Close with who the app is for and what to try first, such as “open the app, pick a 25-minute focus session, and press start”.
Putting Keywords in the Long Description Without Stuffing
Use each supporting keyword once or twice in a natural sentence that describes the feature it belongs to. “The offline mode keeps your timer running without a connection” is a natural home for “offline timer”. “White noise and rain sounds help you block a noisy room” is a natural home for “focus sounds”. If a keyword cannot fit into a true sentence about a real feature, leave it out. A listing that reads like a person wrote it converts better than a listing that reads like a keyword list, and conversion is what turns ranking into installs.
A Concrete Before-and-After Description Example
Before: “Best timer app! Timer, focus, study, pomodoro, productivity, tasks, habits, free timer app with many features. Download now for the best experience.” That paragraph stuffs eight keywords, promises nothing specific, and tells the reader nothing about what the app actually does. After: “Focus Timer is a simple Pomodoro timer for students and deep workers. Set a 25-minute focus session, take a 5-minute break, and repeat. It works offline, blocks distracting apps during a session, and shows your weekly focus time in one clear chart.” The second version uses the core keyword twice, names three real features, states the audience, and gives the reader a reason to install. That is the difference between a listing that ranks and a listing that converts.
Structuring the First Three Lines So the Preview Sells the App
Play shows roughly the first 250 characters of the long description before the cut, so treat those characters as a second short description. Put the benefit, the audience, and the differentiator there, and move the detailed feature list below the cut. A visitor who reads only the preview should still understand what the app does, who it is for, and why it is different. Test this by opening your own listing on a phone and reading only what appears before you tap “read more”. If you cannot answer those three questions from the preview alone, rewrite the opening.
Step 4: Use Icons, Screenshots, and Video to Turn Searches into Installs
Visuals do not rank directly, but they decide whether a search visitor installs, and install rate feeds back into ranking, so visuals matter more than most developers admit. The icon is the first visual anyone sees: it must read clearly at 48 pixels on a search results page, it must suggest the app’s purpose in a glance, and it must look distinct from the ten icons around it. Test your icon by shrinking it to thumbnail size and asking someone who has never seen the app what it does. If they cannot guess within five seconds, the icon needs a simpler idea, a bolder shape, or stronger contrast.
Screenshots carry the next five seconds. The first two screenshots should show the core task, not the welcome screen and not the settings page. For a timer app, the first screenshot should show a session in progress with the time remaining large and clear. The second should show the result the user cares about, such as a weekly focus chart. Add short captions on each screenshot, no more than five words each, because captions are read while the image is scanned. A visitor who understands the app in five seconds is far more likely to install than one who has to read a paragraph to work it out.
Designing the First Two Screenshots Around the Core Task
Plan the first two screenshots as a pair: screenshot one shows the app doing its job, screenshot two shows the payoff. For a maps app, that is a map with a route, then an offline download screen. For a notes app, that is a note being written, then a search result finding it instantly. Keep the phone frame consistent, keep text large enough to read on a small screen, and localise the screenshots for each language you support, because a screenshot in English on a Spanish listing tells the visitor the app may not speak their language either.
Feature Graphics, Video Previews, and What to Test First
The feature graphic is the wide banner shown at the top of your listing on tablets and on the web, and it should carry one idea in the centre, where cropping is least likely to cut it. A short video preview, 30 to 60 seconds, can lift conversion further if it shows the app in real use with no marketing fluff: open the app, start the core task, show the result. Test the icon first, because it affects every impression, then test the first screenshot, then the feature graphic. Testing all three at once tells you nothing about which change helped.
Testing Visuals with Five-Second Tests on Real People
Show the icon or the first screenshot to five people who do not know your app, for five seconds each, then hide it and ask two questions: what does this app do, and who is it for? If fewer than four of the five answer correctly, the visual is not doing its job yet. This test costs nothing, takes ten minutes, and it catches problems that analytics only reveal after weeks of lost installs. Run it before every visual change you publish.
Step 5: Treat Ratings, Reviews, and Retention as Ranking Signals
Ratings influence ranking twice: directly, as a signal to the ranking system, and indirectly, because a visitor who finds your app in search checks the stars before tapping install. A 4.6-star app converts far better than a 3.9-star app with the same ranking, and that conversion gap compounds month after month. The fastest way to lift a rating is not to ask for more reviews. It is to fix the fault that the most reviewers mention, then reply to those reviewers and tell them it is fixed.
Read your reviews every week and sort them by theme, not by star count. If ten reviewers mention a crash on one device, that crash is your next release, and it matters more than any keyword change. If reviewers praise one feature repeatedly, that feature belongs in your screenshots and in your short description, because it is the reason people stay. Reply to reviews with specific answers that show you read the report: “Thank you, we fixed the timer pause bug in version 2.4, please update and let us know if it still happens” is a reply that builds trust. A generic “Thanks for your feedback” builds nothing.
Asking for Ratings at the Right Moment Without Pressure
Ask for a rating after a success, not at startup. A timer app should ask after the user completes a third focus session, when they feel good about the app. A notes app should ask after the user saves a tenth note. Never offer a reward for a rating, and never block the app until the user answers. Respect a decline: if a user taps “not now”, wait at least a month before asking again. A respectful prompt collects ratings from happy users over time, while an aggressive prompt collects one-star reviews from annoyed ones.
Developers who sell subscriptions or handle billing inside their app should also keep their listing honest about pricing and refunds, because billing complaints are one of the fastest routes to poor ratings. The guide to Android app subscriptions refunds and billing APIs explains how refunds and billing flows work, and getting those flows right protects both your rating and your users. In the same way, keeping the app current matters for ranking and trust: the guide to Google Play target API level requirements explains what the platform expects from apps that want to stay visible and installable.
Step 6: Run A/B Tests with Store Listing Experiments
Google Play offers store listing experiments in Play Console, and they are the only honest way to know whether a change helped. The idea is simple: show version A to half of your visitors and version B to the other half, measure which one earns more installs, and keep the winner. The discipline is in the details. Change one element per test, run the test long enough to gather a meaningful number of visitors, and compare similar days, because a test that runs over a holiday weekend will mislead you.
Start with the highest-impact test: the icon, because it appears in every search result. Then test the first screenshot, then the short description, then the title. A title test is the riskiest, because changing the title can change which keywords you rank for, so run it for at least two weeks and watch both installs and keyword positions, not installs alone. Record every test in a log with the date, the change, the result, and the decision, because a log stops you from repeating a test that already failed and it helps a new team member understand why the listing looks the way it does.
Setting Up a Valid Icon Test in Play Console
Open Play Console, go to your app, then Store presence, then Store listing experiments, and create an experiment with your current icon as the control and the new icon as the variant. Set the traffic split to 50/50, choose installs as the goal, and let it run until Play Console reports enough data to call a result, which usually takes one to two weeks for a small app. Do not stop the test early because the first day looks good. Early results are noise, and a test stopped on a lucky day will lock in a worse icon for months.
Reading Results: Installs, Retention, and What Counts as a Win
A win is not just more installs. It is more installs from users who stay. Check the retained installer rate for each variant if your data allows it, and be suspicious of a variant that wins installs but loses retention, because that variant probably promised something the app does not deliver. A real win is a variant that lifts installs by at least a few percent with retention steady or better, and it is worth keeping. A variant that lifts installs by 1% with wide uncertainty is not a win. It is a tie, and ties mean you should test a bolder change next time.
How Long to Run a Test and When to Stop Early
For most small apps, two weeks is the minimum for an icon or screenshot test, and three to four weeks is better for a title test. Stop early only if a variant is clearly harming installs by a large margin for several days in a row, because protecting your baseline matters more than finishing a test. Otherwise, let the test run its course, read the result, record it, and move on to the next single change. Patience here is what separates a team that learns from a team that guesses.
Step 7: Localize Carefully and Plan Seasonal Keyword Updates
Localisation is not translation. A listing translated word for word often misses the phrase local users actually type, and a translated listing that leads to an English-only app disappoints the users it attracts. Localise only for markets where the app genuinely supports the language, and localise the keywords, the screenshots, and the short description together, not the text alone. Ask a native speaker to review the result, and pay attention to the search habits of that market: a literal translation of “focus timer” may be far less common than the local phrase for “study concentration app”.
Seasonal keywords need planning in advance. Some phrases rise during school terms, holidays, or major events: “study planner” rises in September, “fitness tracker” rises in January, “travel planner” rises before summer. Track your own analytics over a full year, note which phrases rose and when they rose, and prepare the listing update a month before the peak. A seasonal keyword added after the peak has passed brings little value, while one added in time can carry a listing for weeks.
Localizing Keywords, Screenshots, and Pricing Together
When you localise, translate the keyword list first, then rewrite the short description around the local keyword, then replace the screenshots with versions in the local language, and finally check that pricing and currency display correctly for that market. A small, careful localisation in one focused market often beats a rushed effort across ten markets, because the careful version converts and the rushed version confuses. Start with your largest non-English audience, prove the approach there, and then expand.
Releases and testing tracks are part of this planning too: a listing change should reach users through a controlled release, not as a surprise. The guide to app releases with alpha beta and internal testing tracks explains how to roll a new version out in stages, and the same staged thinking applies to listing changes, where you can test a new icon with a small audience before it reaches everyone.
Common ASO Mistakes That Hurt Rankings for Months
Keyword stuffing is the classic mistake, and it is still the most common one. A title crammed with five keywords reads poorly, converts poorly, and earns uninstalls from users who expected something else. Copying a competitor’s title with a small change is the second mistake: users notice the copy, the competitor still holds the stronger brand, and you gain nothing you can keep. Promising a feature the app does not deliver is the third, and it is the most expensive, because the installs it buys turn into poor ratings that drag ranking down for months after the listing is fixed.
A fourth mistake is changing three things at once and then not knowing which one worked. Change one element, test it, record it, and then change the next. A fifth mistake is reviewing keyword performance every day and reacting to noise. Daily data jumps around for reasons that have nothing to do with your listing, such as weekends, holidays, and a competitor’s promotion. Review once a month, look for trends that last four weeks, and update the listing only when the trend supports the change. A sixth mistake is ignoring ratings while chasing keywords. Ranking brings traffic, but ratings decide whether that traffic installs, and a listing that wins the search and loses the visitor has won nothing.
Frequently Asked Questions About App Store Listing Optimization
How long does it take for ASO changes to affect keyword rankings?
Most listing changes take one to four weeks to show a stable effect on rankings, because the marketplace needs time to gather new behaviour data from visitors. A title change can move faster, sometimes within days, while a description change may take two to three weeks to settle. Judge a change after a full test period, not after three days, and compare similar weeks rather than single days, because weekends and holidays distort short comparisons.
How many keywords should I target in one listing?
Target one core keyword in the title, one main benefit in the short description, and five to ten supporting keywords in the long description, each tied to a real feature. A small app that tries to rank for thirty keywords ranks for none of them well, while an app that wins three relevant phrases builds the installs and ratings it needs to reach for bigger terms later. Depth beats breadth in the first year.
Does changing my app title hurt my existing rankings?
Changing the title can shift rankings, because the title carries the most weight. A careful change that keeps the core keyword and improves the wording usually holds its position and can improve it. A change that drops the core keyword for a clever brand name can lose the ranking the app spent months earning. Test title changes with a store listing experiment where possible, run them for at least two weeks, and keep a record so you can revert quickly if the result is poor.
Should I pay for a keyword tool or can I start for free?
You can start for free with Play Console data, search autocomplete, competitor listings, and your own reviews and support messages, and that is enough to build a solid first keyword list. A paid tool becomes useful later, when you want volume estimates, historical ranking data, and alerts for competitor changes across many keywords. If you do pay for one, use it to confirm a decision you already made from user language, not to replace that research with a list of high-volume terms that do not fit your app.
Do screenshots and icons really affect keyword rankings?
They affect rankings indirectly, and the effect is real. Screenshots and icons do not contain keywords, so they do not change relevance directly, but they change install rate, and install rate is a ranking signal. A listing that converts twice as well earns twice the installs from the same impressions, and those installs, if the users stay, lift the app in the rankings. That is why the strongest ASO work pairs keyword research with visual testing, instead of treating them as separate jobs.
Your Next Step to Lift Your Keyword Rankings
Open Play Console today and write down your current keyword positions, your install rate, and your rating. Then pick one core keyword, the phrase a real user would type to find your app, and check whether it appears in your title. If it does not, rewrite the title around it, count the characters, and test the new title for two weeks. That single change, done carefully, is the highest-value ASO action most listings need.
After the title, work through the rest of the system in order: research by intent, rewrite the descriptions, test the icon, fix the top review complaint, and log every change. ASO is not a launch task. It is a monthly routine, and the apps that treat it that way are the ones still climbing a year later, while the apps that set a listing once and forgot it slowly slide down the results.

