

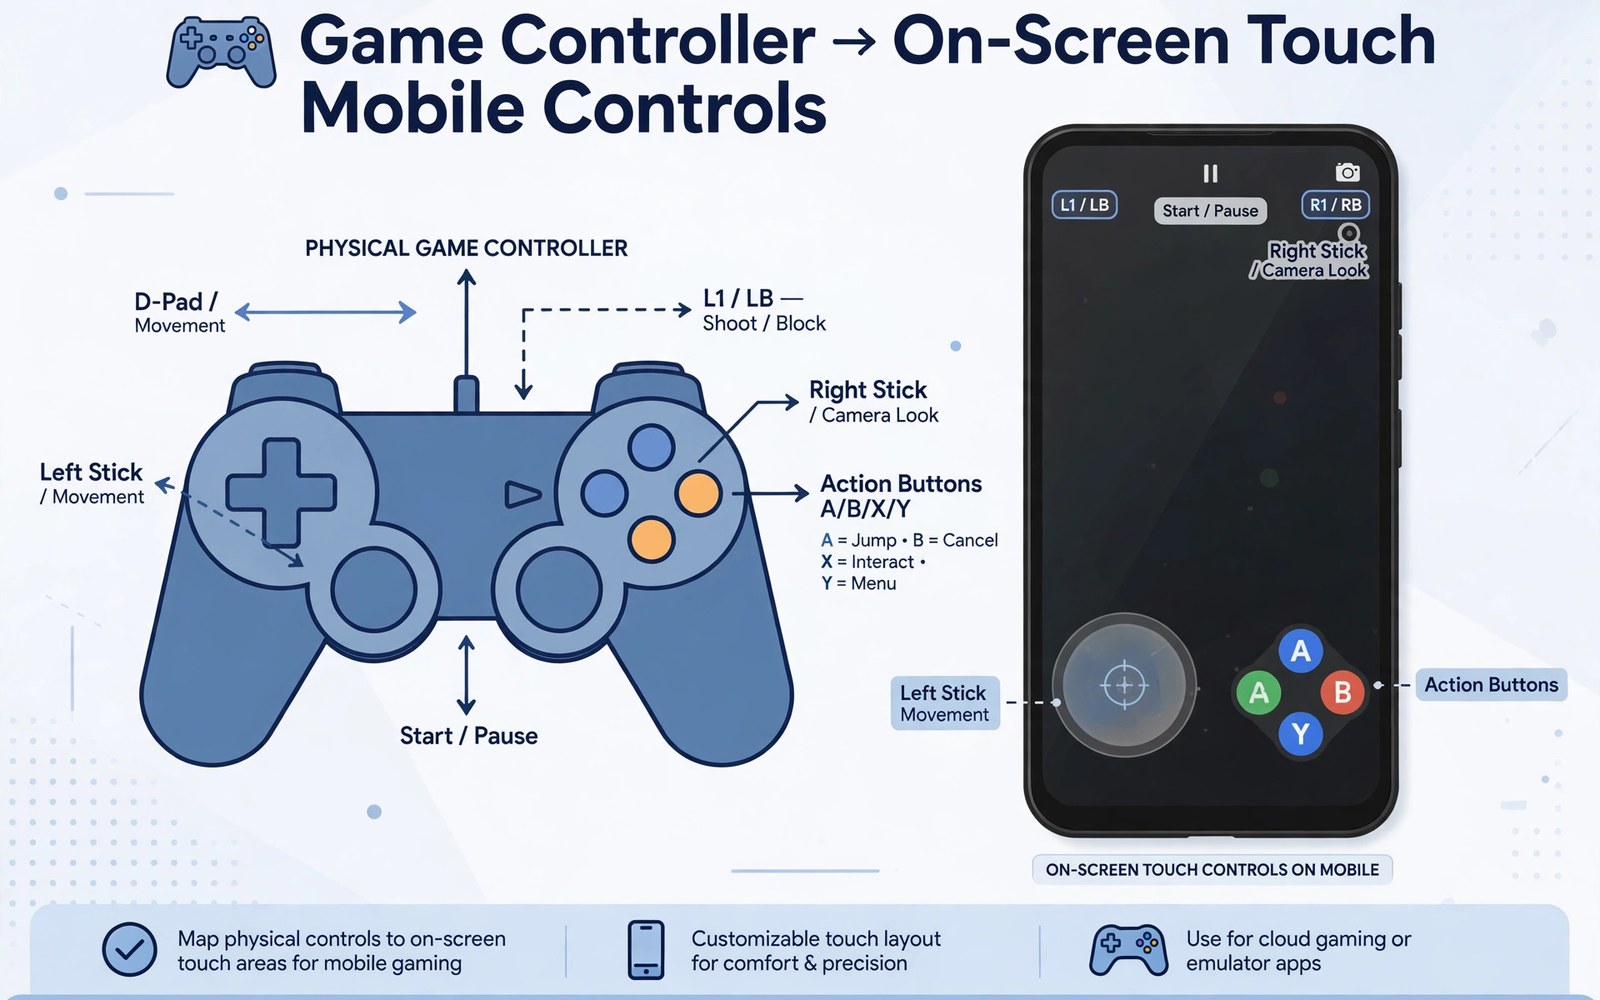
A controller only helps when its buttons mean the right things. The process of controller mapping in emulation decides that meaning for each game. It links a physical button to a virtual system button. The link can change per game or stay global. This article explains the mapping flow in plain terms.
Mapping sounds technical but the idea is simple. You press a physical button and tell the app what it should do. The app stores that link in a profile. The profile loads when the game starts. Good mapping feels invisible during play.
Every emulator handles mapping a little differently. The core steps stay the same across apps. You open input settings and pick a device. Then you assign buttons one by one. A touch versus controller choice affects how you map the rest. Physical buttons reward a careful layout.
How a button press travels
A button press starts in the controller hardware. The phone system receives it as an input event. The emulator reads that event through its input layer. It then translates the event into a virtual console button. The game finally sees the virtual button press.
Each step can add a tiny delay. Good mapping keeps that delay small. A clean profile avoids extra translation layers. Test mapping in a game that needs fast reactions. Fast games expose mapping problems that menus hide.
Global profiles versus per game profiles
A global profile applies to every game in the emulator. It suits systems where controls rarely change. Per game profiles override the global layout for one title. They suit games with unusual button needs. Use global profiles as the base and per game profiles as exceptions.
Too many per game profiles become hard to maintain. Create a per game profile only when a game truly needs it. A fighting game with a special layout earns one. A puzzle game that uses two buttons does not. Restraint keeps the setup tidy.
Mapping sticks and triggers
Analog sticks need range and dead zone settings. The dead zone is the small centre area that counts as no movement. A dead zone that is too small causes drift. A dead zone that is too large makes fine movement hard. Tune the dead zone in a game with slow walking sections.
Triggers may act as buttons or as analog axes. Some games need analog pressure for actions like acceleration. Others treat triggers as simple on or off buttons. Check how your game uses triggers before you map them. The right mode changes the feel completely.
Mapping touch controls as a fallback
Touch mapping matters when no controller is handy. The same profile idea applies to on-screen buttons. You drag buttons to thumb friendly spots and resize them. Save the touch layout per game when a layout differs a lot. A good touch layout keeps the game picture visible.
Some players map a controller and touch layout for the same game. The controller layout serves home play. The touch layout serves travel play. Switching between them should take seconds. Test both layouts before a trip. A travel surprise is the worst kind.
Testing and fixing mapping problems
Test mapping in a safe area of the game first. A training mode or an early level works well. Press every button and watch what happens. Note any button that does nothing or does the wrong thing. Fix one button at a time and retest it at once.
If a button never registers then check the device connection first. Re-pair the controller and test it in the system settings. A controller that fails system wide is not an emulator problem. Fix the connection before you change emulator settings. That order saves a lot of wasted tuning.
Profiles for different controller types
Different controllers send different button codes to the phone. A profile built for one controller may fail on another model. Build a separate profile for each controller you own. Label profiles with the controller name clearly. A clear label prevents loading the wrong profile by mistake. Switching controllers then takes seconds instead of minutes. Profiles turn a multi controller household into a smooth setup. Each player can keep a personal profile ready.
Xbox style and PlayStation style controllers differ in button layout. The same physical position may carry a different label. Mapping by position rather than label avoids confusion. Press the button in the position you want and assign its function. Position based mapping works across brands cleanly. Test the profile in a game after building it. A game test confirms positions match your intent. Labels matter less than positions during real play.
Cheap generic controllers sometimes send unusual button codes. Some buttons may register as keyboard keys instead of gamepad buttons. Check the system input test if a button never registers. A button that fails system wide needs a different approach. Try a remapping app or a different controller for that game. Do not force a broken controller into a profile. A reliable controller beats a cheap one that drops inputs.
Mapping for accessibility needs
Controller mapping can help players with limited mobility. Buttons can move to positions that suit a specific hand. A single button can trigger a combination in some emulators. That feature helps games that demand simultaneous presses. Accessibility mapping turns hard games into playable ones. Small mapping changes can open entire libraries for some players. Emulator mapping is a quiet accessibility tool worth celebrating.
Stick sensitivity settings help players with unsteady hands. A larger dead zone forgives small accidental movements. Lower sensitivity smooths large stick swings. Tune these values in a slow exploration game first. Slow games reveal the right values without combat pressure. A comfortable stick setting improves every game after it. Comfort settings deserve the same care as graphics settings.
Touch button size and opacity also serve accessibility needs. Larger buttons help players with larger fingers or low vision. Higher opacity makes buttons easier to locate quickly. Adjust touch layouts for the player and not for screenshots. A layout that looks clean may still be hard to use. Usability testing with the real player gives the honest verdict. Ask the player what feels better and trust the answer.
Saving controller profiles for travel
Travel play needs controller profiles that load without fuss. A travel profile should use the controller you actually carry. Build the profile at home before the trip begins. Test it in a real game for ten minutes. A tested profile avoids travel day troubleshooting. Travel days already contain enough surprises without input problems. A ready profile turns waiting time into play time instantly. Preparation is the travel version of good mapping.
Pack a small controller that fits your bag comfortably. A bulky controller stays home despite good intentions. A compact controller travels everywhere and gets used often. Test the compact controller grip before buying for travel. A cramped grip causes hand strain on long trips. Comfort during a flight matters more than extra buttons. A travel controller should prioritise grip and battery. Battery life decides whether the controller survives the trip.
Keep a touch fallback profile ready beside the controller profile. A dead controller battery should not end play entirely. Switch to touch for slow games during charging breaks. A fallback profile keeps the session alive gracefully. Label profiles clearly so switching takes seconds. Clear labels prevent loading the wrong profile in haste. Travel rewards players who plan for failure modes. A fallback plan is a sign of experienced travel play.
Back up controller profiles to cloud storage before a long trip. A phone loss or reset should not erase mapping work. Cloud backup restores profiles on a replacement device quickly. Test the restore process once before departure. A tested restore proves the backup actually works. Untested backups are hopes rather than plans. A working backup protects hours of careful mapping. Travel with confidence that profiles survive device trouble.
Common mistakes
The most common mapping mistake is assigning buttons in a rush. Rushed mapping creates swapped buttons that confuse play. Assign one button at a time and confirm each press. Slow mapping feels boring for two minutes. It saves hours of in-game confusion later.
Another mistake is copying a profile from a different controller model. Button codes differ between controller brands. A copied profile may map the wrong buttons silently. Build the profile on the controller you actually own. A fresh profile beats a borrowed one here.
Do not forget to save the profile before you exit settings. Some apps lose unsaved changes without warning. Save after each game profile change. Test the saved profile by restarting the game once. That restart test proves the save worked.
A practical example you can try
getevent -l | head -30
# list input events while pressing controller buttons
# match each event code to a button in the profile
This snippet is an original example written for this article. It shows the idea in a compact form that you can adapt to your own setup and change as you learn what works best on your phone.
Frequently asked questions
Why does my controller work in menus but not in games?
Menus often use system level input handling. Games use the emulator mapping layer instead. A missing game mapping explains the gap. Open the game input settings and assign the buttons. Test again in a safe game area.
Menus use system level input that works without emulator mapping. Games need the emulator mapping layer to interpret buttons. A missing game mapping explains the menu versus game gap. Open the game input settings and assign each button slowly. Test in a safe game area after mapping.
Can one controller serve many emulators?
Yes. Each emulator stores its own profile for the controller. A single app with many cores can share mapping across systems more easily. Separate apps need separate profiles. Build profiles once per app and reuse them.
Each emulator stores its own controller profile separately. A single app with many cores shares mapping across its systems. Separate apps need separate profiles for the same controller. Build profiles once per app and reuse them. The initial effort pays off across many games.
What is a dead zone and why does it matter?
A dead zone is the centre area of a stick that counts as rest. A small dead zone can cause unwanted drift. A steady television setup makes drift easy to spot on a big screen. Tune the dead zone until rest truly means rest.
A dead zone is the stick centre area that counts as rest. Too small a dead zone causes unwanted drift. A steady big screen setup makes drift easy to spot. Tune the dead zone until rest truly means rest. A correct dead zone removes phantom movement entirely.
Conclusion
Your concrete next step is to map one controller fully today. Assign every button slowly and save the profile. Test the profile in a fast game for ten minutes. Fix any wrong button at once. That one solid profile becomes the base for every game after it.
Export or back up your finished controller profiles today. A backup protects hours of careful mapping work. Store the backup where you store game saves. After a phone change the profiles restore in minutes. That backup turns mapping from a chore into a one time investment.

