

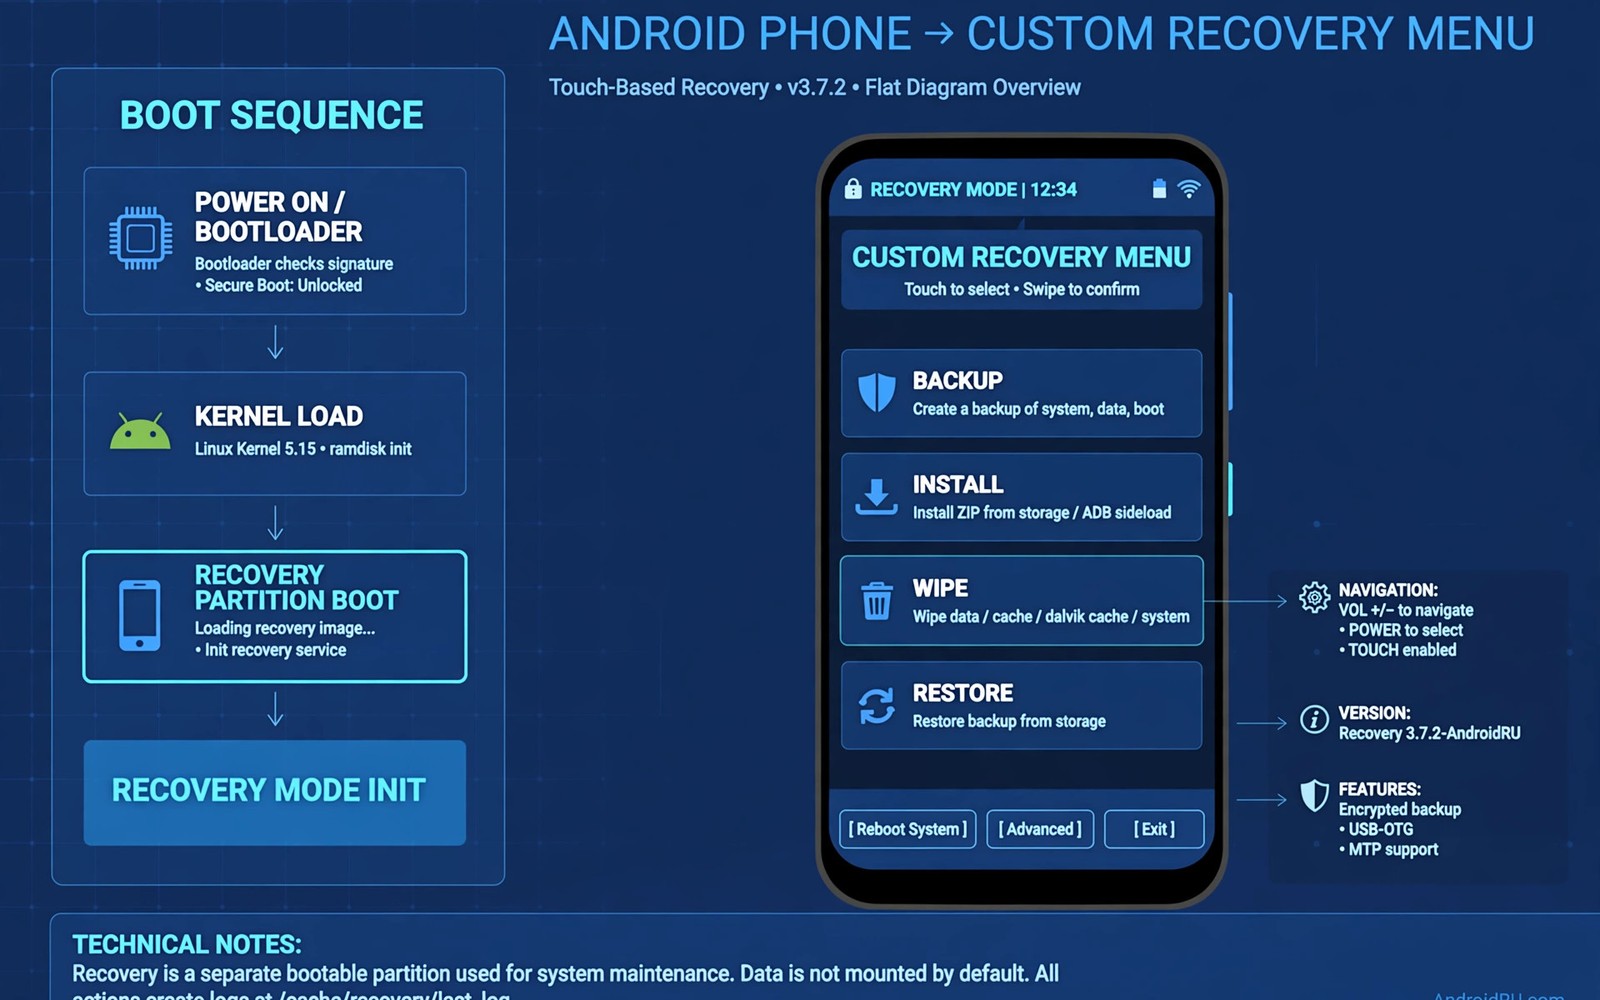
Custom recovery is a small bootable environment that runs before Android starts. It replaces the limited stock recovery that ships with most phones. With it you can install software packages and make full system backups. You can also wipe partitions and repair a phone that no longer boots normally.
Most people meet custom recovery when they want deeper control over a device. Stock recovery can apply signed updates and erase user data. It cannot flash unsigned packages or create complete partition images. Custom recovery removes those limits while adding a touch screen and a file manager. That combination makes it the standard tool for serious Android modification.
How Recovery Fits Into the Boot Process
When you power on a phone the bootloader starts first. It checks the boot image and then loads either Android or recovery. A special key combination tells the bootloader to load recovery instead of the system. This separation matters because recovery runs outside Android itself. It can therefore change files that Android would normally lock.
Recovery lives in its own partition on older devices. On newer devices it may live inside the boot image instead. The exact layout varies by model and by Android version. The idea stays the same in both cases. Recovery is an independent mini system with its own kernel and tools. If Android breaks then recovery can still start and fix the problem.
What TWRP Brings to the Table
TWRP is the best known custom recovery project. Its touch interface feels much closer to a normal app than older button based menus. Large buttons and clear labels reduce mistakes during stressful repairs. You can swipe to confirm dangerous actions so an accidental tap does nothing. That design choice protects beginners and experts alike.
The feature list covers the core jobs of device maintenance. Full backups capture the system and data partitions in one pass. Zip flashing installs ROMs and kernels and extra modules. Partition wiping prepares a clean slate before a new install. A built in file manager lets you move files when Android will not start. These tools together explain why TWRP became the default choice for so many devices.
- Touch based interface with swipe confirmation for risky actions
- Full partition backups that can restore a phone to a known good state
- Zip installation for ROMs and kernels and system modifications
- File manager and terminal for rescue work without a computer
- Support for external storage and USB drives on many models
Backups Before Anything Else
A backup is the single most valuable feature of custom recovery. It copies partitions bit by bit into image files on storage. If a later flash fails then you can restore those images. The phone returns to the exact state captured by the backup. No other common Android tool offers that level of completeness.
Good backup habits make the difference between a scare and a disaster. Store backups on external storage or on a computer when possible. Internal storage can be wiped during a bad flash. Keep at least one backup from a working setup before any major change. Label backups with the date and the ROM version so you can find them later. Readers who want the full backup workflow can read about creating full Nandroid backups in recovery for step by step detail.
Flashing and Wiping Explained Simply
Flashing means writing a software package onto a partition. Recovery reads a zip file and follows its install script. The script places files and sets permissions and updates metadata. This is how custom ROMs and kernels reach the device. It is also how small patches and modules are applied.
Wiping means erasing a partition so old data cannot interfere with new software. A cache wipe removes temporary files only. A data wipe removes apps and settings and personal files. A system wipe removes the operating system itself. Choosing the wrong wipe can erase data you wanted to keep. Careful reading of each wipe option is therefore essential before you confirm.
Advanced Tools Inside Recovery
Beyond backups and flashing, recovery includes tools for diagnosis and repair. The terminal lets you run shell commands directly on the device. You can inspect partitions and check mount status and fix permissions. ADB sideload lets you push a package from a computer over USB. This helps when the phone storage is empty or damaged.
Mount controls decide which partitions recovery can read and write. You can mount system or vendor or external storage as needed. Some builds support decryption of encrypted data partitions. That feature depends on the device and on the recovery build. Without decryption, data backups may be impossible on locked devices. Checking decryption support before you rely on it is wise.
When Custom Recovery Is Worth It
Custom recovery suits users who flash ROMs or test kernels or repair phones. It also suits anyone who values a complete backup strategy. The learning curve is modest but the risks are real. A wrong flash can still damage a device. Reading device specific guides before your first flash reduces that risk greatly.
It is less useful for users who never modify their phones. If you only use stock software then stock recovery is enough. Custom recovery still offers better backups for such users. The trade off is an unlocked bootloader on most devices. That step can affect warranty and payment apps on some models. Weigh those costs against the control you gain before you proceed.
Getting Started Safely
Start by confirming the exact model and variant of your phone. Recovery builds are device specific and a wrong build can fail to boot. Download the build from the project source for your model only. Verify the file hash when the project provides one. Charge the battery well above half before you begin.
Learn the key combination that opens recovery on your model. Practice entering recovery before you need it in an emergency. Make a full backup as your very first action after install. That backup becomes your safety net for every later experiment. Those who plan to install recovery soon should also study flashing TWRP with fastboot so the install itself goes smoothly.
adb reboot recovery
fastboot flash recovery twrp.img
fastboot reboot recovery
The commands above show the general pattern for entering recovery and flashing an image. Exact partition names and file names differ by device. Never run a flash command copied from another model without checking it. A short check now can save hours of repair work later.
Common Mistakes to Avoid
The most common mistake is flashing a build made for a different variant. Phones often share a marketing name across regions and hardware revisions. A build for one revision may not boot on another. Always match the codename printed in device information screens. That codename is the true identity of the hardware.
Another mistake is skipping backups because the flash looks simple. Simple flashes fail too and they fail at the worst moment. A backup costs a few minutes and a little storage space. Recovery from a failed flash without a backup can cost days. Treat backups as part of the flash itself rather than an optional extra.
Understanding partitions also prevents confusion later. Newer phones use slot based layouts that change how recovery works. You can learn more in the article on recovery partitions and seamless A and B layouts before you work on a recent device. Knowledge of slots helps you avoid flashing to the wrong target.
Stock Recovery Versus Custom Recovery
Stock recovery comes preinstalled by the phone maker. It can apply signed updates from the maker only. It can also wipe user data back to factory state. Those two jobs cover basic maintenance for most owners. They do not cover custom software or complete backups.
Custom recovery keeps those basic jobs and adds far more. It can flash unsigned packages that stock recovery would reject. It can back up whole partitions instead of just user files. It can mount storage and run a terminal for repairs. That wider toolkit explains why modifiers install it first.
The trade off for that power is responsibility. Custom recovery will happily flash a wrong package if you tell it to. Stock recovery blocks many mistakes by refusing unsigned files. Users must therefore check files and codenames themselves. Freedom and responsibility arrive together in this tool.
Choosing Your First Recovery Build
Start with the recovery project that supports your exact model best. Official builds receive updates and bug fixes most reliably. Unofficial builds can fill gaps for older or rarer models. Read recent reports from users with your codename. A build that worked a year ago may lag behind current Android versions.
Test the build gently after install before any major flash. Boot into recovery and check touch and storage mounting. Run a trial backup of a small partition set. Confirm the backup folder appears with plausible size. Those checks take minutes and reveal build problems early.
- Prefer official builds with recent updates for your codename
- Read user reports for touch and decryption behavior first
- Test backups on a working phone before an emergency
- Keep the previous recovery image as a fallback file
Realistic Expectations for Beginners
Beginners should expect a learning curve with custom recovery. Menus look simple but consequences can be serious. A calm pace matters more than speed during first sessions. Read each screen before swiping to confirm an action. That habit alone prevents most beginner disasters.
Expect some trial and error with backups and restores. A first backup may target the wrong storage by mistake. A first restore may select the wrong backup folder. Small mistakes on a working phone teach safely. Correct them while the phone still boots normally.
Community help works best with precise information. Share your codename and recovery version when asking questions. Describe the exact step that failed and the exact message shown. Helpers can then point to a fix quickly. Vague questions receive vague answers in return.
The steps above follow the approach described in the official developer documentation for this platform. That documentation explains recovery booting and partition handling in general terms. It also covers backup and flashing concepts that apply across devices. Use it as a reference alongside device specific guidance for your exact model.

