

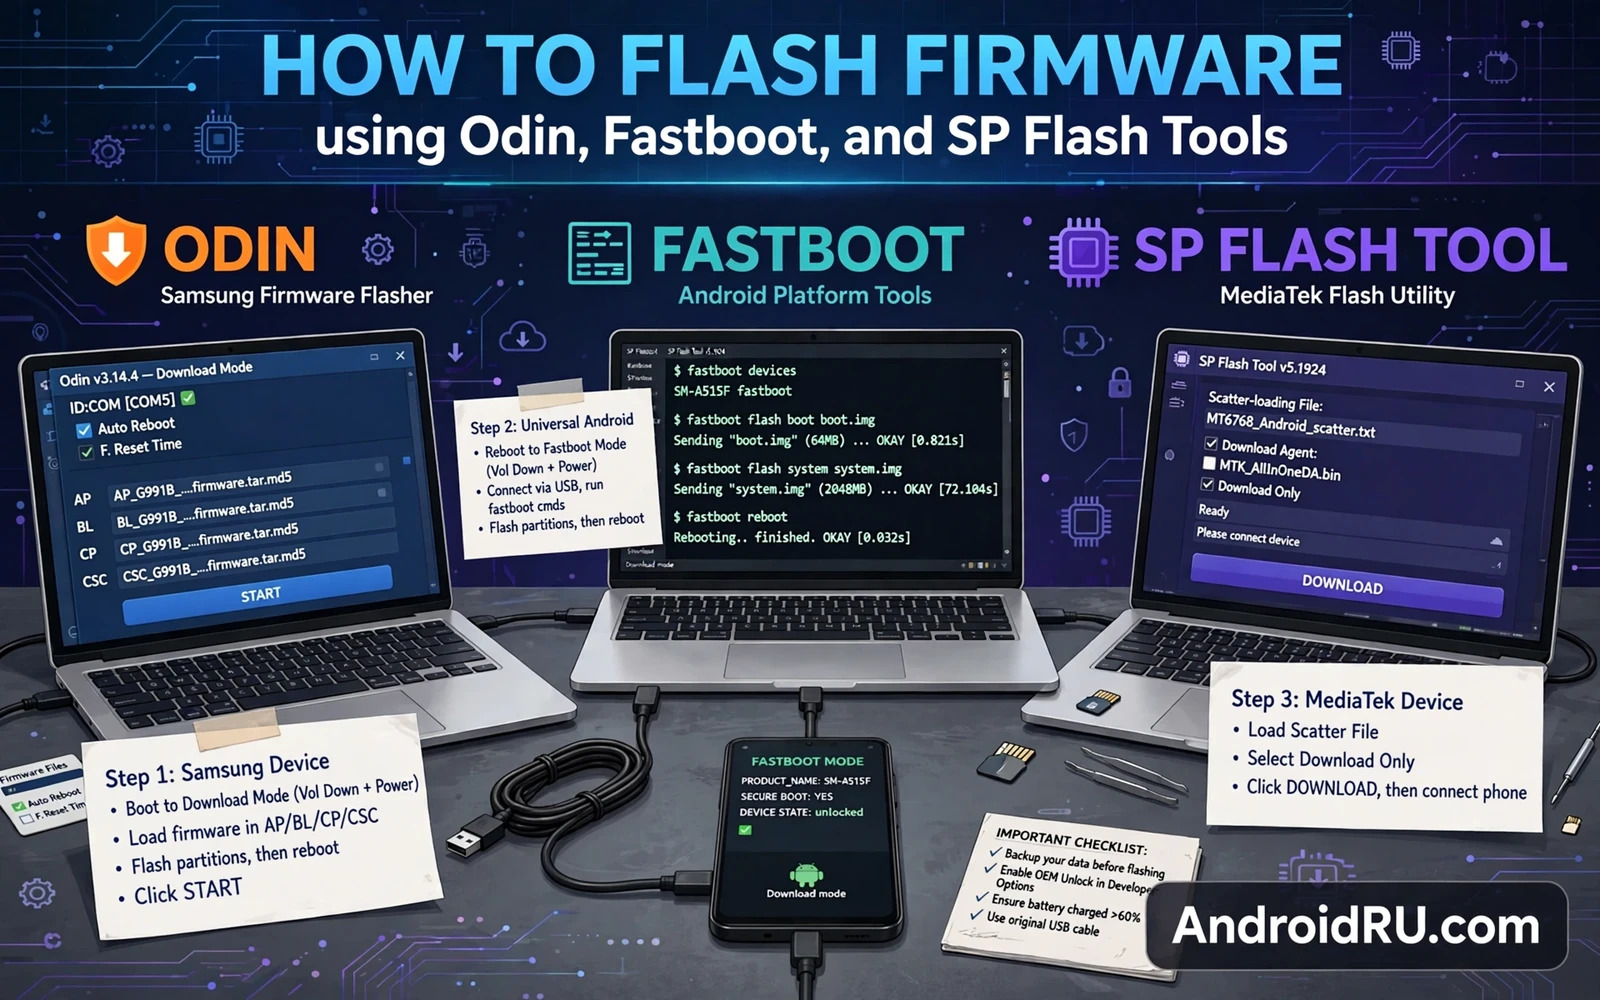
How to Flash Firmware using Odin, Fastboot, and SP Flash Tools
Flashing firmware sounds like something only repair shops do, but most Android owners meet it sooner or later. A phone stuck on an old security patch, a bootloop after a bad update, or a device bought in another region all point to the same fix: writing fresh firmware to the phone with the right tool. I have done this on Samsung, Pixel, Xiaomi, and MediaTek phones over the years, and the difference between a smooth flash and a bricked phone almost always comes down to preparation, not luck.
This guide covers the three tools that handle nearly every Android phone on the market: Odin for Samsung, Fastboot for Pixel and other phones with an open bootloader, and SP Flash Tool for MediaTek devices. You will get numbered steps for each one, the real menu names and commands, a side-by-side comparison, and honest warnings about what can go wrong. Read the preparation section first, even if you are impatient. It is the part that saves phones.
Odin, Fastboot, and SP Flash Tool: What Each Tool Is For
Each of these tools speaks a different language to the phone. Odin talks to Samsung phones in Download mode over a Samsung protocol. Fastboot talks to the bootloader of Pixel, OnePlus, Xiaomi, Motorola, and many other phones through the Android bootloader interface. SP Flash Tool talks to MediaTek chips through a preloader mode that exists even when the phone looks dead. Picking the wrong tool is the most common beginner mistake, and it wastes an evening at best.
The firmware packages differ just as much as the tools. Odin packages usually arrive as tar or tar.md5 archives holding bootloader, modem, system, and CSC images. Fastboot firmware often arrives as a folder of image files with a flash-all script. SP Flash Tool firmware arrives as a scatter file plus a set of images that the tool maps to partitions. The scatter file is the map, and flashing without the correct one is like assembling furniture without instructions.
Odin: Samsung phones and Download mode
Odin is the Samsung flashing tool, and it only works with Samsung phones. You put the phone into Download mode, connect it by USB, load firmware files into the BL, AP, CP, and CSC slots, and press Start. Odin writes each partition in order and reboots the phone when it finishes. Samsung phones also have a separate recovery mode, but Odin work happens in Download mode, which is a different screen entirely.
Fastboot: Pixel, OnePlus, Xiaomi, and other phones with an open bootloader
Fastboot is the bootloader interface used by many devices with an open bootloader. Google ships it as part of the Android platform tools, and it works from a command line on Windows, macOS, and Linux. You boot the phone into fastboot mode, run fastboot devices to confirm the connection, and then write images one partition at a time with fastboot flash commands. Factory images from Google even include a flash-all script that does the whole job for you.
SP Flash Tool: MediaTek phones and the scatter file
SP Flash Tool is the MediaTek flashing tool for devices built on MediaTek chipsets, which power a huge share of budget phones from Xiaomi, Oppo, Vivo, Realme, Infinix, and Tecno. It reads a scatter file that lists every partition, its address, and its image. You load the scatter file, connect the powered-off phone, and the tool writes the images through the preloader. Because the preloader runs before the main system, SP Flash Tool can often reach a phone that will not boot at all.
Why the scatter file matters more than the images
A scatter file that belongs to a different model can map images to the wrong addresses, and that is how a simple flash turns into a hard brick. Always use the scatter file that shipped with the firmware package for your exact model. If the package has no scatter file, or the file names do not match the images in the folder, stop and find a different package. The scatter file is the one file you must never mix between models.
Before You Flash Firmware: The Preparation Checklist That Prevents Bricks
Most flash failures I have seen were decided before the tool ever opened. A wrong firmware file, a dying battery, a loose cable, or a missing driver does more damage than any wrong button press inside the tool. Work through this checklist in order, and do not skip a step because it feels obvious.
- Confirm the exact model number in Settings, then About phone, and match it against the firmware file name, region code, and carrier variant.
- Charge the battery above 60 percent and use the original cable or a known-good cable on a rear USB port of a desktop computer.
- Back up photos, documents, contacts, and chat exports to a computer or a separate drive, because many flashes wipe user data by design.
- Install the correct USB drivers for your chipset and test the connection before any write, with Odin showing a blue or yellow COM port, or
fastboot devicesreturning a serial number. - Verify the firmware download with a published checksum when one exists, and extract the archive fully before you start.
Match the firmware to your exact model and region
Firmware for a similar model with a different modem or a different display panel can break mobile data or break the screen. Check the full model number and the region code and the carrier variant where relevant. A firmware file named for a close model is not a match. Close is not enough when partitions are being overwritten, and a phone that boots with no signal is a long evening of repair work.
Back up everything you cannot afford to lose
Copy photos and documents to external storage. Export contacts and messages where possible. Note down app logins that cannot be recovered through a simple reinstall. Keep the backup on a separate device so a phone failure cannot take the backup with it. Flashing with Odin using the CSC file instead of HOME_CSC wipes the phone, Fastboot flashing usually includes a fastboot -w wipe, and SP Flash Tool in Firmware Upgrade mode can wipe user data too. Assume a wipe and be pleasantly surprised if one does not happen.
Drivers first: test the connection before you write anything
Windows often needs a specific driver package for Samsung Download mode or for MediaTek preloader mode. Linux and macOS handle many fastboot devices without extra drivers but still need proper USB permissions. Test the connection with a simple device detection step before attempting any write. If the tool cannot see the phone, the drivers are wrong, the cable is wrong, or the phone is not in the right mode. Fix that first, because a flash that starts on a flaky connection can stop halfway through a partition write.
How to Flash Firmware with Odin on Samsung Phones
Odin is a Windows program, so you need a Windows computer or a Windows virtual machine with USB passthrough. The current versions are usually called Odin3, and the interface has barely changed in years: four file slots, a log window, and a Start button. That simplicity is deceptive, because the file slots matter and the options matter.
- Extract the firmware archive until you see files starting with BL, AP, CP, and CSC or HOME_CSC. The AP file is large, often several gigabytes, and it holds the system image.
- Open Odin as administrator on Windows. Right-click the Odin executable and choose Run as administrator so it can claim the USB port properly.
- Put the Samsung phone into Download mode. On most modern models, power the phone off, then hold Volume Up and Volume Down together while you plug in the USB cable. On older models, hold Volume Down, Home, and Power. Press Volume Up on the warning screen to continue.
- Connect the phone and wait for Odin to show a connected device. The ID:COM box turns blue or yellow and the log window prints Added. If nothing appears, reinstall the Samsung USB driver and try a different cable.
- Load the files into the correct slots: BL gets the BL file, AP gets the AP file, CP gets the CP file, and CSC gets either CSC or HOME_CSC. Use HOME_CSC to keep your data, and CSC to wipe the phone clean. Never load an AP file into the BL slot.
- Leave the options at their defaults. Auto Reboot and F. Reset Time should stay checked. Do not check Re-Partition unless a trusted guide for your exact model tells you to, and only then with the correct PIT file.
- Press Start and do not touch the cable or the phone. The log window prints each partition as it writes, and a green PASS box appears when the flash finishes. The phone reboots on its own.
- Wait out the first boot. The first boot takes longer than normal because the system builds caches and optimises apps. Do not interrupt it out of impatience. Interrupting the first boot can corrupt the fresh system image and send you back to Download mode.
What the Odin log window tells you while it works
The log window is your only honest feedback during a flash. Lines like SetupConnection, Initialization, and Get PIT for mapping show the stages as they pass. A FAIL in red with a message about a write error usually means a bad cable, a wrong file, or a firmware version that the bootloader refuses. Read the last few lines before you act, because they name the stage that failed.
If Odin stalls at SetupConnection
A stall at SetupConnection almost always means the USB link dropped or the driver failed to claim the phone. Try a rear USB port, a different cable, and a fresh run of Odin as administrator. If the phone still shows in Device Manager with a yellow warning icon, the Samsung driver is the problem, not the firmware. Fix the driver before you try again.
How to Flash Firmware with Fastboot on Pixel and Other Phones
Fastboot is the most flexible of the three tools, and it is also the one that demands the most care. It works from a terminal, it writes one partition at a time, and it assumes you know which image belongs where. The payoff is control: you can flash a single partition, boot a recovery image without installing it, and check the phone state with simple commands.
- Install the Android platform tools on your computer and confirm
fastboot --versionruns. On Windows, add the platform-tools folder to your PATH or run commands from inside that folder. - Enable Developer options on the phone by tapping Build number seven times in Settings, then About phone, then turn on USB debugging and the OEM toggle in Developer options. This is the step that grants bootloader access, and without it the bootloader will refuse most commands.
- Connect the phone and run
adb reboot bootloaderto enter fastboot mode, or power off and hold Volume Down and Power together. The screen shows FASTBOOT MODE with the device state listed. - Run
fastboot devicesand confirm your phone serial number appears. If the list is empty, the driver or the cable is wrong, or USB debugging was never authorised on the phone. - Extract the factory image or firmware package and read its flash script before you run it. A flash-all script usually flashes bootloader, radio, boot, system, vendor, and product images in order, then wipes user data unless you remove the
-wflag from the script. - Run the flash script, or flash images by hand with commands like
fastboot flash boot boot.imgandfastboot flash system system.img. Watch each command finish with OKAY before you run the next one. - Run
fastboot rebootwhen the script or the last flash command completes. The first boot after a full flash takes several minutes while the system rebuilds its caches.
FastbootD mode for dynamic partition flashing
Modern Android phones use dynamic partitions, which means the system, vendor, and product partitions live inside one large super partition instead of fixed slots. Regular fastboot mode cannot resize or rewrite those partitions, so Google added FastbootD, a userspace fastboot mode that runs inside recovery. If your firmware includes a super image or a product image that regular fastboot refuses with a partition error, that is the moment to switch. Read how to use FastbootD mode for dynamic partition flashing before you attempt it, because the entry command is fastboot reboot fastboot from bootloader mode, and the phone must already have a working recovery to get there.
Checking the flash with fastboot getvar
After a flash, run fastboot getvar all and check the version fields against the firmware you installed. The bootloader version, baseband version, and product name should match the package. A mismatch here means the flash wrote some images and skipped others, and that is the kind of half-finished state that causes strange bugs later. Flash the missing images again rather than booting into a half-updated phone.
How to Flash Firmware with SP Flash Tool on MediaTek Phones
SP Flash Tool looks old-fashioned, but it is the only tool that can reach many MediaTek phones when nothing else works. It writes through the preloader, a small loader that runs before the main bootloader, so it can flash a phone that shows no screen at all. That power cuts both ways: the wrong scatter file or the wrong download agent can damage the preloader itself, and a damaged preloader is a repair-shop job.
- Install the MediaTek USB VCOM drivers on Windows and confirm the phone appears briefly in Device Manager as a MediaTek PreLoader USB VCOM port when you plug it in while powered off. The port appears for a few seconds and then vanishes, which is normal.
- Extract the firmware package and confirm the scatter file sits in the same folder as the images. Open SP Flash Tool as administrator.
- Click Choose next to Scatter-loading File and select the scatter file from your firmware folder. The partition table fills in with checked boxes for each image.
- Check that every partition row points to a file that actually exists. A row with a missing file will fail the flash halfway through, so fix the paths before you start.
- Choose Download Only from the mode dropdown for a normal flash. Firmware Upgrade is for changing to a different firmware version on the same model, and Format All plus Download wipes the whole flash chip, including the NVRAM that holds your IMEI. Never pick Format All unless you have a full NVRAM backup.
- Click Download, then connect the powered-off phone by USB. The tool detects the preloader, the progress bar turns red, then yellow, then green as it writes each partition.
- Wait for the green tick and the Download OK message. Disconnect the phone and power it on. The first boot after a MediaTek flash can take several minutes.
Download Only, Firmware Upgrade, and Format All: picking the right mode
Download Only writes the checked partitions and leaves the rest alone, which makes it the safest choice for most jobs. Firmware Upgrade writes the same images but also handles version differences in the partition layout, which matters when you move between Android versions. Format All plus Download erases everything first, including calibration data and the IMEI area, and you should only use it when a trusted guide for your exact model tells you to and you hold a backup of the NVRAM partition. I have seen more phones killed by Format All than by any other single option in this tool.
The preloader trap: why a wrong DA file bricks a MediaTek phone
SP Flash Tool uses a download agent file, usually called DA, to talk to the phone. Most firmware packages work with the default DA, but some phones need a custom DA or an auth file from the maker. If the tool reports an error about the DA or about authentication, stop. Forcing a flash with the wrong DA can overwrite the preloader, and once the preloader is gone the computer cannot see the phone at all. That is the point where home repair ends and a service box begins.
Odin vs Fastboot vs SP Flash Tool: Side-by-Side Comparison
The table below puts the three tools next to each other so you can see at a glance which one fits your phone. The short version is simple: Samsung means Odin, Pixel and most open-bootloader phones mean Fastboot, and MediaTek phones mean SP Flash Tool. Everything else is detail.
| Feature | Odin | Fastboot | SP Flash Tool |
|---|---|---|---|
| Phones it serves | Samsung Galaxy phones and tablets | Pixel, OnePlus, Xiaomi, Motorola, and other open-bootloader phones | MediaTek phones from Xiaomi, Oppo, Vivo, Realme, Infinix, Tecno |
| Connection mode | Samsung Download mode | Bootloader fastboot mode, plus FastbootD for dynamic partitions | MediaTek preloader mode with the phone powered off |
| Firmware format | tar or tar.md5 archives with BL, AP, CP, CSC files | Image files plus a flash-all script, or single images | Scatter file plus a folder of partition images |
| Operating system | Windows only | Windows, macOS, and Linux | Windows mainly, Linux builds exist |
| Can it reach a dead phone? | Only if Download mode still works | Only if the bootloader still responds | Yes, through the preloader, in many cases |
| Biggest risk | Wrong CSC choice wipes data, wrong PIT damages layout | Flashing the wrong partition image by hand | Wrong scatter file or Format All erases IMEI data |
| Skill level | Beginner friendly | Intermediate, command line | Intermediate, needs drivers and care |
One more difference matters in practice. Odin and SP Flash Tool are graphical tools with a Start button, so the main skill is preparation. Fastboot is a command line tool, so the main skill is reading each command before you press Enter. A typo in a fastboot command writes the wrong image to the wrong partition, and there is no confirmation dialog to save you. That is why the fastboot section above tells you to read the flash script first.
Common Flash Failures and How to Recover From Them
Something will go wrong eventually, even with careful preparation. The difference between a lost evening and a lost phone is knowing which failure you have and which recovery path fits it. Work through the failures below in order, from the easiest to the hardest, and stop as soon as the phone boots normally.
Bootloop after a flash
A bootloop means the phone powers on, shows the logo, and restarts in a loop. It usually means the system image and the data partition disagree, often because an old data partition survived a flash that expected a clean one. Boot into recovery, wipe the cache partition, and if that fails, perform a factory reset from recovery. A factory reset after a flash is normal and it fixes most bootloops. If the loop started after installing a module or a custom ROM rather than a stock flash, the cause is usually the module itself, so read how to fix bootloop issues after installing modules or ROMs and remove the offending module before you try anything else.
Phone stuck in Download mode or fastboot mode
A phone that sits in Download mode or fastboot mode after a failed flash is not bricked, it is waiting. The bootloader still works, which means the tool can still talk to it. Reconnect the cable, confirm the tool sees the phone, and run the flash again with the correct firmware. On Samsung, hold Volume Down and Power for about seven seconds to force a restart if the phone will not leave Download mode on its own. On fastboot phones, fastboot reboot or fastboot reboot recovery will usually move things along.
Hard brick: when the phone shows no sign of life
A hard brick means no logo, no vibration, no charging icon, and no response to any button combination. Before you declare it dead, try a different cable and charger, leave it charging for an hour, and try the key combinations for your model again. MediaTek phones in this state can often be reached through the preloader with SP Flash Tool. Qualcomm phones in this state can sometimes be reached through EDL mode, a deeper emergency mode that talks to the chip directly. Read how to unbrick hard-bricked Android phones using EDL mode if your phone uses a Qualcomm chip and shows no life at all, because EDL is the last software path before hardware repair.
When to stop and seek a repair shop
Stop home repair when the computer cannot detect the phone in any mode, when the phone gets hot without booting, or when you have tried the correct firmware twice with the same failure. A repair shop with a service box can rewrite the preloader or bootloader directly, and that is a job for hardware tools. Continuing to flash a phone that the computer cannot see only wastes time and risks making the damage worse. Never interrupt a flash in progress is the rule, and the matching rule is never force a flash onto a phone the tool cannot detect.
Frequently Asked Questions About Flashing Firmware
Can flashing firmware void my warranty?
Flashing official firmware for your exact model and region usually does not void the warranty, because you are installing software the maker itself released. Flashing firmware from another region, a custom ROM, or a modified image is a different story, and a service centre can refuse warranty work if the bootloader shows it was opened. Check your maker policy before you flash anything that is not official stock firmware.
How long does a firmware flash take?
A typical Odin flash takes five to fifteen minutes, depending on the size of the AP file. A Fastboot flash-all script takes a similar time. An SP Flash Tool flash takes five to twenty minutes. The first boot afterwards adds another three to ten minutes while the system rebuilds caches. Budget an hour in total, including preparation, and do not start a flash when you need the phone in thirty minutes.
Can I flash firmware from a different region?
On Samsung phones, flashing firmware from another region usually works if the model number matches exactly, and many people do it to get updates early. The risk is a different CSC, which can change carrier features, remove local apps, or change the default language. On MediaTek and Xiaomi phones, a region mismatch is riskier because the modem and carrier configuration differ more. Match the region when you can, and treat a cross-region flash as an experiment, not a routine update.
What should I do if my phone loses mobile data after a flash?
Losing mobile data after a flash usually means the modem image or the CSC did not match your model or carrier. First check Settings, then Connections, then Mobile networks, and confirm the access point names are present. If they are missing, reset the access point names to default. If that fails, reflash with the correct CP or modem file for your exact model and region. A phone that boots fine but has no signal is almost always a modem mismatch, not a hardware fault.
Flashing firmware is a skill, not a gamble, and the skill is mostly preparation. Match the firmware to your exact model, charge the battery, install the drivers, test the connection, and pick the tool that fits your chipset. Odin handles Samsung, Fastboot handles Pixel and other open-bootloader phones, and SP Flash Tool handles MediaTek. Do those steps in order and the flash itself is the easy part.
Your concrete next step is simple: find your exact model number in Settings, then About phone, and write it down next to the firmware version you plan to install. Compare the two before you download anything. That one minute of checking prevents the most common and most expensive mistake in this whole guide, and it is the habit that separates a smooth flash from a long night of recovery work.

