

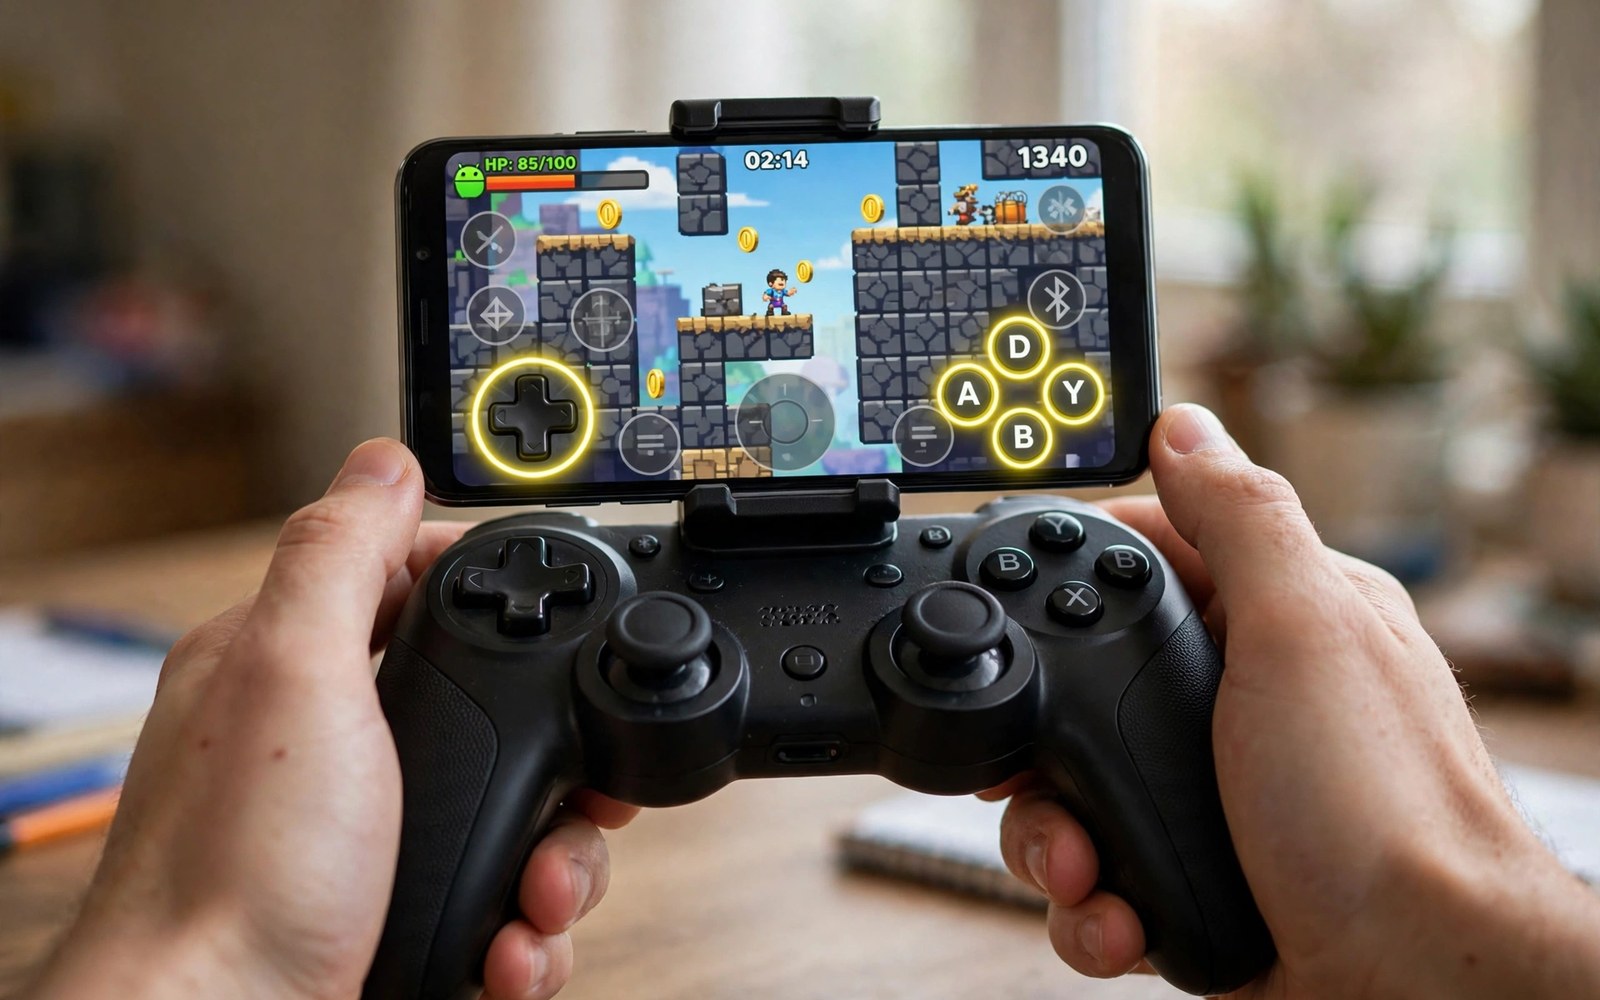
Map physical buttons to touchscreen controls when a game offers no native controller support. Key mapping places virtual buttons on screen and links each one to a real pad button. Pressing the pad button then taps that screen spot for you. This trick opens controller play for many touch only games.
Mapping works best for games with fixed button positions on screen. Shooters with a stable fire button map well. Games with moving buttons or drag gestures map poorly and frustrate players. Learn the limits before you invest hours in a complex layout. A simple layout that works beats a fancy layout that fails mid match.
This article shows a safe setup path from first install to final test. You will learn how to place buttons and tune dead zones and save profiles per game. You will also learn which mapping methods need extra permissions and which stay simple. Follow the steps in order and test after each change.
How button mapping works on Android
A mapping tool draws an overlay on top of the game screen. Each overlay button holds a screen coordinate and a linked pad input. When you press the pad button the tool sends a tap at that coordinate. The game sees a touch tap and reacts as if your finger pressed there. That simple idea powers most mapping tools on Android today.
Some tools use an accessibility service to send taps without root access. Others need a computer activation step on each reboot. Root tools can inject input more directly but carry higher risk. Choose the simplest method that works for your game. Extra power is not worth extra risk when a basic overlay already maps your buttons well.
Building your first mapping layout
Start the game and note where each key button sits on screen. Place one overlay button over each key action and link it to a pad button. Keep the layout sparse at first with movement and fire and jump only. Add extra buttons only after the core layout feels natural. A sparse layout teaches muscle memory faster than a crowded screen full of icons.
Use the left stick for the virtual joystick area in movement heavy games. Set the stick radius to match the on screen joystick size. Test diagonal movement early since bad radius settings cause sluggish turns. Tune sensitivity in small steps and retest after each change. Small tweaks beat large swings when you chase a natural movement feel.
Tuning dead zones and sensitivity
Dead zones ignore tiny stick movements near the centre position. A small dead zone helps precise aim but can cause drift on worn sticks. A large dead zone stops drift but makes fine aim feel stiff. Start near ten percent and adjust by tiny steps. Test aim in a calm practice area before you enter ranked matches with a new setting.
If a game already supports pads natively then mapping adds needless complexity. Check native support first in the game settings menu. For games that lack it a mapper bridges the gap well. You can also compare pad types in cheap Bluetooth gamepads to find a comfortable pad for mapping sessions.
Saving profiles and switching games
Save one profile per game rather than reusing a single layout everywhere. Button positions differ between games and a shared layout causes missed taps. Name profiles clearly with game name and control style. Back up profiles if the tool offers export. A backup saves hours when you switch phones or reinstall the mapping tool.
Test each profile after game updates since updates can move buttons. A patch that shifts the fire button breaks a mapped layout silently. Spend two minutes in practice mode after each major update. Fix moved buttons before you play ranked matches. That habit keeps mapping reliable across long game lifespans.
Accessories that pair well with this setup
A comfortable pad matters as much as mapping software for long sessions. A pad with good sticks reduces hand fatigue during mapped play. Cheap pads with drift ruin mapped aim faster than software bugs do. Test pad sticks in a native game before mapping work. A reliable pad makes every mapped layout feel more precise and more enjoyable.
A phone stand helps mapping sessions at a desk a lot. The stand holds the screen steady while you place overlay buttons. That stability improves placement accuracy for small buttons. A shaky handheld phone makes fine placement frustrating. Use a stand for initial layout work and then test layouts handheld afterwards.
Keyboard players may prefer key based mapping over pad mapping for some games. Keymappers link keys to screen taps in a similar way. Learn that method in keyboard and mouse keymappers before choosing your main input style. Some games suit keys while others suit pads. Test both styles in practice mode for your favourite title.
A weekly routine that keeps everything working
Review saved profiles monthly and delete layouts for games you abandoned. Old profiles clutter menus and slow switching between active games. Keep only profiles for games played in the last month. Export active profiles before reinstalling the mapping tool. That backup habit saves hours when phones change or tools reset unexpectedly.
Recheck button placement after every game update as part of a weekly routine. Updates shift buttons silently and break mapped taps. Spend two minutes in practice mode after each patch. Fix moved buttons before ranked matches expose them. That discipline keeps mapping reliable across long game lifespans and frequent patches alike.
Revisit native support checks monthly for mapped games since updates sometimes add pad support. Native support beats mapping for smoothness whenever it appears. The genre picture in games with native pad support helps you spot titles that already support pads well. Switching to native support when available removes overlay complexity from daily play entirely.
How this plays out in real life
A shooter fan stuck with a touch only favourite maps fire to a shoulder button first. That single mapping frees the right thumb for camera control during fights. Movement stays on the left stick area mapped from the virtual joystick. Practice mode drills build the new muscle memory within days. Ranked matches wait until training feels smooth and misfires disappear from practice sessions entirely.
A racing fan maps analogue style throttle control to a trigger for a touch only racer. The trigger press maps to the on screen accelerator button position. Brake maps to the opposite trigger for balanced control. That layout mimics console racing feel surprisingly well on a phone. Lap times improve once trigger timing replaces thumb sliding on glass during tight corners.
A student with a small phone maps only essential buttons to avoid screen clutter. Movement and jump and interact cover most adventure gameplay needs. Extra buttons stay hidden until the student learns core controls fully. That minimal layout keeps the small screen readable during exploration. Complexity grows only when the student requests specific actions that truly need dedicated buttons.
A player with limited thumb mobility maps actions to comfortable shoulder buttons instead. Mapping tools let players redistribute controls away from painful thumb zones. That accessibility benefit matters more than competitive advantage for many players. Custom layouts turn unplayable touch games into enjoyable experiences. That inclusive use shows mapping at its most valuable for real players with real needs.
A casual puzzle gamer maps a single button for undo actions in a touch puzzler. That tiny mapping speeds repeated actions without changing core gameplay. The rest of the game stays touch based for dragging and placing pieces. Minimal mapping respects the original design while removing one repetitive annoyance. That restrained approach suits casual players who dislike complex overlays and crowded screens.
A practical check you can run
You can inspect which input devices Android sees before mapping starts. Run the checks below on a computer linked to the phone with the pad attached. The output helps you confirm the pad name and its input nodes.
adb shell dumpsys input
adb shell cat /proc/bus/input/devices
adb shell getevent -l
The commands above are adapted from public platform documentation for Android developer tools. They are included here as a teaching example for checking device behaviour and not as copied product code.
Common mistakes
A common mistake is mapping too many buttons on the first attempt. A crowded overlay hides game info and confuses muscle memory. Start with core actions only and add extras slowly. Each new button should earn its place through regular use. Remove buttons you never press during real matches.
Another mistake is ignoring game updates that move on screen buttons. Mapped taps then hit empty screen areas and actions fail. Recheck button positions after each update. Practice mode reveals broken mappings without ranked pressure. Fix layouts promptly rather than blaming the pad for missed actions.
A third mistake is using mapping tools from unknown sources without checks. Some tools ask for broad permissions that they do not need. Use well known tools and grant only needed access. Remove tools you stop using. Keep your phone secure even while you chase better controls.
Frequently asked questions
Do I need root to map buttons on Android?
Most modern mapping tools work without root through an accessibility service or a computer activation step. Root tools offer deeper input control but carry higher risk for banking apps and system stability. Try a no root tool first for your game. Switch only if no root options map your game well.
Why does my mapped button miss sometimes?
Missed taps often come from a button placed slightly off the game control. Recheck placement with the game running at full screen. Screen scaling and notch areas can shift coordinates on some phones. Move the overlay button a few pixels and retest. Small placement fixes solve most missed tap problems.
Can mapping get my game account banned?
Mapping mimics touch input and most games tolerate it for casual play. Competitive games may restrict overlays or third party input tools in their rules. Read the game terms before using a mapper in ranked modes. Use native controller support when a game offers it to stay safest.
Conclusion
Button mapping turns touch only games into controller friendly experiences with patience and testing. Start sparse and tune dead zones slowly and save profiles per game. Respect game rules for ranked play and keep your tools from trusted sources. Those habits make mapping a lasting upgrade rather than a weekend experiment.
Your next step is simple and concrete. Pick one game and map only movement and fire and jump today. Play three practice rounds and tune the layout after each round. Once that core feels natural then add one extra button at a time.
Plan your first mapping week around one game and gradual complexity growth. Map movement and fire on day one and practise those controls for fifteen minutes. Add jump on day two only after movement feels automatic in practice mode. Test the layout in casual matches on day three without ranked pressure. Fix misplaced buttons on day four based on casual match mistakes. Add one extra button on day five and practise it separately first. Review game update notes on day six for button position changes. Decide on day seven whether mapping improves your game enough to continue. A patient first week builds reliable muscle memory without frustration or ranked losses.

