

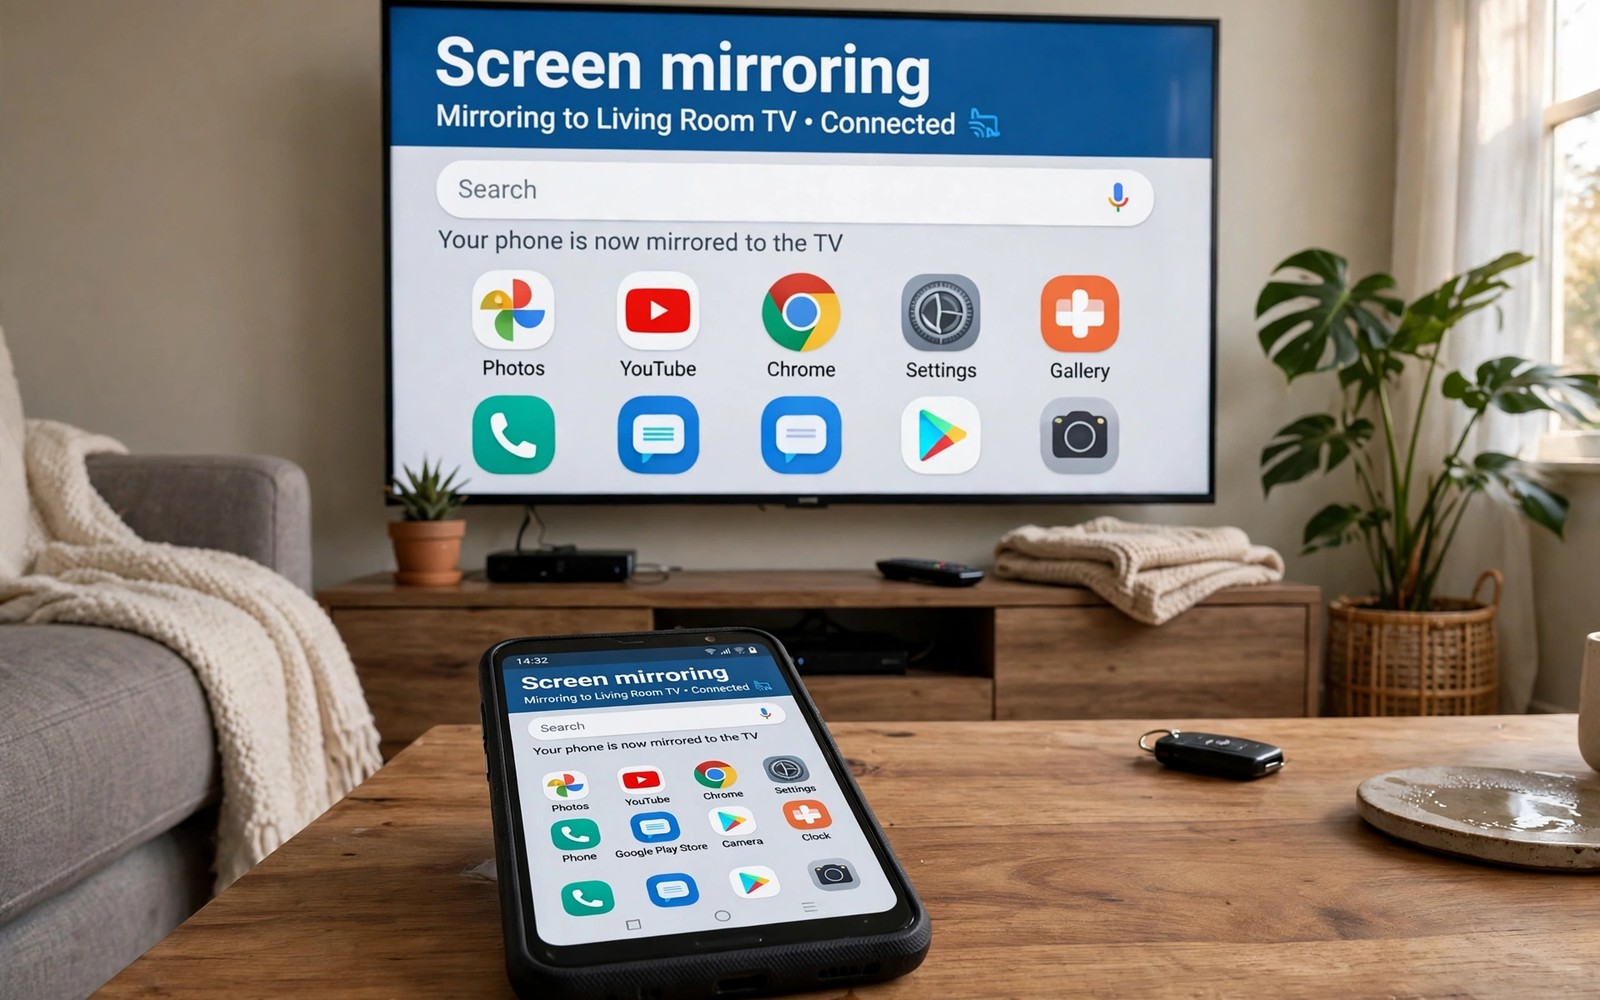
The Secret Trick to Mirror Android Screen to Any TV Instantly
Screen mirroring puts your phone display on a TV so photos and videos and apps fill a large screen. A mirrored screen helps during family photo sharing, work presentations, and casual gaming on the couch. The setup takes only a few taps once you know which method your TV supports, and after the first successful cast it becomes a one-tap routine you can start without thinking.
Android mirroring works through built-in casting, through Miracast, and through a cable, depending on the TV. Built-in casting suits smart TVs with the same feature enabled. Miracast suits TVs that can receive a direct wireless display signal. A cable suits older TVs without wireless casting support, and it suits fast games where even a small delay ruins the timing. This guide covers all three methods with numbered steps, a comparison table, and the fixes for lag and sound problems.
You will learn how to start a cast, how to optimise the network, how to stop a cast cleanly, and how to pick the right method for films, games, and work. A tested method soon becomes a one-tap routine, and the table near the middle of this guide will help you pick it in under a minute.
What Your TV Can Receive Before You Tap Cast
Every mirroring attempt starts at the TV, not at the phone. Open TV settings and look for screen mirroring, casting, or Miracast entries. A smart TV that supports casting usually shows a cast receiver name on the network, and you should note that name because your phone will list it during casting. If the settings menu has no such entry, the TV probably needs a streaming stick or a cable before it can receive anything.
When the TV lacks casting support, a streaming stick can add the feature through an HDMI port. A stick turns an older TV into a cast target without replacing the TV, and it costs far less than a new television. Choose a stick that matches your phone casting protocol, because a stick built for one protocol will not answer a phone speaking another one. Check the stick box for the casting standard it supports before you buy.
A wired adapter offers a reliable fallback when wireless casting lags or when the TV has no wireless receiver at all. A USB adapter that outputs HDMI can mirror the phone screen with low latency, and it works even where Wi-Fi is weak or missing. Wired mirroring suits gaming and fast video better than a weak Wi-Fi link, and it never drops a connection because a neighbour started a large download.
How to find the cast or Miracast entry in TV settings
Open the TV settings menu and look under Network, Connection, or Display, depending on the brand. Samsung calls it Screen Mirroring, LG calls it Screen Share, and many Android TVs list it under Cast or Chromecast built-in. The name changes, but the idea stays the same: the TV opens a receiver that your phone can discover. Turn the receiver on and note the name it shows, because that name is what you will tap on the phone in a moment.
If you cannot find the entry, check the TV manual or the maker support page for your exact model. Some TVs hide the receiver behind a Source or Input menu rather than Settings. Others need a firmware update before the receiver appears at all. A five-minute check here saves twenty minutes of tapping a phone that cannot see a TV that is not listening.
When a streaming stick is the cheapest fix
A streaming stick is the cheapest fix when the TV has an HDMI port but no cast receiver. The stick plugs into the port, joins your Wi-Fi, and presents itself as a cast target your phone already knows how to talk to. Setup takes about ten minutes the first time and about ten seconds afterwards, because the stick remembers the network and the phone remembers the stick.
Pick a stick that matches how you watch. A basic stick suits photo sharing and casual video. A faster stick with a stronger Wi-Fi radio suits films and long sessions. Either way, the stick is a one-time purchase that turns a dumb TV into a cast target for every phone in the house, and that shared value is hard to beat.
Matching the stick to your phone protocol
Most Android phones cast with the Cast protocol, so a Chromecast or a TV with Chromecast built-in is the natural match. Some phones also support Miracast, which talks to a different set of receivers. Check which protocol your phone offers in Quick Settings before you buy, and buy the stick that speaks the same language. A mismatch here is the most common reason a new stick never appears in the cast list.
The HDMI port check people skip
Before you buy anything, check that the TV has a free HDMI port and that you know which input number it is. A stick plugged into HDMI 2 will not show up while the TV sits on HDMI 1, and that simple mistake causes a surprising number of support calls. Plug the stick in, switch the TV to that input, and finish the stick setup before you touch the phone. Order matters, and this order works.
Method 1: Built-In Cast From Quick Settings
Built-in casting is the fastest method for most people because it uses a feature already on the phone and a receiver already on the TV. No extra hardware, no cable, and no app to install. The phone finds the TV on the home network, sends the screen as a stream, and the TV shows it within a few seconds. It is the method to try first, and it is the method you will keep using once it works.
The only real requirement is that the phone and the TV share the same Wi-Fi network. A phone on mobile data cannot discover a TV on home Wi-Fi, and a phone on a guest network cannot see a TV on the main network. Switch the phone to home Wi-Fi before you start the cast, and the TV name should appear in the list without a fight.
Step by Step: Start a Cast in Under a Minute
- Turn on the TV and open the app or photo you want to mirror on the phone.
- Connect the phone to the same Wi-Fi network the TV uses, and check the network name matches exactly.
- Swipe down from the top of the phone screen to open Quick Settings.
- Tap the Cast or Screen Cast tile. If you do not see it, tap the edit icon and add the tile to Quick Settings.
- Wait a few seconds for the phone to list nearby receivers, then tap your TV name from the list.
- Accept any prompt on the TV, and wait for the phone screen to appear on the television.
- Rotate the phone to landscape when you mirror a video or a game, so the picture fills the TV without black bars.
That is the whole routine. The first time takes a minute because you are learning the tile and the TV name. The second time takes about ten seconds, because the phone remembers the TV and offers it at the top of the list. If the TV name never appears, the fix is almost always the network, and the next section covers that.
What to Check When the TV Name Never Appears
A missing TV name means the phone and the TV cannot see each other on the network, and the cause is usually simple. Check that both devices sit on the same Wi-Fi network and the same band, because some routers run a 2.4 GHz network and a 5 GHz network under different names. Check that the TV receiver is turned on in TV settings, because some TVs turn it off after a firmware update. Check that the phone is not on a VPN, because a VPN can hide the phone from local devices.
If all three checks pass, restart the phone Wi-Fi and the TV receiver. Turn Wi-Fi off and on again on the phone, then open the TV receiver setting and toggle it off and on. Discovery is a polite conversation between two devices, and a restart gives them a fresh chance to introduce themselves. A router restart is the last resort, and it fixes the stubborn cases where the router stopped passing discovery messages between devices.
Same Wi-Fi network first
The same Wi-Fi network rule is the one people break most often, because a phone can join a network silently in the background. A phone that joined the guest network yesterday will still be on it today, and the TV on the main network will stay invisible. Open Wi-Fi settings on the phone, read the network name out loud, and compare it with the network name on the TV. Matching names fix more casts than any other single step.
Restarting discovery without restarting the TV
You rarely need to restart the whole TV. Toggling the receiver off and on in TV settings is enough to restart discovery, and toggling Wi-Fi off and on on the phone is enough on the other side. Do the phone side first, because it takes five seconds. Do the TV side second. Do the router only when both sides have been toggled and the name still refuses to appear.
Method 2: Miracast for TVs Without a Cast Button
Miracast is a direct wireless display standard that lets a phone send its screen to a TV without a router in the middle. The phone and the TV talk to each other over a direct Wi-Fi link, which means Miracast can work in a hotel room, a classroom, or a house where the router is acting up. Many Samsung, LG, and Sony TVs support it, and many Android phones carry it under names like Smart View, Screen Mirroring, or Wireless Display.
The trade-off is quality. A direct link has less bandwidth to spare than a home network, so Miracast can stutter on fast video and it can lag a fraction of a second behind the phone. That lag is fine for photos and slides, and it is annoying for action games. Use Miracast where built-in casting is missing, and switch to a cable when the lag starts to matter.
Turning On Miracast on the TV
- Open TV settings and find the screen mirroring or Miracast entry under Network or Connection.
- Turn the receiver on and note the name the TV shows for itself.
- On the phone, open Settings, then Connected Devices, then Connection Preferences, then Cast, or open Quick Settings and tap Smart View.
- Tap the three-dot menu in the Cast screen and enable Wireless Display if the option appears.
- Wait for the TV name to appear, tap it, and accept the connection prompt on the TV.
- Keep the phone within a few metres of the TV during the session, because a direct link weakens fast with distance.
Some phones hide the wireless display toggle behind a menu, and some brands removed Miracast support in newer Android versions. If your phone has no wireless display option at all, the manufacturer likely dropped it, and built-in casting or a cable is the way forward. That is a brand decision, not a fault in your TV, and no settings change will bring the option back.
When Miracast Is the Wrong Choice
Miracast is the wrong choice for fast games, because the small delay between your input and the TV picture makes timing hard. It is the wrong choice for long films on a crowded network, because the direct link has no router to help it recover from interference. It is also the wrong choice when the TV sits far from the couch, because the direct link loses strength with every metre and every wall.
Miracast is the right choice for photos, slides, and short videos in a room without a strong router. It is the right choice for a classroom or a meeting room where you cannot join the local Wi-Fi. Match the method to the room and the content, and Miracast earns its place as the middle option between built-in casting and a cable.
The direct wireless link behind Miracast
Miracast uses Wi-Fi Direct, which is a direct connection between two devices with no router between them. The phone becomes a small access point and the TV joins it, which is why the method works without a home network. The direct link is also why distance matters so much: there is no router halfway to boost the signal, so the phone and the TV must stay close.
Why Miracast and home Wi-Fi sometimes clash
Some phones can hold only one Wi-Fi connection at a time, so starting Miracast can drop the home Wi-Fi link and cut the phone off from the internet. The screen still mirrors, but videos that need the internet may stall. If that happens, download the video first or switch to built-in casting, which uses the home network and keeps the internet flowing while you mirror.
Method 3: A Wired HDMI Adapter for Zero Lag
A wired adapter is the oldest method in this guide and still the most reliable. A USB-C to HDMI adapter plugs into the phone charging port, an HDMI cable runs from the adapter to the TV, and the phone screen appears on the television with almost no delay. No network, no discovery, no pairing, and no interference from a neighbour microwave. It simply works, every time, on every TV with an HDMI port.
The method suits fast games above all, because the delay is so small you cannot feel it. It suits work presentations in rooms with locked-down Wi-Fi, because it never touches the network. It suits long films too, because a wired connection never drops halfway through a scene. The only cost is a cable and an adapter, and the only habit to learn is keeping the phone charged during a long session.
Choosing the Right USB-C to HDMI Adapter
- Check your phone port: most modern Android phones use USB-C, while older models use Micro-USB with a different adapter.
- Check that your phone supports video output over USB-C. Most Samsung, Huawei, and Pixel models do, but some budget phones do not, so check the maker specifications first.
- Pick an adapter with power pass-through, so a charger can plug into the adapter while the phone mirrors.
- Pick an adapter rated for the resolution you want, such as 1080p for most TVs or 4K for a large screen.
- Buy a known brand rather than the cheapest listing, because a weak adapter can flicker or drop the signal mid-film.
A good adapter feels like a solid piece of hardware with a snug connector, and it works the moment you plug it in. A bad one feels loose, flickers when you move the phone, and fails when the phone gets warm. The price gap between the two is small, and the reliability gap is large. Spend the extra few dollars once and forget about the adapter for years.
Setting the TV to the Right HDMI Input
Plug the adapter into the phone, plug the HDMI cable into the adapter and the TV, then use the TV remote to switch to the matching HDMI input. The phone screen should appear within a few seconds, usually without any prompt on the phone. If the TV shows a blank screen, check the input number first, then unplug and replug the adapter, then try a different HDMI port on the TV.
Some phones ask for permission the first time an adapter connects, and a few ask you to pick a mode like mirror or desktop. Pick mirror for a TV session, because desktop mode is a different feature for monitors. Once you pick mirror, the phone remembers the choice and later sessions start without a prompt.
Power pass-through: the feature that saves long sessions
Mirroring drains battery fast, and a wired session drains it faster because the phone drives an external display. An adapter with power pass-through lets a charger plug into the adapter itself, so the phone charges while it mirrors. Without it, a two-hour film can end with a dead phone and a dark TV. With it, the phone ends the film at a higher charge than it started. That one feature is worth more than any other on the adapter box.
What to do when the TV shows no signal
No signal usually means the TV is on the wrong input or the cable is loose. Check the input number against the port you used, then push both ends of the HDMI cable firmly into place. If that fails, try a different HDMI port, then a different cable, then a different adapter. Test one change at a time so you know which change fixed it, and keep the working combination in mind for next time.
Built-In Cast vs Miracast vs Cable: Which Method Fits You
The three methods cover almost every TV, but they are not equal. Built-in casting is the easiest and it keeps the internet flowing. Miracast works without a router and suits rooms where the network is out of reach. A cable gives the lowest lag and the most reliable picture, and it works on any TV with an HDMI port. The table below puts the differences side by side so you can pick in under a minute.
| Method | Setup time | Lag | Needs Wi-Fi | Best for |
|---|---|---|---|---|
| Built-in cast | Under a minute | Low | Yes, same network | Films, photos, and daily sharing |
| Miracast | About two minutes | Medium | No, direct link | Slides and photos without a router |
| Wired HDMI adapter | Under a minute | Almost none | No | Fast games and work presentations |
| Streaming stick | About ten minutes first time | Low | Yes, same network | Older TVs with an HDMI port |
Read the table as a decision tool, not a ranking. A cable wins on lag but loses on freedom, because the phone is tied to the TV by a wire. Built-in casting wins on ease but loses when the network is weak. Miracast wins on independence but loses on quality for fast video. The right method is the one that fits your TV, your content, and your room, and that answer changes from one evening to the next.
The Verdict for Films, Games, and Work
For films, built-in casting is the natural pick. The lag is too small to notice, the phone stays free in your hand as a remote, and the TV speakers carry the sound. A streaming stick gives the same result on an older TV. For games, the cable is the only pick that feels right, because a fraction of a second of delay is the difference between a win and a loss in an action game. For work, the cable is the safest pick too, because a meeting room network may block casting and a cable never asks the network for permission.
For photos and slides, any method works, so pick the one that is already set up. A family photo night needs no special hardware, and a slide deck needs reliability more than speed. The verdict changes with the content, and a household that mirrors often will end up using all three methods in a single week. That is normal. Keep the cable in a drawer, keep the cast tile in Quick Settings, and pick whichever fits the evening.
Pick built-in cast when
Pick built-in cast when the TV already supports it and the Wi-Fi is strong. The setup is a few taps, the phone stays wireless, and the picture is sharp for films and photos. It is the default method for a reason, and most households never need anything else.
Pick a cable when
Pick a cable when timing matters or the network cannot be trusted. Fast games, competitive play, and work presentations in unfamiliar rooms all favour a wire. A cable is also the right pick when the Wi-Fi is crowded, because a wire never shares bandwidth with a neighbour download.
Fixing Lag, Blur, and Dropped Connections
Lag often comes from a crowded Wi-Fi network or a weak signal to the TV. Move closer to the router or switch the TV to a less crowded Wi-Fi band when possible. A wired TV connection through Ethernet can also reduce lag sharply, because the TV stops competing for wireless airtime. Lower the phone screen resolution or close background apps when mirroring stutters, because a phone that renders a heavy game and a mirror stream at once can struggle. Closing unused apps frees processor power for the mirror stream.
Blur has a different cause. It usually means the mirror stream dropped to a lower resolution because the network could not carry the full picture. Move the phone closer to the router, switch the router to the 5 GHz band, and close apps that use the network in the background. A wired connection gives the sharpest result for fast video, because the picture never crosses the air at all. If the picture stays blurry on a strong network, check the TV picture settings, because some TVs apply heavy smoothing to a mirrored input.
The Three Most Common Causes of Mirror Lag
The first cause is a crowded network. A house with several people streaming video at once leaves little airtime for a mirror stream, and the mirror is the first thing to stutter. The second cause is distance. A phone two rooms away from the router sends a weak signal, and a weak signal means a slow stream. The third cause is a busy phone. A phone rendering a game, recording the screen, and mirroring at the same time is doing three heavy jobs at once, and one of them will suffer. Fix the cause that matches your room, and the lag usually goes with it.
A quick command can show display settings on a phone with debugging enabled, and the output helps you confirm screen settings before a mirror session. Connect the phone and run the command below once to view display and cast related values. The snippet is read-only: it alters no display setting while it reports screen and Wi-Fi values, and you can run it again after a network change to confirm Wi-Fi state.
adb shell dumpsys display
adb shell settings get global wifi_on
A Five-Minute Lag Checklist
- Move the phone and the TV closer to the router, or move the router closer to the TV.
- Switch the phone and the TV to the 5 GHz band when the router offers it, because that band is usually less crowded.
- Connect the TV to the router with an Ethernet cable when the TV sits near the router.
- Close background apps on the phone, especially games and screen recorders.
- Restart the cast, and restart the router only when the first four steps change nothing.
Work through the list in order and test the mirror after each step. Most lag problems end at step one or two, and the list saves you from restarting the router for a problem that was really a background app. Keep a note of the step that fixed it, because the same cause tends to return in the same room.
Moving the router vs moving the TV
Moving the router is usually easier than moving the TV, because the router is small and the TV is not. A router moved one metre higher and out from behind the TV cabinet often gains a stronger signal across the whole room. Moving the TV is the last resort, and it is only worth it when the TV sits in a dead spot the router cannot reach.
Why closing background apps helps
A mirror stream is a video encoder running in real time, and an encoder needs processor power and memory. A game running in the background takes both, and a screen recorder takes both as well. Closing them hands the encoder the resources it needs, and the stream sharpens within seconds. It is the cheapest fix in this guide, and it works more often than people expect.
Sound, Privacy, and Battery During a Mirror Session
Sound usually routes to the TV during a mirror session, yet some apps keep sound on the phone. Open media output settings during the cast to confirm the TV as the output device, because a quick output check prevents silent video on the TV. Adjust TV volume rather than phone volume when sound routes to the TV, because phone volume may control only the phone speaker in some casting setups. A TV remote gives finer control over the larger speakers, and it is easier to find in the dark than the phone volume buttons.
Disconnect Bluetooth headphones before a mirror session when you want TV sound. A connected headphone can steal audio output from the TV, and the room will watch a silent film while you hear it perfectly. A clean audio path avoids confusion during a shared viewing. Readers who want shared audio on the go will also like how to split audio to two Bluetooth headphones because mirroring and dual audio both share media with others. A TV mirror shares video with a room and dual audio shares sound with a partner, and both features turn solo media into shared media.
Privacy matters as much as sound, because the TV shows whatever the phone screen shows, including notifications. Turn on Do Not Disturb during a mirror session to hide message previews, because a message preview on a mirrored screen can expose private content to the whole room. Close the mirrored app after disconnecting when it contains private content, because a closed app prevents a later accidental cast from showing sensitive material. A clean close is a simple privacy habit for shared TVs.
Battery is the third thing to watch. Mirroring plus video playback drains battery fast, and a long film can empty a phone that started at half charge. Keep a charger nearby for films and presentations that last over an hour, and use an adapter with power pass-through for wired sessions. A charger near the couch is a small habit that prevents a dead phone mid-film, and a dead phone mid-film is a mood killer nobody needs.
Getting Sound Onto the TV Speakers
Open the media output panel during the cast by tapping the output icon in the volume panel or in Quick Settings. The panel lists every available output: the phone speaker, any connected Bluetooth device, and the TV. Tap the TV name and the sound should move within a second. If the TV name is missing, the cast may be sending video only, and restarting the cast usually brings the audio with it.
Some apps route sound on their own rules, and a video app that keeps sound on the phone is usually following a setting inside the app. Check the app audio settings for a cast or output option, and set it to the TV. The system output panel is the first place to look, and the app settings are the second. Between the two, almost every sound problem has an answer.
Keeping Private Notifications Off the Big Screen
Do Not Disturb is the single most useful setting for a shared mirror session. Turn it on before you start the cast, and set it to hide notifications from the screen rather than only silencing them. A silenced notification can still appear as a banner, and a banner on a TV is visible to the whole room. A hidden notification stays hidden, and the session stays focused on the photos or the film.
The habit takes five seconds and it protects more than your messages. It hides calendar reminders, banking alerts, and work emails too, and it keeps the session calm. Turn it off when the session ends so you do not miss anything afterwards. A mirror session with Do Not Disturb on is a private session in a public room, and that is exactly the combination you want.
When headphones steal the audio
A Bluetooth headphone that connects automatically when you sit down can steal the audio before the cast even starts. The phone remembers the headphone and routes sound to it out of habit. Disconnect the headphone from Bluetooth settings before the session, or turn Bluetooth off if you do not need it. The TV speakers will take over, and the room will hear what you hear.
Do Not Disturb setup in 20 seconds
Open Quick Settings, long-press the Do Not Disturb tile, and set it to hide notifications from the screen. The tile turns on with one tap afterwards, and it turns off with one tap when the session ends. Set it once and the habit becomes a single tap before every mirror session. Twenty seconds of setup buys you privacy for every session that follows.
Mirroring for Photos, Games, and Work
The same three methods serve very different evenings, and the details change with the content. A photo night needs a slideshow and a quiet room. A game night needs low lag and a controller. A work presentation needs a backup file and a rehearsal in the actual room. This section covers the three evenings that most people mirror for, with the small habits that make each one work.
Mirror Photos for Family Sharing
Family photo sharing works best on a large TV where everyone can see details. A mirrored phone shows photos in full size without passing the phone around, and that keeps the group together during a story. Use a slideshow app on the phone during a mirrored photo session, because a slideshow advances photos automatically and lets the storyteller talk without tapping. That flow feels more like a presentation than a manual browse.
Turn on Do Not Disturb during a family photo session to hide message previews, because a message preview on a mirrored screen can expose private content to the whole room. A quiet session keeps the focus on photos, and the storyteller keeps the room attention. Keep the phone charged during a long photo session, and keep a charger near the couch so the story does not end with a dead battery.
Mirror Games With Low Latency
Games need low latency mirroring to feel responsive on a TV. A wired HDMI adapter gives the lowest latency for fast games, and a wireless cast can lag enough to ruin timing in an action game. Close background apps before a mirrored gaming session to free processor power, because a phone that renders a game and a mirror stream needs all available resources. A lean background improves frame rate and responsiveness in one move.
Use a controller connected to the phone for mirrored gaming when the game supports it. A controller gives precise input that touch mirroring cannot match, and that setup turns a phone game into a console style experience on the living room TV. A trackpad phone can also help here, as described in how to turn a smartphone into a wireless trackpad, because a second phone can act as a controller surface while the first phone mirrors the game.
Mirror for Work Presentations
Work presentations benefit from mirroring because slides fill a meeting room screen without a laptop. A mirrored phone can present a deck without a computer, and that portability helps when a meeting room lacks one. Test the mirror connection in the meeting room before the audience arrives, because a room test reveals network restrictions that block casting. An early test gives time to switch to a wired adapter, and a wired adapter is the fallback that never needs the room network.
Keep a PDF copy of the deck on the phone as a backup for mirroring failures. A PDF can open quickly when a presentation app fails to cast, and a backup file prevents a failed cast from stopping the meeting. A trackpad phone can advance mirrored slides from anywhere in the room, as described in how to turn a smartphone into a wireless trackpad, and that freedom lets the presenter move around instead of standing beside the phone. Rehearse the whole flow once in the room, including the backup PDF, and the meeting will run without surprises.
Rehearsing in the actual room
A rehearsal in the actual room catches the problems a rehearsal at your desk cannot. The room network may block casting, the TV may sit on a different input, and the lighting may wash out the slides. Ten minutes in the room before the meeting finds all three, and each one has a fix you can apply while the room is still empty. A rehearsal is the cheapest insurance a presenter can buy.
Keeping a backup deck ready
A backup deck is a PDF on the phone and a copy on a USB stick in your bag. The PDF opens in any viewer and mirrors like any other app, so a failed presentation app costs you thirty seconds, not the meeting. The USB stick covers the case where the phone itself fails. Two backups sound like overkill until the day one of them saves a meeting.
Questions Readers Ask About Mirroring Android to a TV
Can I mirror without Wi-Fi?
A wired HDMI adapter mirrors without Wi-Fi, and a Miracast connection can work through a direct wireless link with no router involved. Built-in casting usually needs a shared Wi-Fi network, because the phone and the TV find each other through the router. Choose a wired adapter when no Wi-Fi exists, and choose Miracast when you have no cable and no router. Both methods work in a hotel room, a classroom, or a house with a dead router.
Why does mirrored video look blurry?
Blur often comes from a weak Wi-Fi signal or a low mirror resolution. Move closer to the router and close background apps to improve quality, and switch the router to the 5 GHz band when it offers one. A wired connection gives the sharpest result for fast video, because the picture never crosses the air. If the picture stays blurry on a strong network, check the TV picture settings, because some TVs apply heavy smoothing to a mirrored input that softens the image.
Can I use the phone while mirroring?
Yes. The TV shows whatever the phone screen shows, including other apps you open, and that behaviour means private messages can appear on the TV when you switch apps. Stay in the mirrored app during a shared session, and turn on Do Not Disturb before you start. Some phones offer a separate desktop mode over a cable that lets the TV show one thing while the phone shows another, but standard mirroring shows the same screen on both.
Does mirroring drain the battery fast?
Yes, mirroring drains battery fast, because the phone renders the screen, encodes a video stream, and sends it over Wi-Fi all at once. A long film can use a large share of a full charge, and a phone that starts at half charge may not finish a two-hour film. Keep a charger nearby for long sessions, and use an adapter with power pass-through for wired sessions so the phone charges while it mirrors. Lowering the screen brightness also helps, because the screen is a major part of the drain.
Why does the sound stay on the phone instead of the TV?
Sound stays on the phone when the audio output is still set to the phone speaker or to a connected Bluetooth device. Open the media output panel during the cast and tap the TV name to move the sound. A connected headphone is the most common cause, because the phone routes sound to it out of habit. Disconnect the headphone before the session, and check the media output panel the moment the cast starts. A two-second check at the start saves a silent film.
Wrapping Up: Your First Cast Tonight
Mirroring an Android screen to any TV becomes simple once you know the TV method and the network requirements. Built-in casting and Miracast and wired adapters together cover almost every TV, and the table in this guide tells you which one fits your evening. Lag fixes and sound checks and clean disconnects make the experience reliable, and a short rehearsal makes it routine. The 5 GHz band is the single easiest upgrade for a wireless session, and the cable is the single easiest upgrade for a game night.
Your concrete next step is to open Quick Settings today and tap the cast tile to see your TV name. Start a short photo mirror session to test the method, turn on Do Not Disturb before you begin, and stop the cast cleanly from the same tile when you finish. Readers who want hands-free control will benefit from how to auto answer handsfree calls with headphones as a companion skill, and a second phone as a trackpad can carry the next session even further. One test tonight, and the big screen is yours whenever you want it.

