

The Secret Hack to Clean Dirty USB-C Ports Without Damage
A USB-C port can stop charging well long before the cable fails. Lint from a pocket packs into the port a little at a time, dust joins it, and the two form a firm layer at the back. That layer stops the plug from seating fully, so the phone charges only when the cable sits at an angle, or not at all. I first met this fault on a phone that had worked perfectly for a year and then started dropping its charge overnight, and the fix took ten minutes once I knew what to look for.
The secret is not a clever chemical or an expensive tool. It is patience, bright light, and a soft pick that is weaker than the metal inside the port. A wooden toothpick with a blunted tip can lift lint without scratching contacts, while a metal pin can bend a contact or short the port in a second. The difference between a clean port and a broken one is the tool you choose and the pressure you use, and this guide walks through both in order.
Who this is for: anyone whose cable feels loose, whose phone charges only at an angle, whose fast charging has stopped working, or whose plug no longer clicks into place. If your phone charges fine and the plug seats firmly, leave the port alone. Cleaning a clean port is the fastest way to damage a good one.
Why USB-C Ports Collect Lint, Dust and Grit in Your Pocket
A USB-C port is an open slot, and it spends most of its life face-down in a pocket or a bag. Every time the phone goes into a pocket, a few fibres from the lining brush against the opening, and some of them catch on the small tongue inside the port. Over weeks those fibres build into a grey mat, and dust and grit stick to it. The mat is soft at first, then it gets pressed flat by every cable insertion until it feels almost solid. By that point the plug cannot reach its full depth, the locking tabs cannot engage, and the cable wobbles.
Heat and humidity make the problem worse. A phone that lives in a warm pocket collects sweat and skin oils along with lint, and the mix sticks harder than dry dust alone. A phone used at a beach or a building site collects fine grit that is harder than the lint around it, and that grit can scratch if it is dragged across a contact. None of this means the port is broken. It means the port needs a careful clean, the way a camera lens needs a careful wipe, not a scrub.
The tongue inside a USB-C port carries the contacts on one side, and the shell around it is thin metal. Both can be damaged by a hard tool, but both survive a soft tool used gently. That is the whole logic of this guide: use the softest tool that can still lift lint, use the lightest pressure that still moves it, and stop the moment the plug seats properly again.
How to tell lint apart from a worn cable or a loose port
Try a second cable that you know is good, and try the same cable in a second device. If the cable works elsewhere and the phone still wobbles with a good cable, the port is the likely fault. Look inside with a bright light: a grey or brown mat at the back of the port points to lint, while a tongue that looks bent or a contact that looks dark and pitted points to damage. A loose cable fault can look exactly like a dirty port, so the guide to fixing loose charging cables falling out of a phone helps you tell the two faults apart before you start cleaning.
Signs that point to lint rather than damage
The plug used to click firmly and now sits shallow, the phone charges when you push the cable in and hold it, and the problem grew slowly over months rather than starting after a drop. Those three signs together point to a lint mat, and a gentle clean is the right next step.
Signs that point to damage rather than dirt
The port stopped working suddenly after a drop or a tug on the cable, the tongue inside looks bent to one side, or the phone shows no charging sign at all with any cable. Those signs point to a bent tongue or a broken solder joint, and cleaning will not fix them. Skip to the repair section instead of digging harder.
Safe Tools for Cleaning a USB-C Port: Wooden Pick, Antistatic Brush and Compressed Air
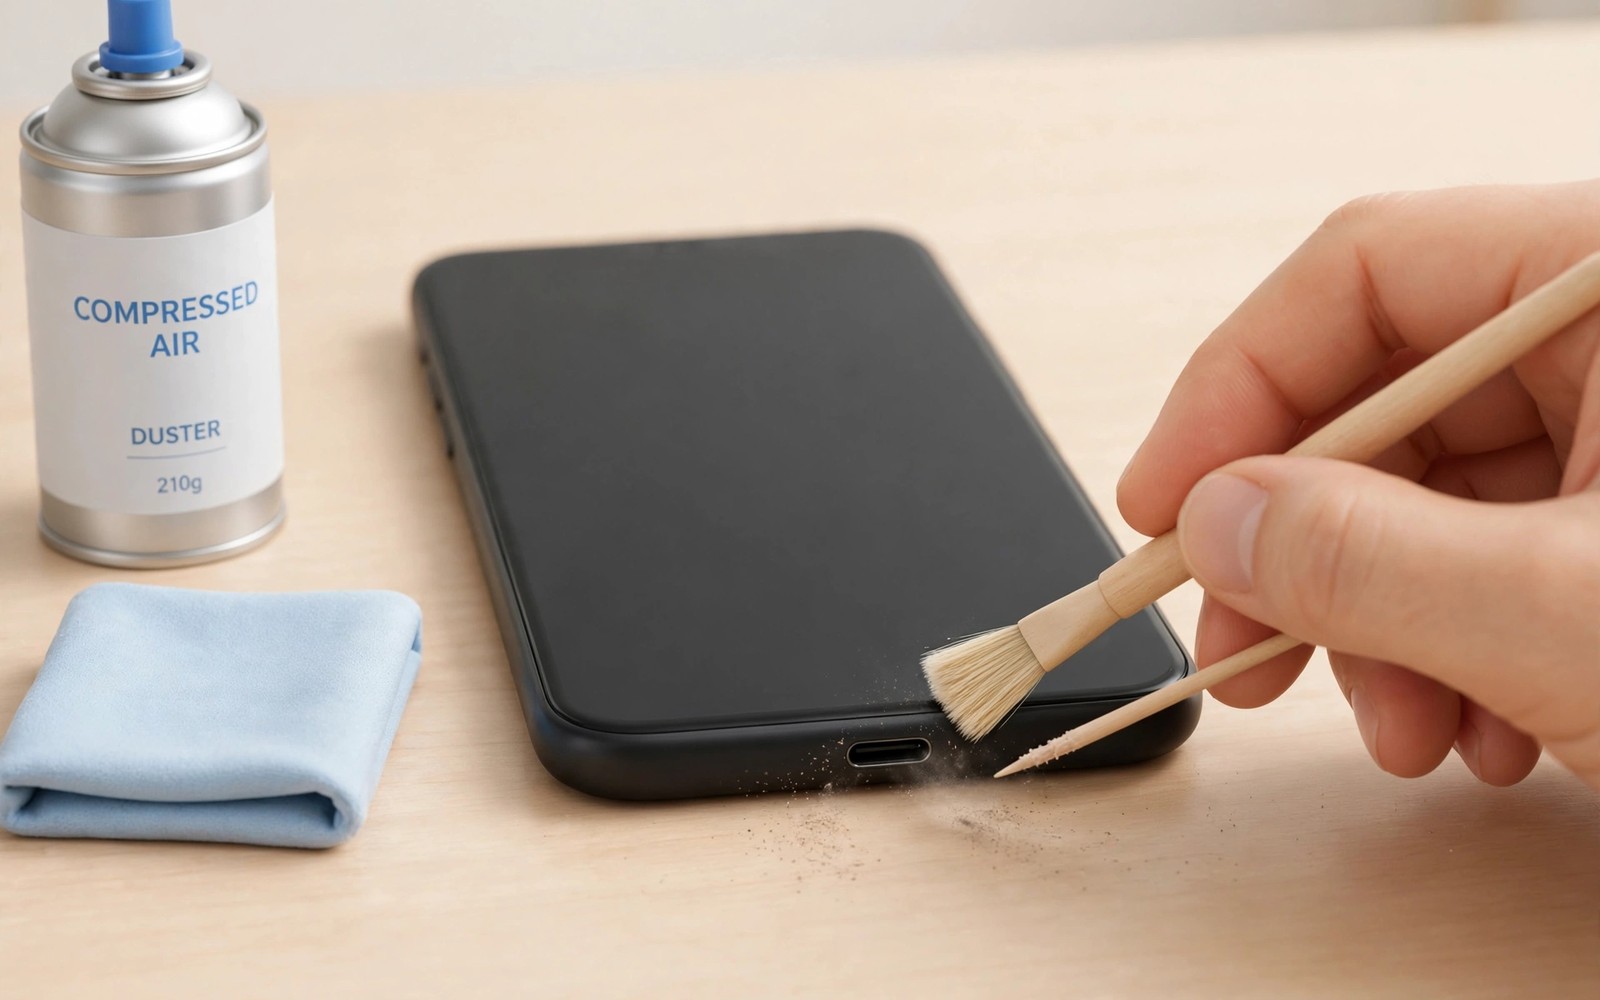
Gather the tools before you start, and put everything else away. You need a wooden toothpick or a soft plastic pick, a small antistatic brush or a clean soft toothbrush, a bright torch or a second phone, and, if you want it, a can of compressed air. That is the whole kit, and it costs almost nothing. The most important tool is the light, because you cannot clean what you cannot see, and most damage happens when people poke blindly into a dark port.
Prepare the wooden pick by breaking off the sharp tip so the end is blunt and flat. A sharp point can dig between contacts, while a blunt end slides under lint and lifts it. If you use a plastic pick, choose one made for electronics or a plastic dental pick, and check that the tip is smooth rather than jagged. A soft antistatic brush is for loose dust on the surface, not for packed lint, so keep it for the start and the finish of the job.
Compressed air is optional, and it is the tool most people misuse. A short gentle puff from a safe distance can lift loose dust out of the port. A long hard blast can push dust deeper, and a can held at an angle can spray cold liquid into the port. Hold the can upright, keep the nozzle at least ten centimetres away, and use one short puff at a time. If any liquid appears, stop at once and let the port dry fully before you test it.
Wooden toothpick with a blunted tip: the main cleaning tool
The wooden pick is the workhorse of this method. Wood is softer than the metal contacts and the metal shell, so a gentle wooden pick cannot easily scratch them, and it is firm enough to lift a packed lint mat in small pieces. Blunt the tip before you start, and replace the pick if it splinters, because a splinter inside the port is a new problem.
Antistatic brush and soft toothbrush: for loose dust only
A small antistatic brush sweeps loose dust out of the opening without pushing it deeper, and a clean dry soft toothbrush does the same job if you do not have a brush made for electronics. Use short strokes outward, away from the port, and never press the bristles hard into the tongue. The brush cannot remove packed lint, so do not keep brushing when the lint does not move. Switch to the pick for the packed layer.
Compressed air: one short puff, can upright, from a distance
Use compressed air only for loose dust at the start, and only in short puffs with the can upright and well away from the port. Test the can away from the phone first so you know what a short puff feels like. Never shake the can, never hold it upside down, and never use a workshop air line, which can deliver far more pressure than a phone port can take.
Tool checklist before you start cleaning
Blunted wooden pick, soft brush, bright torch, second phone for photos if you have one, and a known good cable for testing afterwards. Put the SIM ejector tool, the sewing needle, and any metal pin in another room, because the easiest way to avoid using them is to make them hard to reach.
What a good cleaning kit costs and where to find it
A pack of wooden toothpicks costs almost nothing, a plastic electronics pick set costs a few dollars, and a small antistatic brush costs about the same. You do not need a branded kit. A kitchen toothpick, a torch, and patience are enough for most ports, and the rest of the kit is there to make the job easier rather than to make it possible.
Step-by-Step: How to Clean a Dirty USB-C Port Safely in Ten Minutes
Follow these steps in order, and pause after each one to look inside the port. The job is a cycle of look, lift a little, look again, and test, not a single deep dig. Ten unhurried minutes beat two rushed minutes, because a rushed clean is how contacts get bent.
Step 1: Power the phone off and work in bright light
Turn the phone fully off before you touch the port. A powered-off phone removes the risk of a short while you work, and it stops the phone from trying to charge while a tool is inside. Sit in a bright room or under a desk lamp, and shine a torch directly into the port. Take a photo with a second phone if you can, so you have a before picture to compare with later. A photo also helps a repair shop if cleaning does not fix the problem and you need to show what the port looked like.
Step 2: Brush loose dust out with the antistatic brush
Hold the phone with the port facing down so dust falls out rather than deeper in. Sweep the antistatic brush across the opening in short outward strokes, three or four times, and look again. This step removes the loose layer and shows you how much packed lint sits underneath. If the plug already seats better after this step, the problem was loose dust and you may be done. Test it before you go further.
Step 3: Lift packed lint with the blunted wooden pick
Slide the blunted wooden pick along the bottom edge of the port, flat and gentle, and lift toward the opening. Pull small pieces of lint out one at a time, working from one side to the other in slow moves. Check the port with light after every few moves. Keep the pick flat, keep the pressure light, and never scrape the side walls hard, because the contacts sit on the tongue and bend easily. If a piece resists, stop and try a slightly different angle instead of forcing it. Forcing a stuck piece is how a contact breaks.
Step 4: Use one short puff of compressed air, if you use it at all
Hold the can upright at least ten centimetres from the port and give one short puff to clear dust the pick loosened. Look inside again. If dust remains, use the pick, not more air, because repeated blasts push dust deeper rather than out. Stop at once if any liquid sprays from the can, and let the port dry fully before you test the phone.
Step 5: Test charging with a known good cable
Insert a cable you know is good, and feel for the click as the plug seats. The plug should sit flush with the phone edge and stay put when you wiggle it gently. Power the phone on and check that charging starts at once and that fast charging appears if your phone supports it. If the plug seats fully and charging is steady, the job is done. If it still sits shallow, repeat steps 3 and 5 once more, and no more than that, before you consider the next section.
Step 6: Repeat once, then stop and reassess
One careful repeat of the pick and test cycle is reasonable. A third or fourth round is not, because each pass adds risk and the lint that has not moved after two gentle passes is either stuck hard or is not lint at all. Stop, look at the port with light, compare with your before photo, and decide whether the problem is a stubborn mat that a repair shop can remove with proper tools, or damage that needs a repair rather than a clean.
What Never to Put Inside a USB-C Port: Metal Pins, Water, Glue and Sharp Tools
The fastest way to turn a dirty port into a broken port is to use the wrong tool. A metal needle, a SIM ejector tool, a paperclip, or a knife blade can bend a contact, scratch through the thin plating, or short two contacts together while the phone is on. A bent contact may still work for a while and then fail, which makes the damage harder to trace. A short can damage the charging circuit, which is a far more expensive repair than a port clean. Put every metal tool away before you start, and do not improvise with one because the wooden pick is in another room.
Water and liquids are just as harmful. Pouring water, alcohol, or cleaning spray into the port can trap grit against the contacts, wash lint deeper, and leave corrosion behind as it dries. A damp cotton bud sheds fibres that add to the lint you are trying to remove. Compressed air from a can is the only spray that belongs near a port, and even that needs the upright, distant, short-puff discipline from the steps above. If the port has had liquid in it, let it dry fully in air for hours before you charge the phone, and do not use heat from a hair dryer.
Glue, tape, and sticky putty are also a bad idea. Sticky substances can leave residue on contacts that blocks charging, and a blob of glue that sets inside the port is a repair-shop job to remove. The same goes for vacuum cleaners held against the port, which can pull the tongue sideways. The safe rule is simple: if a tool is harder than wood, wetter than air, or stickier than a brush, keep it out of the port.
Why a metal SIM ejector tool is the most common cause of port damage
The SIM ejector tool is small, metal, and always nearby, which is why people reach for it. It is also thin enough to slip between contacts and strong enough to bend them with very little force. A single careless push can lift a contact off the tongue, and the port may then charge only when the cable presses the contact back down. That fault looks like a loose cable, and it tempts people to push harder, which makes it worse.
Why water, alcohol and cleaning sprays make lint worse
Liquid turns dry lint into a paste that sticks harder to the port walls, and it carries fine grit onto the contacts where it can scratch during the next cable insertion. Alcohol dries fast, but it can also carry dissolved grime onto the contacts and leave it there. Dry cleaning with a wooden pick and a brush avoids all of this, which is why the dry method is the one repair shops teach first.
How to protect the port after you clean it
Keep the phone out of loose pockets when you can, use a case with a port cover if you work in dusty places, and check the port with a torch once a month. A quick brush once a month stops the lint mat from forming, and a monthly check takes less than a minute. Cable care helps too: a cable with a frayed plug sheds fibres into the port, so the guide on how spring protectors extend cable lifespan shows a cheap way to keep the plug end tidy, and that tidiness protects the port as well as the cable.
When a port cover is worth using and when it is not
A silicone port plug is worth using on a phone that lives in a dusty workshop, a building site, or a beach bag. It is less useful on a phone that charges several times a day, because the plug itself gets lost or becomes a chore. If you use one, buy a pack of several, and keep a spare in the case.
How to Check Your Clean Worked: Plug Fit, Charging Speed and Fast Charging
A clean port passes three checks. First, the plug seats fully and clicks, with almost no gap between the plug housing and the phone edge. Second, the cable stays put when you wiggle it gently from side to side, without the charging icon flickering. Third, the phone charges at its normal speed, and fast charging appears if your phone and charger support it. Test all three, because a port can pass the first check and fail the second if a little lint remains on one side.
Watch the charging speed for ten minutes. A phone that charges from 20 percent to 30 percent in roughly the time it used to is back to normal. A phone that crawls or that stops and starts is telling you that lint remains, or that the cable or charger is the fault. Try a second known good cable and a second charger before you blame the port again, because a cable that looks fine can still have a broken wire inside. Keeping the cable healthy matters as much as keeping the port clean, and a magnetic cable can reduce wear on the port itself: read the magnetic cable trick that protects charging ports to see how a magnetic tip stays in the port while the cable part detaches, so the port is plugged and unplugged far less often.
Plug fit test: flush, firm and no wobble
Insert the cable slowly and feel for the click. Look at the plug from the side: a clean port lets the plug sit flush, while a dirty one leaves a visible gap. Wiggle the plug gently. A little movement is normal, but a plug that rocks freely or falls out under its own weight is not fixed yet.
Charging speed test: ten minutes with a known good charger
Note the battery percentage, plug in with a known good charger, and check again after ten minutes. Compare with the speed you remember from when the phone was new. A small difference can come from the phone being warm or busy, so test with the screen off and no heavy apps running.
What to do if charging works but fast charging does not
Fast charging needs all the data pins as well as the power pins, so a port that is partly clean can charge slowly while fast charging stays off. Repeat the pick step gently on the side where the contacts sit, test again, and if fast charging still does not return, try a different charger and cable before you decide the port is at fault.
When Cleaning Will Not Fix It: Loose Tongue, Bent Contacts and Repair Time
Some ports are beyond a home clean. A tongue that is bent to one side, a contact that is visibly dark or pitted, a port that feels loose in the frame, or a phone that shows no charging sign with any cable all point to hardware damage. Cleaning cannot straighten a bent tongue, and digging at it will snap it. A repair shop can replace a USB-C port on most phones for a modest fee, and the job usually takes under an hour once the part is in hand. Ask for a quote before you agree, and ask whether the price includes a test of fast charging afterwards.
Water damage is another repair-shop job. If the phone was dropped in water and the port then stopped charging, corrosion may have started on the contacts or on the board behind the port. Drying the phone in air helps, but corrosion keeps growing once it starts, and a shop can clean the board properly and test it. Do not keep trying to charge a phone that was recently wet, because charging through a wet port can damage the charging circuit.
Use the troubleshooting table below to decide your next step. It lists the symptom, the likely cause, and what to do, so you can stop guessing and act on the pattern you actually see.
| Symptom | Likely cause | What to do next |
|---|---|---|
| Plug sits shallow, charges at an angle | Packed lint at the back of the port | Clean with the blunted wooden pick, then test |
| Plug wobbles but charging is steady | Small lint layer or worn cable plug | Clean the port, then try a second known good cable |
| Charges slowly, fast charging missing | Partly blocked contacts or weak charger | Clean gently, then test with a second charger and cable |
| No charging with any cable | Bent tongue, broken joint, or board fault | Stop cleaning and visit a repair shop |
| Port looks bent or a contact looks dark | Physical damage or corrosion | Do not clean further, get a repair quote |
| Phone was wet, then stopped charging | Water damage and corrosion | Let it dry fully in air, do not charge, visit a shop |
How to choose a repair shop for a USB-C port
Choose a shop that quotes the port replacement before opening the phone, that tests fast charging after the repair, and that offers a short warranty on the work. Ask whether they use a proper replacement part or a salvaged one, and how long the job takes. A shop that will not quote a price or test the repair afterwards is a shop to avoid.
What a port replacement usually costs and how long it takes
On many common phones the part is cheap and the labour is the main cost, so the total often falls in the range of a modest repair rather than a major one. The job usually takes well under an hour once the part is available, though some phones need the screen removed to reach the port, which adds time. Get the quote in writing before you leave the phone with the shop.
Frequently Asked Questions About Cleaning a USB-C Port Without Damage
Can I use a metal pin or a needle to clean my USB-C port?
No. A metal pin can bend a contact, scratch the plating, or short the port, and the damage can appear days later as intermittent charging. Use a blunted wooden toothpick or a soft plastic pick instead. Wood is softer than the contacts, so it lifts lint without the risk that metal carries, and a blunt tip is far safer than a sharp one.
Is compressed air safe for a USB-C port?
It is safe when used correctly: one short puff, can upright, nozzle at least ten centimetres away, and only for loose dust. It is not safe as a long blast, with the can upside down, or from a workshop air line, because that can push dust deeper, spray liquid, or deliver too much pressure. If you are unsure, skip the air entirely and use the wooden pick and brush, which are the main tools anyway.
How often should I clean my USB-C port?
Check it with a torch once a month and clean it only when you see lint or when the plug starts to sit shallow. Most people need a proper clean every few months if the phone lives in a pocket, and less often if it lives in a bag or on a desk. A monthly brush takes less than a minute and stops the lint mat from forming, which is far easier than removing a packed mat later.
Will cleaning the port fix a cable that keeps falling out?
It fixes the fault when lint is the cause, which is the most common cause of a plug that will not stay seated. If the port is clean and the cable still falls out, the cable plug itself may be worn, or the port may be loose in the frame. Try a second cable first, and if the problem follows the phone rather than the cable, take it to a repair shop for a port check.
Your Next Step: Check the Port Tonight and Clean It Only If You See Lint
Shine a torch into the port tonight and look for the grey mat at the back. If you see it, power the phone off, blunt a wooden toothpick, and lift the lint out in small gentle moves, testing the plug fit after each pass. If you see a bent tongue or a dark contact instead, close the torch, put the pick away, and book a repair. A clean port should click, hold, and charge at full speed, and the whole job takes ten minutes when you let the soft tool do the work.

