

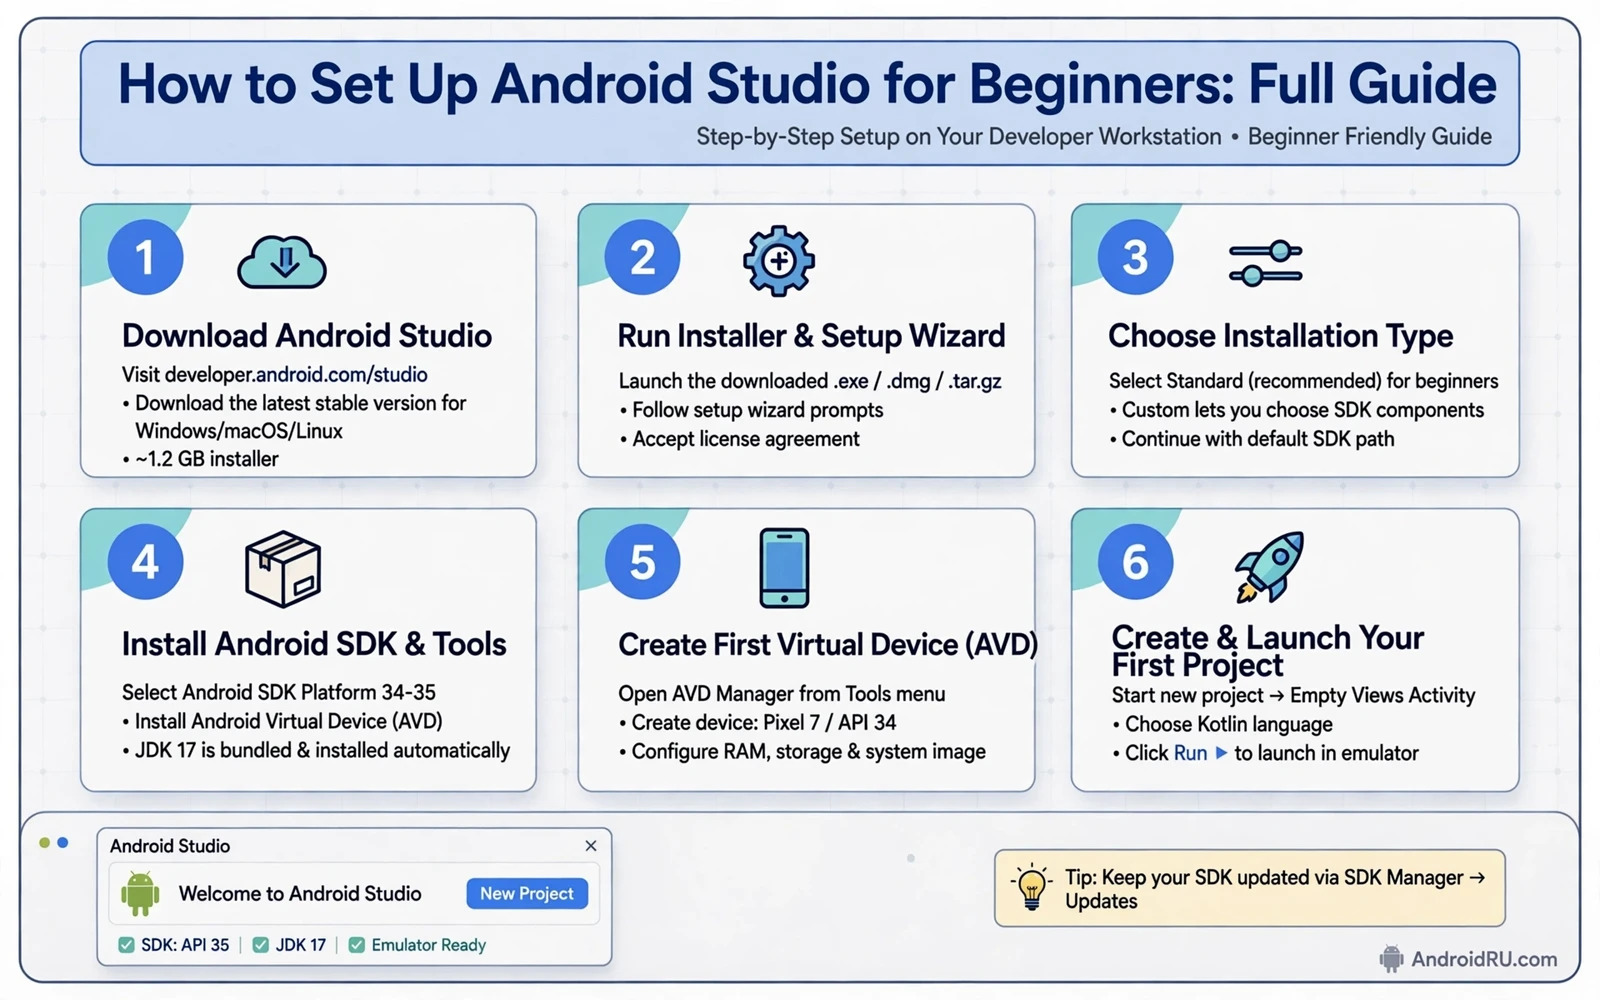
Start With a Clear Picture of Android Studio
Android Studio is the official integrated development environment for Android development. It brings a code editor and a layout editor and a build system and a device emulator into one workspace. A beginner does not need to learn every panel on the first day. A beginner needs a working install and a simple project and a clear way to run that project.
The setup process has three main parts. The first part is the installation of Android Studio itself. The second part is the configuration of the Android SDK and the platform tools. The third part is the creation and the first run of a small test project. Each part depends on the part before it. A rushed install can hide a missing SDK component until the first build fails.
Before you start you should check the basics of your computer. You need enough free disk space for the IDE and the SDK and at least one system image. You need a stable internet connection for the first download of SDK packages. You also need permission to install software on the machine you use. A work computer with a locked installer policy may block the setup even when the download succeeds.
Install Android Studio Step by Step
Download Android Studio only from its official distribution channel. Verify that the installer matches your operating system and your processor type. Run the installer with the default options unless you have a clear reason to change a path. The default options place the IDE and the SDK in locations that later guides and tools expect to find.
During installation the setup wizard asks about SDK components and about virtual device support. Accept the recommended SDK platform for a current Android version. Accept the Android SDK Build Tools and the Android Emulator if they are offered. These components are needed for a normal build and for a normal emulator run. Skipping them at this stage only creates extra work later.
After the first launch Android Studio may download additional SDK packages. Let that download finish before you create a project. A project created during a partial SDK download can report missing platform errors that look more serious than they are. When the wizard reports that setup is complete you have a clean base to build on.
Understand the SDK and the Tools Inside the IDE
The Android SDK is a collection of platforms and tools and libraries. A platform matches one Android API level. Build tools turn source code and resources into an installable package. Platform tools include the bridge that talks to a connected device or an emulator. The SDK Manager inside Android Studio lets you add or remove each piece without touching system folders by hand.
The Android API level is a number that identifies one Android platform version. A project declares a minimum API level and a target API level. The minimum level sets the oldest devices that can run the app. The target level sets the platform behaviour that the app is tested against. Beginners should keep the defaults from a new project template until they understand the trade-offs of changing these values.
Gradle is the build system that Android Studio uses for Android projects. It reads build files and resolves dependencies and runs build tasks in a defined order. A beginner does not need to edit Gradle files by hand for a first project. A beginner should know that a build failure often points to a Gradle task or a dependency problem rather than to a single line of app code.
Create Your First Project Without Guessing
Choose the New Project wizard and pick a simple template such as an empty activity. Give the project a clear name and a package name that uses only lowercase letters and dots. Choose Kotlin as the language for a modern first project. Choose a minimum API level that matches the devices you plan to test on and keep the default build settings for now.
The first project contains a small set of files that each have one job. The main activity file holds the code that runs when the app screen opens. The layout file describes the visible elements on that screen. The manifest file declares the app components and the permissions that the app may request. The build file declares the dependencies that the project needs. Reading these files in that order gives a beginner a useful mental map of an Android project.
Do not add libraries or plugins to a first project before the basic project runs. Extra dependencies add extra failure points and extra download time. A clean first run proves that the IDE and the SDK and the emulator all work together. Later changes can then be judged against that known working state.
Run the Project on an Emulator
The Device Manager lets you create a virtual device with a chosen phone profile and a chosen system image. Pick a common phone profile and a system image that matches your target API level. A system image with Google APIs is a good default for a general test. The first emulator boot is slower than later boots because the virtual device must complete its first setup.
Press the run button and watch the build output at the bottom of the IDE. A successful build installs the app on the emulator and opens it on the virtual screen. If the build fails then read the first error message in full before you change anything. The first error is usually the root cause and later errors are often side effects of that same problem.
Test the app with simple actions such as tapping a button or rotating the virtual device. Rotation tests how the activity handles a configuration change. A basic app should survive rotation without losing its visible state in an obvious way. This simple check teaches a habit that matters for every real app that you build later.
Connect a Physical Device When You Are Ready
A physical device gives a truer picture of performance and touch behaviour than an emulator. Enable developer options on the device and turn on USB debugging for the connection. Connect the device with a data cable that supports data transfer and not only charging. Android Studio should list the device in the device selector once the computer is authorised on the device screen.
The device authorisation prompt is a security step and it deserves attention. Authorise only a computer that you own or trust. Revoke old authorisations from the developer options screen when you stop using a shared machine. A beginner who treats this prompt as a routine tap can grant debug access to a machine that should never have it.
Device testing also connects naturally to building a first Kotlin app because a real device reveals layout and performance issues that a virtual screen can hide. Keep the first device test simple and keep the same small project that already runs on the emulator. A change of device and a change of code at the same time makes a new failure harder to explain.
Fix the Most Common Beginner Setup Problems
A missing SDK platform is one of the most common first errors. The fix is to open the SDK Manager and install the platform that matches the project target. A second common error is a Java version mismatch. Android Studio ships with a bundled Java runtime and a beginner should use that bundled runtime for a first project rather than pointing the IDE at a random Java install.
An emulator that fails to start often points to a virtualisation setting or a lack of free disk space. Check that hardware virtualisation is enabled in the machine firmware settings when the emulator reports an acceleration problem. Check free disk space when a system image download stalls or when an emulator image cannot be created. Both checks are faster than reinstalling the whole IDE.
A Gradle sync failure often follows a network interruption or a changed dependency version. Try a sync again after the network is stable. Read the sync message for the name of the missing artifact before you edit any build file. Editing a build file to fix a network problem can turn a temporary failure into a lasting project problem.
Build a Safe Daily Workflow in Android Studio
Save your work often and use version control from the start even for a practice project. A version control system records each working state and lets you return to it after a bad experiment. A beginner who learns this habit early avoids the painful loss of a project that only existed in one folder on one machine.
Keep the project folder in a path without spaces or special characters when possible. Long paths and unusual characters can break build tools in ways that look unrelated to the path itself. Keep backups of a working project before a major change such as a target API change or a large dependency update. A backup turns a risky change into a reversible experiment.
When a project grows beyond a single screen then inspecting compiled code becomes a useful study method for understanding how a built package differs from source code. Study a package that you built yourself before you study any other package. Your own build gives you a known source to compare against the compiled result.
Know the Risks Before You Change System Settings
Developer options change how a device behaves and some options can weaken device security. USB debugging should stay off on a device that you carry every day unless you are actively testing. OEM unlocking is a separate and far more serious step that can erase a device and can void warranty terms on some models. A beginner setup does not require OEM unlocking at all.
Do not install SDK packages or IDE plugins from untrusted mirrors. A modified tool can inject code into every project that it builds. Keep the IDE updated through its official update channel and review plugin permissions before you install a new plugin. A small set of trusted plugins is safer than a large set of plugins that you never review.
Good tooling habits also support later learning such as choosing open source libraries for Android projects because a stable setup lets you judge a library by its behaviour rather than by setup noise. Add one library at a time and run the project after each addition. A project that breaks after one addition points clearly at that addition.
A Sensible First Week Plan
Spend the first day on installation and on the SDK and on a first emulator run. Spend the second day on small edits to the layout and to the activity code. Change one element at a time and run the project after each change. This rhythm builds confidence and it builds a clear link between a code change and a visible result.
Spend the rest of the first week on reading error messages and on simple debugging. Set a breakpoint and step through a small function. Inspect a variable value at a breakpoint instead of guessing what it holds. These skills matter more than memorising panel names because panels change while debugging habits stay useful across IDE versions.
End the first week with a small finished app that you can explain from start to finish. The app can be simple and the explanation should cover the activity and the layout and the manifest and the build result. A simple app that you fully understand is a stronger base than a complex app that you copied without understanding its parts.
- Install from the official channel
- Finish the SDK download before the first project
- Run the default template on an emulator first
- Add version control before major changes
- Keep USB debugging off when testing ends

