

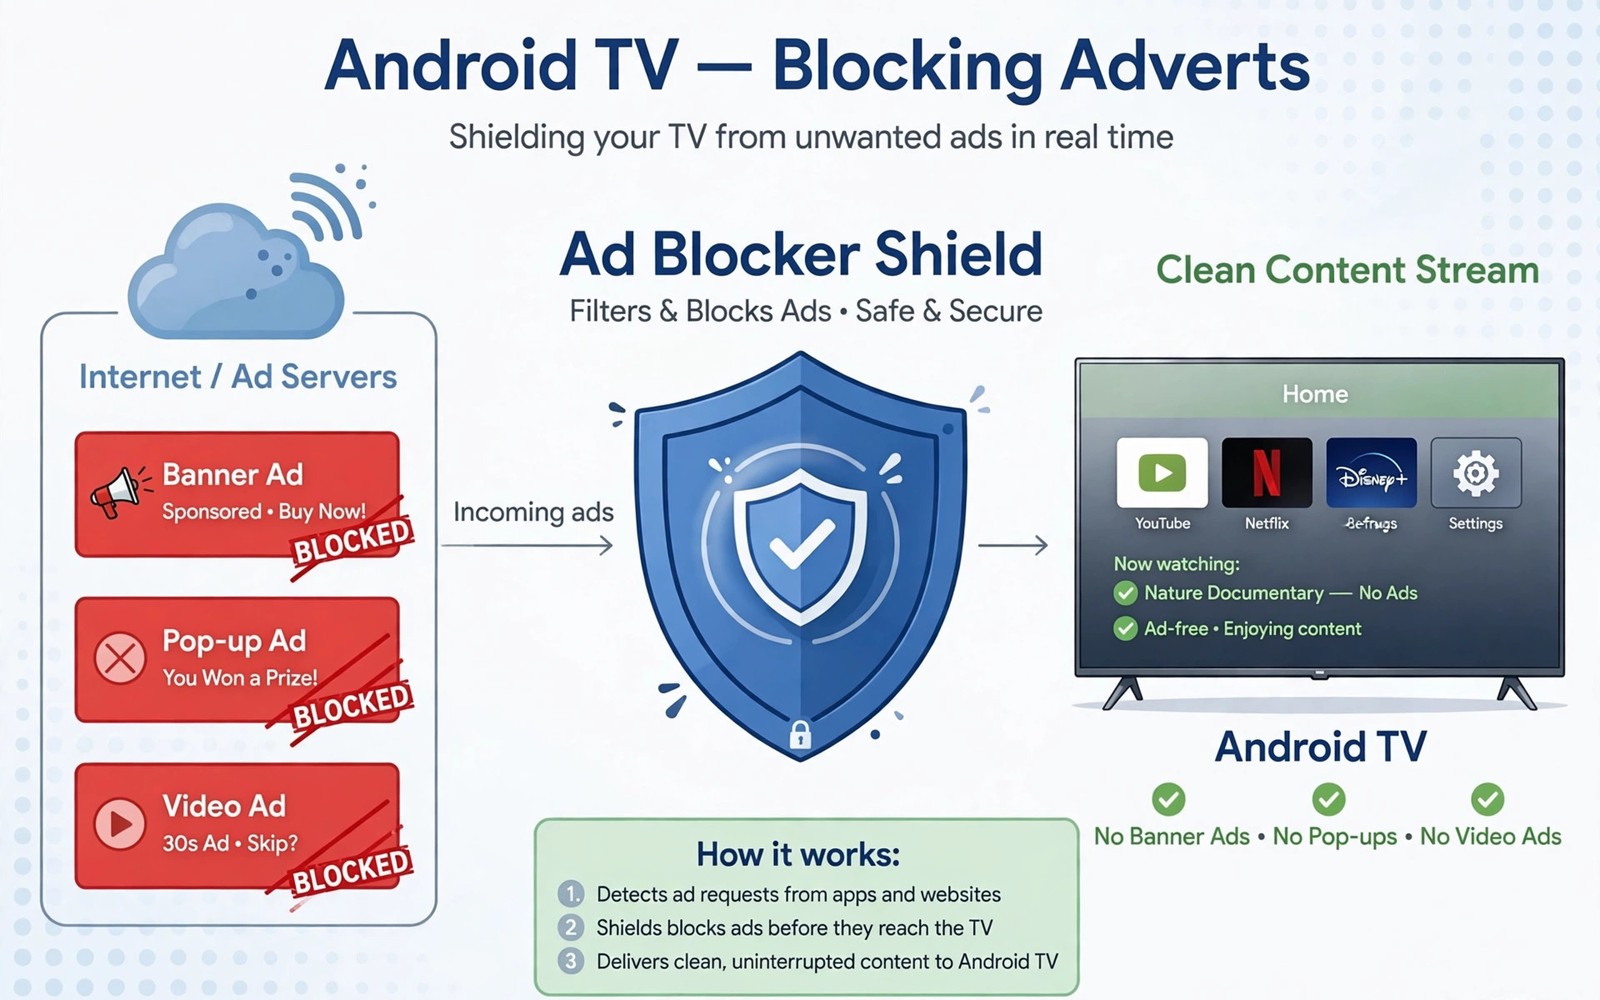
How to Block Annoying Ads Across Your Entire Android TV OS
Open your TV after a long day and the first thing you see is a sponsored row pushing a show you will never watch. Scroll down and another row does the same thing. Open a free app and a video ad plays before the content you actually wanted. I have lived with that home screen for years, on a Chromecast with Google TV and on a Sony set running the same system, and the difference between a tuned TV and a stock TV is bigger than most people expect. A tuned TV still shows the apps you love. It just stops shouting at you.
This guide walks through every layer that actually works: the built-in settings, private DNS filtering, whole-house blocking with Pi-hole and AdGuard Home, on-device tools like Blokada, a replacement launcher, and the honest limits of each method. You will get numbered steps with real menu names, real provider examples, and real tests you can run after each change. Nothing here asks you to sideload a cracked app or to break a service agreement. The aim is a calmer TV that still plays everything you pay for.
One warning up front, because it shapes every choice below: no method blocks every ad on a TV. Ads served from the same servers as the video itself, and ads baked into a paid streaming app, sit beyond the reach of DNS filtering. If a method promises a completely ad-free TV, it is selling a fantasy. What you can do is remove the sponsored rows, cut most network ads, and pay for an ad-free tier where that matters most to you.
Where Android TV ads come from and what you can really block
Ads on a TV arrive through three different doors, and each door needs a different key. The home screen shows sponsored rows and banner-style recommendations pushed by the launcher itself. Free apps show banner and video ads fetched from ad networks while you browse inside them. Some services play pre-roll video ads from their own servers before a film or episode starts. A DNS filter can shut the second door most of the way, a launcher change can shut the first, and only a paid tier reliably shuts the third.
Knowing which door an ad came through saves you hours of pointless tuning. If an ad appears on the home screen, DNS will not help much, because the launcher draws that row itself. If an ad appears inside a free app, DNS filtering is often the strongest tool you have. If an ad plays before a video in a service you pay for, check whether that service sells an ad-free tier, because no network trick will separate that ad from the video stream cleanly.
Sponsored rows on the home screen
The stock Google TV home screen mixes your apps with rows labelled as sponsored or recommended. Those rows are not fetched like a web banner. They are part of the launcher feed, so a DNS blocklist rarely removes them. The fix here is settings and launcher choice, not network filtering. Turn off personalised recommendations first, hide the rows you never open, and consider a launcher that shows only installed apps if the stock feed still annoys you.
Ads inside free apps and pre-roll video
Free apps earn their keep by requesting ad content from known ad domains each time you open a screen. A DNS filter answers those requests with a dead end, so the ad slot stays empty or never loads. Pre-roll video is harder. When the ad video and the film come from the same domain, blocking the domain blocks the film too. That is why a filter that is too aggressive can break playback, and why a narrow exception list matters more than a huge blocklist.
Why some ads ignore every blocker you install
Some apps fetch ads over the same connection as their main content, a trick called first-party ad serving. Others bundle ads inside the app package itself, so no network request ever happens. A few services check for a blocker and refuse to play until you turn it off. None of that means blocking has failed. It means that particular ad was never reachable by network filtering, and the right answer is a different layer: a launcher change, a different app, or a paid tier.
A quick map of what each method can and cannot touch
Think of the layers as a stack. Settings remove targeting and some recommendations. Private DNS removes most network ads across apps. Pi-hole or AdGuard Home does the same job for every device in the house. Blokada does it on the TV alone without touching the router. A replacement launcher removes sponsored rows. A paid tier removes ads inside one service. No single layer does the whole job, and that is exactly why this guide stacks them in order from gentlest to strongest.
| Method | What it blocks | What it cannot block | Effort |
|---|---|---|---|
| Built-in settings | Targeted ads, some recommendations | Network ads inside apps | Low |
| Private DNS filtering | Most network ads across apps | Ads served from content servers | Low |
| Pi-hole or AdGuard Home | Network ads on every device | Ads baked into an app | Medium |
| Blokada local VPN | Network ads on the TV only | Home screen sponsored rows | Low |
| Replacement launcher | Sponsored home screen rows | Ads inside apps | Low |
| Paid ad-free tier | Ads inside one service | Ads in other services | Low |
Turn off personalised ads and recommendations in Android TV settings
Start here, because it costs nothing, breaks nothing, and takes about two minutes. These settings do not remove every ad, but they stop the TV from building a profile of what your household watches, and they calm the home screen down. Do this before you touch DNS or install anything, so you can judge each later change on its own.
- Open Settings on your TV, then go to Device Preferences, then About, and note your Android TV OS version, because menu names shift slightly between Android 11, 12 and 14.
- Go to Settings, then Privacy, and open Ads. Tap Delete advertising ID, or Reset advertising ID on older versions, and confirm. Do this every few months to break long-term tracking profiles.
- Go to Settings, then Accounts and Sign In, then your Google account, and turn off Personalised recommendations if the option appears on your device.
- Go to Settings, then Device Preferences, then Home Screen, and turn off the recommendation rows you never use, such as sponsored channels or rows from apps you never open.
- Open each streaming app you use, go into its own settings, and turn off personalised ads or interest-based ads there too, because app-level toggles survive a system reset of the TV setting.
- Restart the TV once, then browse the home screen for a day before judging the result, because cached recommendations can linger for hours after the toggle changes.
That last step matters more than it sounds. I once turned off recommendations, saw the same sponsored row an hour later, and assumed the setting had failed. The row was a cached feed. By the next evening it was gone. Give the TV a full day before you decide a setting did nothing.
Reset the advertising ID on a regular schedule
Resetting the advertising ID is a small habit with a real effect. Advertisers use that ID to link viewing across apps into one household profile. A fresh ID breaks the chain, so new tracking starts from zero. Put a reminder in your calendar every three months, and check the toggle again after every system update, because updates have a habit of quietly restoring personalisation options you turned off.
Check the setting again after a system update
After a major update, walk the same path: Settings, then Privacy, then Ads, and confirm the ID is still deleted and recommendations are still off. Check the home screen rows too. If a row you hid has returned, hide it again. Two minutes after each update protects the calm home screen you built, and it is far easier than rebuilding it from scratch months later. Readers who want the full tour of useful toggles should also read the hidden Android TV settings you must enable guide, because several of those settings pair naturally with the privacy changes in this section.
Set up private DNS filtering on your Android TV
Private DNS is the single best first network step for most households. It filters ad and tracking domains before they load, it works across apps without installing a blocker in each one, and it needs no extra hardware. The TV sends its DNS queries to a filtering provider instead of your internet provider, and that provider answers known ad domains with a blocked response. The ad never loads, the page or app loads faster, and the change is easy to undo.
Two honest limits apply. First, private DNS only filters domain lookups, so it cannot touch ads served from the same domain as the video. Second, a bad hostname or an unreachable provider will cut the TV off the network entirely, which is why you write down the original setting before you change it. Keep that note near the TV or in your phone for a fast recovery.
Pick a filtering DNS provider that fits your household
AdGuard DNS and NextDNS are the two providers I recommend most often for a TV, because both publish a hostname you can type into the private DNS field, both maintain blocklists for TV traffic, and both offer a free tier that covers a household. AdGuard DNS is the simpler choice: one hostname, no account, and a sensible default list. NextDNS is the flexible choice: you create a free profile, pick your own blocklists, and see a log of blocked domains so you can spot a false block quickly. Cloudflare and Google run fast public DNS services, but their standard hostnames do not filter ads, so they solve speed, not blocking. Pick AdGuard DNS if you want the shortest setup, and pick NextDNS if you like to see exactly what was blocked and to add your own exceptions.
Enter the private DNS hostname step by step
- Open Settings, then Network and Internet, then your Wi-Fi network, and write down whether the connection uses DHCP or a static address, so you can restore it later.
- Go back to Network and Internet, then open Private DNS. Choose Private DNS provider hostname on Android 12 and later, or the equivalent hostname option on older versions.
- Type the hostname exactly as the provider publishes it. For AdGuard DNS, use dns.adguard-dns.com for the default filtered service. For NextDNS, use the personal hostname shown in your NextDNS profile, which ends in dns.nextdns.io. Check every character before you save, because one wrong letter means no network at all.
- Save the setting, then open a browser or a free app on the TV and check that pages and videos load normally.
- Open your main streaming apps one by one and play a short video in each. If playback starts quickly, the filter is working and nothing important was blocked.
- If the TV loses network access, go back to Private DNS, switch it to Automatic, and restart the TV. That restores the original behaviour in under a minute.
Test with a free app that normally shows banner ads, such as a free news or weather app. If the banner slot stays empty or fails to load while the rest of the app works, your filter is active. If nothing changes, double-check the hostname spelling and confirm the TV is actually on Wi-Fi rather than Ethernet with its own DNS setting, because some TVs keep separate DNS settings per connection type.
Test whether the filter is working with a known ad domain
On a computer on the same network, you can run a quick check with nslookup against a known ad domain from your filter list and see whether it returns a blocked address. On the TV itself, the practical test is simpler: open three free apps, note which ad slots stay empty, and check that your paid apps still play. A filter that blocks ads and keeps playback smooth is doing its job. A filter that blocks playback needs an exception, which the next sections cover.
Block ads for the whole house with Pi-hole and AdGuard Home
Router-level blocking is the strongest network method in this guide, because it covers the TV, every phone, every tablet, and every smart device in the house from one place. Pi-hole and AdGuard Home both run on a small computer on your home network, usually a Raspberry Pi, and they answer DNS queries for the whole household. Set the router to point at that computer, and every device inherits the filter without any change on the device itself.
The trade-off is real: you need a computer that stays on, and a mistake can cut the whole house off the internet instead of just one TV. That sounds scary, but the fix is simple and worth learning before you start. Keep the router admin page open, keep the old DNS addresses written down, and test one device at a time. If something breaks, you restore the old addresses in one step.
Pi-hole on a Raspberry Pi for whole-house filtering
Pi-hole is a free, open-source DNS filter that runs well on a Raspberry Pi 3 or newer, or on any small Linux computer you already own. Install it with the official installer, point your router DNS at the Pi address, and add blocklists built for TV and mobile traffic. Start with the default lists plus one well-maintained ad list, and resist the urge to add ten lists on day one. A huge list blocks more ads but also blocks more innocent domains, and every false block becomes a troubleshooting session. Pi-hole shows a dashboard of blocked queries, so when a service breaks you can search the log, find the blocked domain, and add it to the allowlist in seconds. That visibility is the reason I recommend Pi-hole to households that enjoy a little hands-on control.
AdGuard Home for filtering with a friendlier dashboard
AdGuard Home does the same job with a dashboard that many people find easier to read, and it includes safe search and parental controls if you want them. Install it on the same kind of small computer, set the router DNS to its address, and enable the built-in ad and tracking filters. AdGuard Home also supports encrypted DNS from your devices, which matters if your internet provider inspects DNS traffic. For a household that wants Pi-hole results without the command line, AdGuard Home is the easier path, and its query log makes the same allowlist fixes just as fast.
Add a narrow exception when a service breaks
When a service breaks after filtering, do not turn the whole filter off. Open the query log, find the domain that was blocked at the moment the service failed, and add that one domain to the allowlist. Test the service again. If it works, you have fixed the problem with the smallest possible hole in the filter. Document each exception in a note, and review the list every few months to remove exceptions you no longer need. A narrow exception list is what separates a filter that lasts for years from one that gets switched off in frustration after a week.
Blokada and other on-device blockers that use a local VPN
Blokada is the on-device blocker I reach for when I cannot touch the router, for example on a TV in a rented flat or on a network shared with other people. It creates a local VPN on the TV itself, which sounds alarming until you understand what local means here: traffic never leaves the device to a remote VPN server. Instead, Blokada inspects DNS requests on the TV and blocks the ones on its lists before they leave the device. Install it from its official site, pick a blocklist, turn it on, and ads inside many apps stop loading.
That said, a local VPN blocker adds a small layer of work to every connection, and on an older TV with a slow processor you may notice a slight delay when an app first opens. Test playback after installing it, and if a stream stutters, try a DNS-only method instead. A blocker that harms video quality is a poor trade for most viewers, and the DNS methods in this guide give you most of the same benefit with less overhead.
How Blokada filters traffic without a remote server
Blokada works by registering itself as a VPN service on Android, then filtering DNS queries locally against its blocklists. Because the filtering happens on the device, it works on any Wi-Fi network, including a hotel network or a friend’s house, without changing router settings. The free version covers DNS-based blocking, which handles most banner and tracking ads. Paid plans add a real VPN tunnel, but you do not need that for ad blocking on a TV, and buying it for this purpose alone is money spent on the wrong tool.
When a local VPN blocker slows playback
If video stutters after you enable Blokada, check three things in order. First, turn Blokada off for one video and see whether the stutter disappears, which confirms the blocker as the cause. Second, switch to a smaller blocklist, because a huge list costs more processing time on a weak TV processor. Third, try private DNS instead, which filters at the network level with no local processing at all. Keep whichever method plays smoothly, and do not stack Blokada on top of private DNS filtering, because two filters doing the same job only add overhead and make troubleshooting harder.
Replace the stock launcher and hide sponsored rows
The launcher is the home screen itself, and on many TVs it is the single biggest source of ads you see every day. A replacement launcher such as Projectivy Launcher or FLauncher shows only your installed apps in a clean grid, with no sponsored rows and no recommendation feed. That change alone makes the TV feel faster and calmer, even before any network filtering, because the home screen stops loading promoted content every time you turn the TV on.
Picking a launcher deserves care, because a launcher has broad access to your home screen and to app launches. Install only from a trusted source, check recent reviews and update history, and read the permissions it requests. A launcher that asks for network access it does not need, or one that has not been updated in years, is a poor choice no matter how clean its screenshots look. Set the new launcher as the default home app in Settings, then Apps, then Default Apps, then Home App, and keep the stock launcher installed so you can switch back in seconds if you change your mind.
What a third-party launcher changes on your TV
A good replacement launcher changes three things: the home screen shows your apps and nothing else, the rows of promoted content disappear, and navigation gets simpler for everyone in the house, including guests and children. It does not block ads inside apps, it does not speed up video playback, and it does not change how a streaming service works. Judge it on the home screen alone. If the home screen feels calm and every app still opens normally after a week, the launcher has done its job.
Launcher safety checks before you install
Before installing any launcher, check that the developer is active, that the app has recent updates, and that its privacy policy explains what data it collects. Avoid launchers from unknown sources that promise to remove all ads, because a launcher with broad access can collect more data than the ads it removes. That caution applies to every tool in this guide: the privacy you protect by blocking ads is worthless if the blocker itself harvests your viewing habits.
SmartTube, paid tiers and free apps: cutting video ads without breaking rules
Video ads are the hardest ads on a TV, so this section deserves honesty. SmartTube is a popular alternative YouTube client for Android TV that skips sponsored segments and video ads, and many TV owners use it daily. It is free and open-source, and it works by playing YouTube content through its own player rather than the official app. That said, using it means stepping outside the official YouTube app, and it can break when YouTube changes its systems. Keep the official app installed alongside it, so you always have a working fallback, and never pay anyone for a copy of SmartTube, because the real app is free.
Do not use modified or cracked versions of paid streaming apps. They promise an ad-free experience, but they are the most common way malware reaches a TV, and they put your account at risk. The legitimate path is simpler: use the official app, pay for the ad-free tier of the services you watch most, and use free tiers with ads for the services you open rarely. That mix costs less than most people expect, and it keeps every account safe.
What SmartTube does differently from the official app
SmartTube replaces the player rather than the network. It skips ad segments inside videos, supports sponsor segment skipping through community data, and offers finer playback controls than the official TV app. Setup takes a few minutes: install it from its official source, sign in if you want subscriptions and history, and adjust the sponsor skipping settings to your taste. If a video fails to play, update SmartTube first, because YouTube changes break it regularly, and an update usually follows within days.
When paying for an ad-free tier is the better deal
Add up the monthly cost of the ad-free tiers for the two services you watch most, then compare it with the hours you spend tuning blockers. For a service you open every night, a paid tier is usually the simplest and most reliable answer, and it supports the creators you watch. For a service you open once a month, the free tier with ads is fine. Make the choice per service, not once for every app, and revisit it every few months as your viewing habits change. While you weigh those choices, exploring free streaming apps for Android TV can help you find services worth watching in the first place, and a free service with honest ads is often a better deal than a paid service you never open.
Fix it when blocking breaks a streaming service
Every blocking setup breaks something eventually. A streaming app refuses to start, a thumbnail row stays empty, or a live channel buffers forever. That is normal, and it is fixable in minutes if you change one thing at a time. The golden rule of this whole guide is simple: change one layer, test your main apps, and only then change the next layer. Two changes at once make it impossible to know which one caused the problem.
Playback fails after you change DNS
First, switch private DNS back to Automatic and test the app again. If playback returns, the filter was the cause, and the fix is an exception rather than abandoning filtering. In NextDNS or AdGuard Home, open the query log, find the blocked domain from the moment of failure, and allowlist it. In AdGuard DNS, you cannot add personal exceptions, so switch to NextDNS or Pi-hole if that service needs one. If playback still fails with DNS set to Automatic, restart the TV and the router, because the failure may be a stale cache rather than your change.
One app still shows ads while the rest are clean
That pattern points to first-party ads or ads bundled inside the app, and no DNS list will fix it. Check whether the app offers a paid tier, check whether an alternative client like SmartTube exists for that service, and check whether the ads appear only in one section of the app. Sometimes a single app uses its own ad server that no public list covers yet, and reporting that domain to your filter provider helps the whole community. Accept the ads in that one app if the alternatives are worse, because a single noisy app does not mean the rest of your setup has failed.
Avoid the mistakes that turn blocking into frustration
Three mistakes cause most of the frustration I hear about. The first is blocking every ad domain aggressively and then blaming the TV when a service fails, when a moderate list with narrow exceptions would have worked. The second is installing a blocker from an unknown source without checking its reputation, which hands your network traffic to a stranger. The third is changing DNS on the TV and on the router at the same time, so no one knows which change broke playback. Change one layer at a time, test your main apps after each change, and keep a short note of what you changed and when. That note is the difference between a ten-minute fix and a lost evening.
Frequently asked questions about blocking ads on Android TV
Can I block every ad on Android TV?
No method blocks every ad reliably without breaking some services. DNS filtering removes most network ads, a replacement launcher removes sponsored rows, and paid tiers remove ads inside specific services. Used together, those three layers give you the cleanest TV that still plays everything, and that combination is a better goal than chasing a completely ad-free screen that does not exist.
Will DNS filtering slow down my TV?
DNS filtering usually has little impact on speed, and it can make apps feel faster because ad content never loads. A local VPN blocker can add a small overhead on older TVs, so if you notice stuttering, switch to private DNS or router-level filtering instead. Test with a long video after each change, and keep the method that plays smoothly on your hardware.
Is it legal to block ads on a TV I own?
Blocking ads on a device you own for personal use is generally accepted, but it can break the terms of a specific free service. A service can require ads as part of its free tier, and it can limit features if it detects blocking. If you want an ad-free experience for that service, its paid tier is the compliant option, and it keeps your account in good standing.
Why do ads still appear inside my paid streaming app?
Some paid plans are ad-supported by design, and only a higher tier removes ads. Other apps show house ads for their own shows even on paid plans, and those promos come from the same servers as the video, so DNS cannot separate them. Check your plan details in the app settings, and if you are on the ad-free tier and still see promos, those are usually in-house recommendations rather than third-party ads.
A cleaner TV tonight: your next step
Start tonight with the two-minute job: turn off personalised ads, reset the advertising ID, and hide the sponsored rows you never use. Tomorrow, set up private DNS filtering and test your main streaming apps for a few days. Add narrow exceptions only for services that break, and leave the aggressive lists alone. If the home screen still feels noisy after that, try a replacement launcher for a week and see whether the calm is worth the switch.
That gradual path gives you a cleaner TV without breaking the services you love, and each layer you add makes the next one easier to judge. Once the ads are under control, the next improvement is speed, so finish by reading the secret trick to speed up laggy Android TV animations and apply it to the same TV. A calm home screen and a fast interface reinforce each other, and together they make the TV feel like it was built for you rather than for advertisers.

