

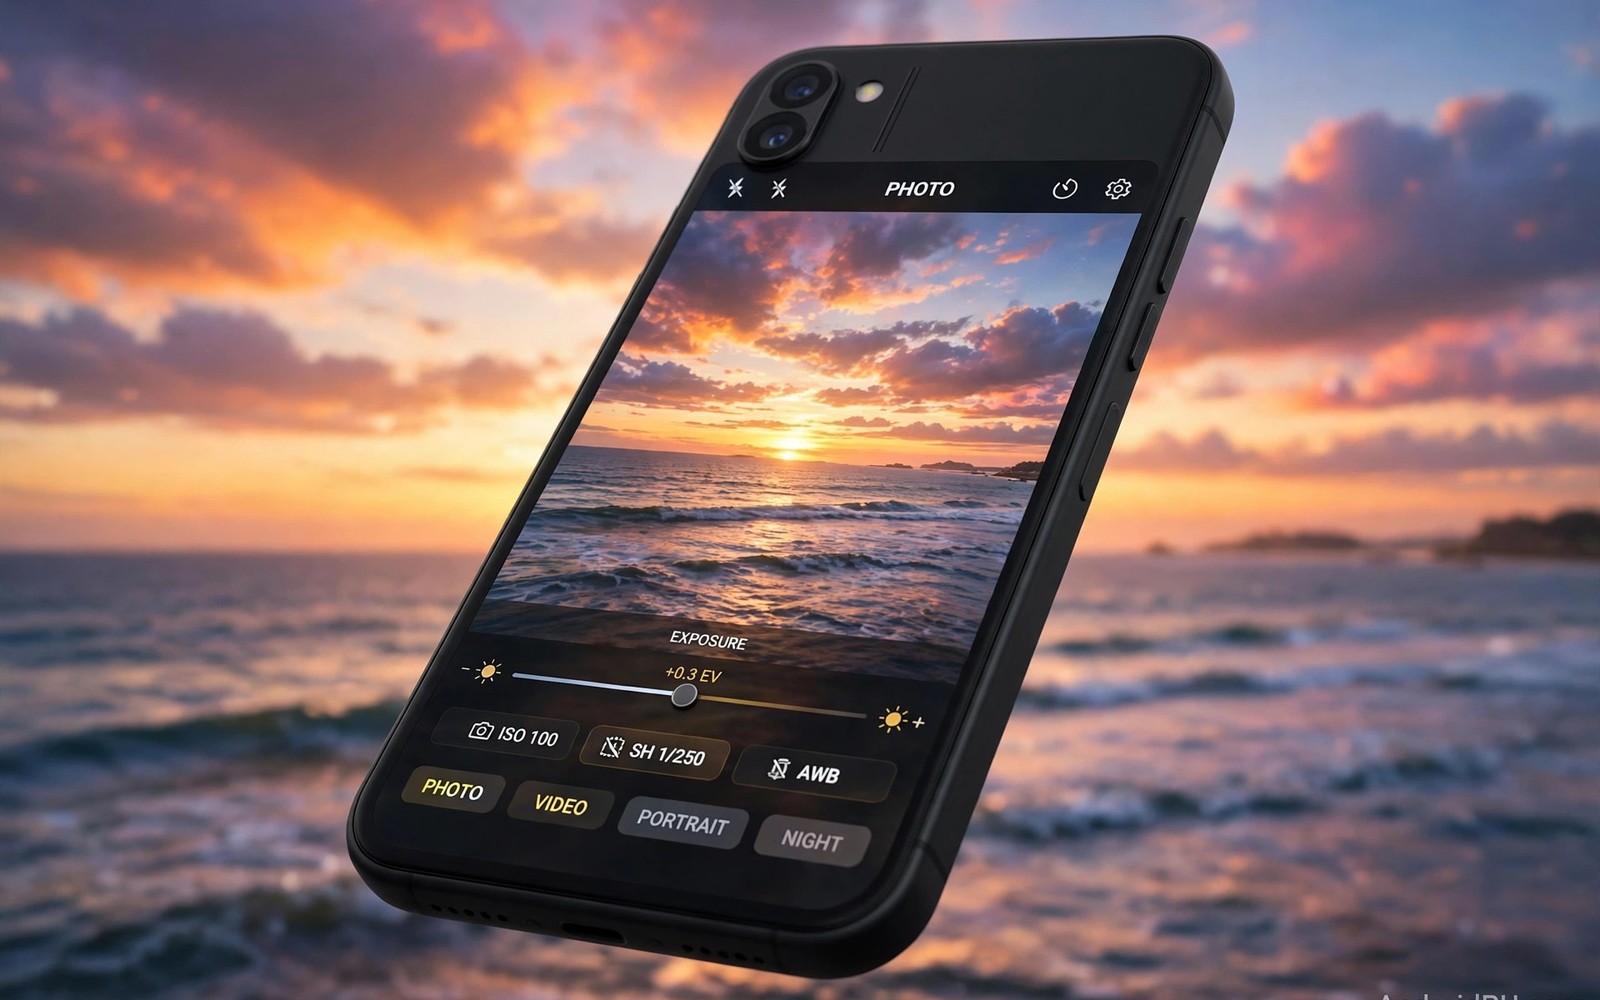
Stop Overexposing Sunset Photos: Manual Exposure Lock Hack
I still remember the sunset that taught me this lesson. The sky over the beach was burning orange, clouds edged in pink, and the sea catching every last bit of light. I lifted my phone, tapped the shutter, and looked down at a photo where the sky had turned into a flat white sheet. The foreground looked fine. The sunset, the whole reason I had stopped walking, was gone. That gap between what my eyes saw and what the phone saved is the exact problem this guide fixes.
Your phone is not broken. Its automatic metering is doing what it was built to do: it looks at the whole frame, notices a dark beach or a dark street, and brightens everything so you can see the shadows. At sunset, that brightening is fatal to the sky. The sky is already the brightest part of the scene, so one extra push from the meter wipes out its colour and texture. Manual exposure lock stops that push. You point the meter at the bright sky, lock the brightness value there, and the phone stops rethinking the exposure while you recompose.
This guide walks through the full routine I use now: how to lock exposure on different Android camera apps, how to recompose without losing the lock, when HDR helps and when it ruins a sunset, how to shoot RAW for a second chance, and how to time the shoot so you catch the afterglow most people miss. It works on Samsung, Pixel, Xiaomi, OnePlus, and most other Android phones, because the idea is the same even when the gesture differs slightly. By the end you will have a repeatable routine you can run in under a minute at any sunset.
Why Sunset Photos Overexpose on Android Phones
A phone camera meter has one job: pick a brightness that keeps most of the frame readable. In daylight that works well, because the brightest and darkest parts of a scene sit fairly close together. A sunset breaks that balance. The sky can be ten or twenty times brighter than the foreground, and no single exposure can show both perfectly. The meter has to choose, and it usually chooses the foreground, because most photos are judged by whether the subject in front is visible.
The result is a blown sky. Highlights clip to pure white, which means the sensor recorded no colour information there at all. Once a highlight is clipped, no editing app can bring the orange back, because there is nothing to recover. A slightly dark sunset photo, on the other hand, still holds the colour data in its shadows. That is why experienced phone photographers prefer to underexpose a sunset by a little and lift the shadows later, rather than trust the meter to get it right.
Phone makers know this, which is why most camera apps now show a small sun icon or a brightness slider when you tap to focus. That slider is your manual override. Dragging it down tells the meter to darken the whole frame by a set amount, usually measured in exposure value steps. The lock goes one step further: it freezes that value so the phone does not change its mind when you move the camera. Without the lock, the slider resets the moment the scene changes, and you are back to a white sky.
How automatic metering reads a sunset scene
Most Android cameras use evaluative metering by default, which splits the frame into dozens of zones and averages them. A dark road at the bottom of the frame pulls the average down, so the camera raises exposure to compensate. The sky at the top, already bright, gets pushed past the clipping point. Some phones use centre-weighted metering instead, which gives extra weight to the middle of the frame. That helps when the sun sits in the centre, but it still fails when the brightest clouds sit off to one side.
Tap-to-focus changes the metering point to wherever your finger lands. Tap a dark building and the sky blows out. Tap the bright sky and the building turns into a silhouette. Neither tap is wrong on its own. The trick is tapping the sky, locking that reading, and then framing the shot you actually want. The lock turns a one-off tap into a decision that survives recomposing.
What clipped highlights really cost you
When a highlight clips, three things disappear at once: colour, cloud texture, and the gradient from orange near the sun to pink higher up. What remains is a white hole that draws the eye for the wrong reason. Viewers read it as a mistake, even if they cannot name the cause. A locked exposure keeps those gradients intact. Even a small downward adjustment, half a stop or so, can be the difference between a white blob and a sky with visible cloud edges.
I check for clipping with the histogram when my camera app shows one, or by looking at the brightest cloud on screen and asking whether I can still see its shape. If the cloud has no edges, the exposure is still too high. If I can see texture, I am close. That visual check takes two seconds and it has saved more sunsets for me than any other habit.
Manual Exposure Lock on Samsung Galaxy Phones
On Samsung phones, open the Camera app and tap the brightest part of the sky that still shows colour. A small circle appears, and a brightness slider shows up beside it. Press and hold on the focus area until the words AE/AF Lock appear on screen. The lock icon stays visible while the value is frozen. Now drag the slider down slightly, usually to around minus 0.7 or minus 1.0, until the orange deepens and the clouds gain edges.
Keep holding the phone steady for a second after the lock appears, because a wobble can shift the focus point and break the lock on some models. Once the lock is set, move the phone slowly to frame your shot. The brightness should stay exactly where you left it. If the screen suddenly brightens again, the lock has released, which happens when you switch lenses, switch to video, or tap the screen again. Lock it once more and shoot quickly.
Exposure lock steps in the Samsung Camera app
- Open Camera, choose Photo mode, and point the phone at the sunset with the sky filling most of the frame.
- Tap the brightest cloud that still shows colour, not the sun itself and not a dark rooftop.
- Press and hold that spot until AE/AF Lock appears, then drag the brightness slider down until the clouds show texture.
- Move the phone slowly to include your foreground, a tree, a pier, or a person, and check that the sky stays rich.
- Tap the shutter, then take a second frame at one step darker as insurance, and compare both on a larger screen later.
Where the Samsung lock indicator lives
The AE/AF Lock label appears near the focus circle, and a small padlock icon sits beside the exposure slider on newer Galaxy models. If you do not see it, check Settings, then Camera settings, and confirm that the tracking focus option is not fighting the lock. On Galaxy phones running One UI 6 and later, the lock holds until you tap the screen again or close the app, which gives you time to take several frames from the same spot.
Manual Exposure Lock on Google Pixel Phones
Pixel phones handle exposure a little differently. Tap the sky in the Camera app and a brightness slider appears. Long-press the viewfinder until the lock engages, then use the slider to darken the scene. Pixels also offer a useful pair of sliders in some versions: one for brightness and one for shadow detail. If your Pixel shows both, darken the brightness first and leave shadows alone until you review the result. Pushing shadows up while the sky is locked can wash out the contrast that makes a sunset look dramatic.
Pixel Night Sight and the regular Photo mode meter differently, so lock exposure in the mode you plan to shoot in. A lock set in Photo mode does not always carry over when you switch to Night Sight, and Night Sight will often brighten the scene again to chase detail in the dark. For sunsets, plain Photo mode with a manual lock gives more predictable colour than Night Sight in most cases I have tested.
Pixel exposure lock steps and the dual slider
- Open the Pixel Camera app in Photo mode and frame the sunset so the sky fills the upper half of the screen.
- Tap the brightest coloured cloud, then long-press until the exposure locks and the slider appears.
- Drag the brightness slider down in small steps and watch the orange deepen without the foreground turning into a black void.
- If a second slider for shadows appears, nudge it only slightly, and stop the moment the sky starts to look grey.
- Recompose slowly, keep the lock active, and shoot two frames at slightly different brightness levels.
When Pixel Night Sight fights your lock
Night Sight is built to rescue dark scenes, so it will lift a sunset exposure if you let it. If your locked sunset suddenly looks brighter after a second, check whether the mode switched or whether the phone decided the scene was dark enough for a longer exposure. Stay in Photo mode for the locked shot, and use Night Sight only for the blue hour after the sun has fully set, when the sky is dark enough that brightening helps rather than hurts.
Manual Exposure Lock on Xiaomi, OnePlus, and Other Android Phones
Xiaomi phones in the stock Camera app use the same long-press idea: tap the sky, hold until the lock message appears, then slide the exposure control down. On many Xiaomi models the exposure control sits as a small sun icon next to the focus ring, and dragging it down darkens the frame in real time. OnePlus phones show a similar ring and slider in the Camera app, and the lock holds until you tap elsewhere or change modes. The names differ, the gesture is nearly identical, and the habit transfers across brands once you have practised it on one phone.
If your stock camera app does not offer a clear lock, try the Pro or Manual mode. Pro mode usually shows separate controls for ISO, shutter speed, and exposure compensation, and it often keeps your settings until you change them. Set exposure compensation to minus 0.7, take a test frame, and adjust from there. Pro mode also helps at sunset because you can fix the white balance to a warm setting instead of letting the phone drift toward grey as the light fades.
Exposure lock steps for Xiaomi and OnePlus
- Open the stock Camera app, stay in Photo mode, and point at the brightest coloured part of the sky.
- Tap that spot, then press and hold until the lock indicator or AE/AF Lock message appears on screen.
- Drag the exposure slider down slowly and stop when the clouds show clear edges and the orange looks deep.
- Recompose with a slow, steady movement, and take the shot before switching lenses or modes.
- If the lock keeps dropping, switch to Pro mode, set exposure compensation to minus 0.7, and shoot from there.
Using Pro mode when the lock keeps dropping
Pro mode is the fallback I reach for on phones where the auto lock feels fragile. In Pro mode, go to the exposure compensation control, often marked EV, and set it to minus 0.7 or minus 1.0. Leave ISO on Auto at first, so the phone only controls sensitivity, and keep the shutter speed on Auto as well. That combination gives you a fixed exposure offset without the complexity of full manual control, and the value stays put while you recompose, which is exactly what a fragile auto lock fails to do.
Recompose Without Losing the Lock
Locking is only half the job. The other half is moving the phone to frame the picture you want without the lock resetting. Move slowly, keep your grip steady, and avoid tapping the screen while you reframe. The lock survives a slow pan across the scene, but it often breaks when you jerk the phone, switch to the ultra-wide lens, or open another mode. Plan the composition before you lock, so the movement after the lock is small and calm.
Silhouettes are the natural partner for a locked sky. A tree, a person, a pier, or a rooftop placed low in the frame reads as a clean dark shape against a colourful sky. The shape needs a clear outline to work. A person standing against the horizon with arms at their sides reads well. A person half hidden behind a bush does not, because the outline merges with the dark ground. Keep the silhouette simple and give it space in the frame.
When both sky and foreground matter, shoot two frames. Lock on the sky for the first, then lock on the foreground for the second. Later, an editing app can blend the two into one balanced image. This two-frame method suits scenes like a sunset over a harbour, where the boats deserve detail and the sky deserves colour, and one exposure cannot serve both. Take both frames from the same spot, on a tripod if you have one, so the blend lines up cleanly.
Silhouette framing that works with a locked sky
Place the silhouette in the lower third of the frame and let the sky take the upper two thirds. That ratio gives the colour room to breathe while the dark shape anchors the picture. Leave a small gap between the silhouette and the edge of the frame so the shape does not feel cramped. If you are shooting a person, ask them to stand sideways to the camera with their profile against the brightest part of the sky, because a side profile holds its shape better than a front-facing pose in silhouette.
Two-frame blending for sky and foreground
After shooting the two frames, open them in an editor that supports exposure blending or HDR merging from separate shots, such as Lightroom Mobile or Snapseed. Load the sky frame first, then blend in the foreground frame at a low opacity and mask the join along the horizon line. The goal is a natural result, not a painting. If the blend looks fake, lower the foreground brightness until it matches the mood of the sky. A subtle blend beats an obvious one every time, and viewers should feel the balance rather than notice the edit.
Use HDR Carefully at Sunset
HDR can help a sunset by merging a bright frame and a dark frame into one image, but it can also flatten the drama out of the scene. Strong HDR lifts the shadows so far that the sky turns grey and the sunset loses its warmth. The safe approach is to use the lowest HDR strength your phone offers, or to lock exposure first and then let HDR work around that locked value. Compare the HDR frame with the single locked frame on a larger screen before you decide which one to keep.
Some phones apply HDR automatically and give you no strength control. In that case, lock the exposure first, then take the HDR frame, and check whether the sky kept its colour. If the HDR frame looks washed out, turn HDR off and rely on the locked single frame plus a RAW file for editing. A locked single frame with good colour is a better starting point than an HDR frame that has already flattened the scene.
| Approach | Sky colour | Foreground detail | Best for |
|---|---|---|---|
| Locked single frame | Deep and saturated | Dark, often silhouette | Dramatic skies and silhouettes |
| Locked frame plus low HDR | Rich, slight lift | Some shape visible | Balanced scenes with a subject |
| Strong HDR, no lock | Often grey and flat | Bright and detailed | Scenes where the foreground is the subject |
| RAW plus locked frame | Recoverable in editing | Recoverable in editing | Maximum editing freedom later |
That table is the decision aid I use in the field. When the sky is the subject, I choose the locked single frame. When a person or a building in the foreground also matters, I add low HDR or shoot a second frame. When I want the most freedom later, I shoot RAW alongside the locked frame and decide at the desk, where I can compare versions calmly instead of guessing on a small screen in fading light.
When HDR helps and when it hurts
HDR helps when the foreground holds a subject that needs to be recognisable, such as a friend standing on a beach at sunset. It hurts when the sky is the whole point of the photo, because the merging process averages the brightest and darkest tones toward the middle. A sunset lives at the extremes, so averaging it away removes exactly what makes it beautiful. Test both versions on the same evening and keep the comparison in your mind for the next shoot.
Testing HDR against a locked frame
Take the locked frame first, then enable HDR and take the same composition again without moving. Later, open both side by side and look at three things: the orange near the sun, the cloud edges, and the foreground shape. Whichever frame keeps the orange deep while showing enough foreground shape is the winner. Write down which setting won for that phone, because the answer differs between brands and you will not remember it in the moment next time.
Shoot RAW at Sunset for a Second Chance
RAW files keep far more highlight information than JPEGs, especially in the highlights. A JPEG throws away data to save space, so a clipped sky in a JPEG is gone for good. A RAW file keeps the extra highlight data, which means an editor can often pull back a sky that looks slightly too bright in the preview. Shoot RAW plus JPEG at sunset when your phone supports it, and use the JPEG for quick sharing while the RAW file waits for a careful edit.
In an editor, lower the highlights slider first, then lift the shadows gently. Lowering highlights brings back cloud texture. Lifting shadows reveals the foreground without touching the sky. The order matters: if you lift shadows first, you may brighten the whole image and undo the work. Keep the white balance warm, around the golden tones the scene actually had, and resist the urge to push saturation to the maximum. A small saturation lift, plus a touch of vibrance, usually looks more natural than a heavy push.
RAW files are large, so clear space before a sunset shoot and back the files up afterwards. A single evening can produce hundreds of megabytes of RAW files if you shoot freely. I keep only the best frames as RAW and delete the rest, because a library full of near-identical sunset RAWs is a chore to manage. The keepers are the frames where the lock held, the composition worked, and the colour survived.
Editing a locked RAW sunset in Lightroom Mobile
- Open the RAW file in Lightroom Mobile and tap Light, then drag Highlights down until cloud texture returns.
- Lift Shadows a little, just enough to show the shape of the foreground without greying the sky.
- Tap Color, set Temperature slightly warm, and add a small Vibrance lift rather than a heavy Saturation push.
- Tap Effects, add a touch of Clarity to the clouds, and check the result at full zoom for banding in smooth sky gradients.
- Export a copy as JPEG for sharing and keep the RAW file as the master for any later re-edit.
Highlight recovery limits in RAW editing
RAW recovery has limits. If the sensor recorded pure white with no data, even RAW cannot invent colour. That is why the lock still matters when you shoot RAW. The lock keeps the exposure low enough that the data survives, and the RAW file gives you room to shape it afterwards. Think of RAW as a safety net, not a rescue plan for a badly blown frame. The best results come from a locked exposure plus a RAW file, not from either one alone.
Time Your Sunset Shoot and Read the Sky
Arrive at least twenty minutes before sunset. That time is for scouting, not for waiting. Walk the spot, find a foreground shape, test the lock on the sky, and take a few practice frames while the light is still easy. Light changes fast during golden hour, and a lock set twenty minutes early will need a small adjustment as the sun drops. Check the exposure every few minutes and nudge the slider down as the sky darkens.
The richest colour often appears after the sun has dipped below the horizon, in the afterglow period that lasts ten to twenty minutes. Many photographers pack up too early and miss it. Stay, keep shooting, and watch the sky ignite with pink and purple light that the earlier frames did not have. The afterglow rewards patience, and the lock routine is the same: tap the brightest colour, lock, darken slightly, recompose, shoot.
Clouds matter more than a clear sky. A sky with scattered clouds catches colour across a wide area, while a perfectly clear sky gives you a smooth gradient with less drama. Check the forecast for cloud cover before you go, and aim for days with 30 to 60 percent cloud. Those days give you texture to lock onto and colour to preserve. A fully overcast day rarely gives a strong sunset, and a cloudless day gives a clean but plain gradient.
Golden hour timing and the afterglow window
Golden hour is the hour before sunset, when the light turns warm and long shadows stretch across the ground. The last fifteen minutes before the sun touches the horizon are the most changeable, with colour shifting every minute. The afterglow, the fifteen minutes after the sun sets, often produces the deepest pinks and purples of the evening. I plan my shoot around both windows: golden hour for warm foreground light, and afterglow for the sky itself.
Reading clouds before you leave home
Look at a weather app that shows cloud cover by height, not just a single cloud percentage. High thin clouds catch colour early and hold it well. Low thick clouds can block the sun entirely and kill the sunset before it starts. Mid-level scattered clouds are the sweet spot for most phone sunsets. If the forecast shows high cloud with clear air below, that is a day worth going out for, even if the morning looked dull.
Clean the Lens, Control Flare, and Shoot in Different Places
Sunset light is unforgiving about a dirty lens. A smudge you never notice in daylight turns into flare streaks and haze across the sky at sunset. Wipe the lens with a soft microfibre cloth before every session and check it against the light. That wipe often improves a sunset photo more than any setting change, because it restores the contrast that flare steals.
When flare streaks appear, shade the lens with your hand. Hold your hand just out of frame above the lens and watch the flare disappear on screen before you shoot. Move slowly, because a fast hand movement can enter the frame or shake the phone. The hand shade costs nothing, works instantly, and is the oldest trick in sunset photography for a reason. A locked exposure plus a clean lens plus a shaded lens is a combination that fixes most of the common sunset failures in one go.
Different places reward different compositions. Beach sunsets offer reflections and open horizons, and water doubles the sky colour into a symmetrical frame. Mountain sunsets give layered ridges that darken into silhouettes, and overlapping ridges add depth that a flat horizon lacks. City sunsets add buildings and bridges as dark shapes against warm tones, and a rooftop or crane can turn an ordinary street into a strong frame. Desert and field sunsets offer wide open skies where a single tree or fence line becomes a powerful focal point. The exposure routine stays the same everywhere; only the foreground changes.
For framing ideas that pair well with a locked sky, read these landscape composition tricks for mobile photographers before your next outing. Good framing and good exposure reinforce each other: the composition gives the eye somewhere to go, and the locked sky gives the composition colour worth looking at. I practise both together now, because a well-framed photo with a white sky still disappoints, and a well-exposed sky with a messy frame still feels unfinished.
Beach, mountain, and city sunset framing
At the beach, arrive early and find a rock or a pier to anchor the lower frame, so the wide sky does not feel empty. In the mountains, position yourself so the ridges overlap rather than merging into one shape, because overlapping layers create depth. In the city, use a building edge or a bridge to frame one side of the sky, and let the warm tones fill the rest. Each place has its own anchor, and finding it is the scouting work that the twenty minutes before sunset are for.
Hand shading the lens to kill flare
Hold your free hand above the lens, out of the frame, and tilt it until the flare streak fades on screen. Watch the preview while you move, because the flare disappears suddenly at one angle and returns just as fast if you move past it. Once it is gone, hold the hand still and shoot. If you are using a tripod, a small piece of card taped to a stick does the same job without tying up your hand.
Common Sunset Mistakes and How to Fix Them
The biggest mistake is trusting automatic metering at sunset, because it always favours the dark foreground over the sky. Lock on the sky first for every sunset frame. The second mistake is leaving before the afterglow, which is often the best colour of the evening. Stay fifteen minutes past sunset and keep shooting. The third mistake is forgetting the lens, because flare looks like a camera flaw when it is really a smudge. Wipe the lens, shade it, and the sky clears up.
Another common error is shooting only one frame and hoping it worked. Sunsets change every minute, and a single frame is a gamble. Take several frames at slightly different brightness levels, and take the two-frame pair for blending when the scene deserves it. A short burst of frames costs nothing on a phone, and it gives you choices later when the light is gone and the moment cannot be repeated.
People also overdo the editing. A sunset that looked warm in person can turn orange and artificial after a heavy saturation push. Edit in small steps, compare with the original, and stop when the colour matches what you remember seeing. The phone screen lies a little in bright sunlight, so check the edit indoors or on a larger screen before you share it. A restrained edit that keeps the sky believable will age better than a vivid one that shouts.
Night shooting has its own version of the same problem, and the fix overlaps: lock the exposure, keep the phone steady, and let the dark stay dark. If you want to carry this control into the evening, these night shots that stay sharp without a tripod show the settings that keep low-light frames clean. The habits transfer directly, because both sunset and night work reward a phone that is held still and an exposure that is chosen by you, not by the meter.
A quick troubleshooting checklist for white skies
- Sky still white after locking: drag the slider down one more step and check for cloud texture before shooting.
- Lock keeps releasing: stop switching lenses, hold the phone steadier, or switch to Pro mode with a fixed exposure offset.
- Foreground too dark: take a second frame locked on the foreground and blend the two, rather than brightening the sky frame.
- Flare across the sky: wipe the lens, then shade it with your hand and watch the preview until the streak fades.
- Colours look grey: check whether HDR is flattening the scene, turn it off, and rely on the locked single frame.
Sunset Exposure Lock FAQ
Why does my sunset look white instead of orange?
Automatic metering brightens the dark foreground and pushes the sky past the clipping point, where no colour data survives. Tap the brightest coloured cloud, lock the exposure, and drag the slider down until the orange returns and the clouds show edges. A frame that starts slightly dark keeps the colour, while a blown frame cannot be fixed in editing because the data is gone.
Should I use a filter for sunsets?
A graduated filter can balance sky and ground, but an exposure lock usually does the same job on a phone without extra gear. Try the lock first, and add a second frame for blending before you buy accessories. If you shoot sunsets often and want a physical filter, a small clip-on graduated filter is the cheapest useful option, and it pairs well with a locked exposure rather than replacing it.
Can I fix an overexposed sunset in editing?
Only partly. A slightly bright frame can be pulled back, especially from RAW, but a fully clipped sky holds no colour to recover. A slightly dark original edits far better than a blown one, which is why the lock matters more than any editing slider. Shoot the locked frame, keep the RAW file, and edit gently from there.
Does exposure lock work on the front camera for sunset selfies?
It works, but the result is a silhouette selfie, because the lock darkens the whole frame for the sky. That can look striking with a clear profile against the colour. If you want your face visible as well, take a second frame locked on your face and blend the two, or use a small amount of fill light from the phone screen. Keep the pose simple and the profile clear, so the silhouette reads cleanly.
Why does my lock keep turning off between shots?
Most camera apps release the lock when you tap the screen again, switch lenses, switch modes, or close the app. Some phones also release it after a few seconds of inactivity. The fix is to lock, recompose, and shoot without extra taps, and to re-lock for each new composition rather than expecting one lock to last the whole evening. In Pro mode the exposure offset stays until you change it, which is why it is a useful fallback.
Your Next Sunset Shoot
Your next step is simple and it takes five minutes today, before any sunset is involved. Go to a bright window, tap the brightest part of the sky outside, lock the exposure, and drag the slider down until the clouds gain colour. Recompose to include a dark object in the room and take the shot. Look at the result and notice how the sky survived while the foreground went dark. That is the whole technique, learned at home, ready for the field.
When the next sunset comes, arrive twenty minutes early, wipe the lens, find a foreground shape, and run the same routine. Take the locked frame, take a darker insurance frame, and stay for the afterglow. Then compare the results at home and note what worked. After three evenings the routine will feel automatic, and the white-sky sunsets will be behind you. For a deeper look at making those skies pop in editing, read this guide to capturing high dynamic range (HDR) photos that actually pop and use its HDR advice alongside the lock, so the two techniques support each other instead of fighting.

