

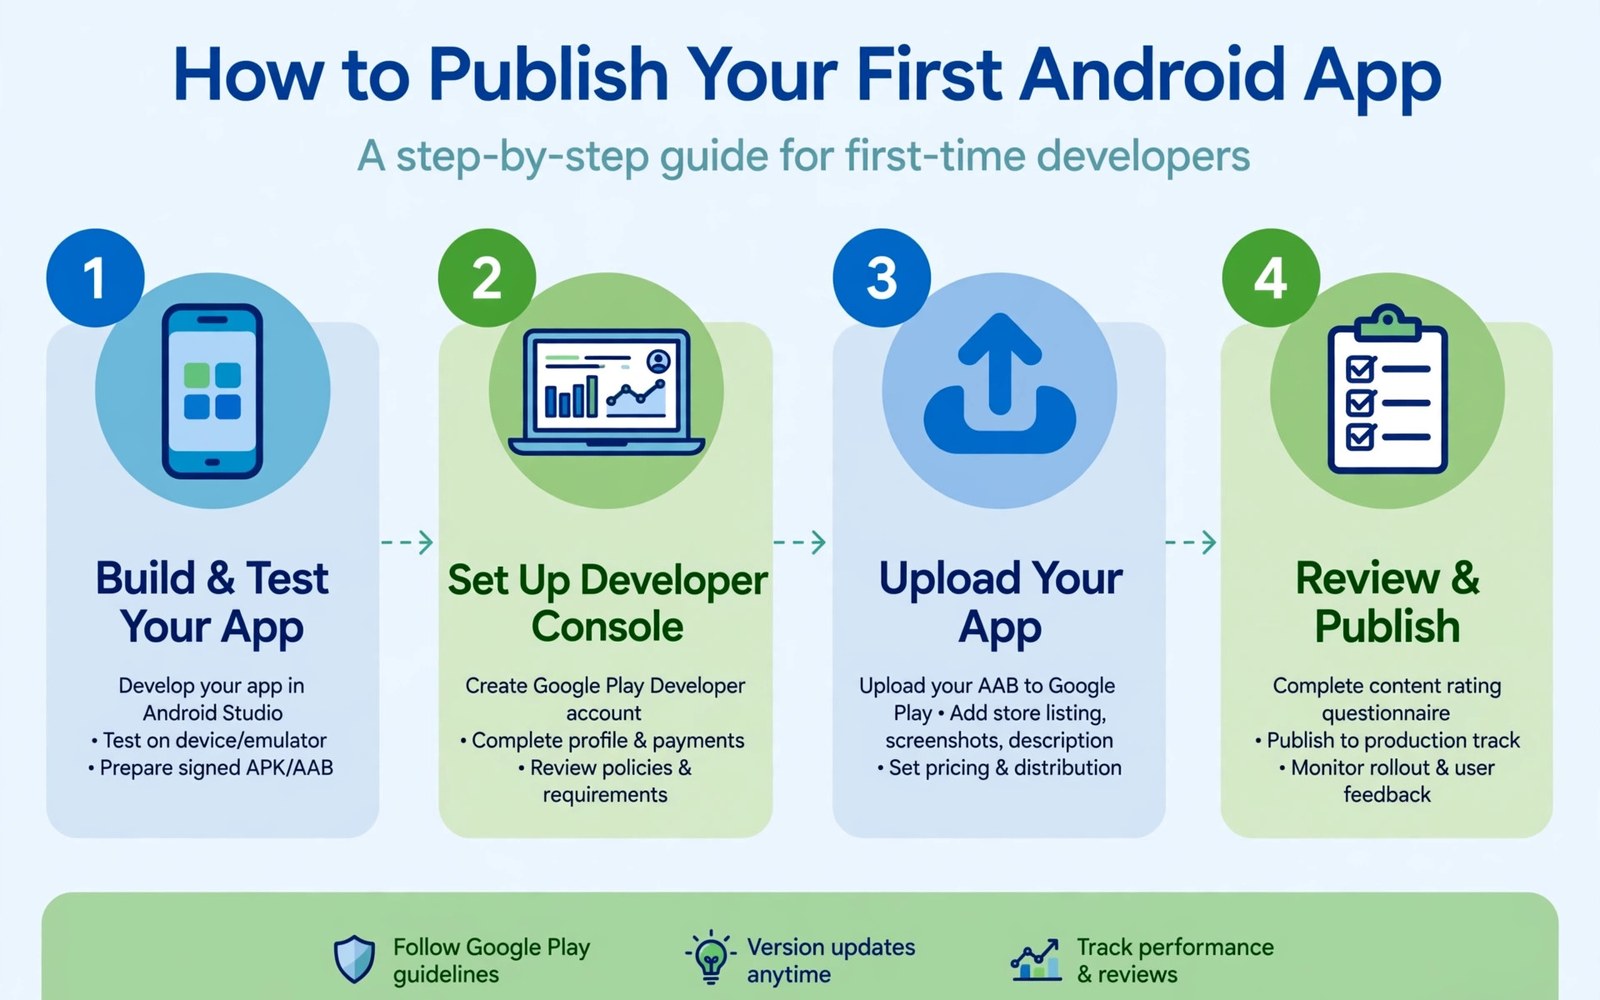
Publishing your first app feels large because the console asks for many details at once. You must prepare an account and a signed bundle and a store listing and a privacy declaration before you can press release. This guide breaks that work into small steps that you can finish in order. Each step builds on the previous one so you avoid going back to fix basic errors late in the process.
A calm first release starts long before the upload button. You should decide the app name and the package name and the target audience early. You should also test the app on at least two real devices with different screen sizes. Real device testing catches layout faults and permission faults that an emulator can hide. A short test plan saves hours of review delays later.
Think of the console as a checklist rather than a single form. The dashboard shows which sections are complete and which sections still need attention. Work through the sections from left to right and save each section as you finish it. Do not rush the privacy section or the content rating section because errors there cause the longest delays. A careful first pass is faster than a fast pass followed by a rejection.
Why First Releases Feel Complex
New developers often expect one upload to finish the job. The real process includes account verification and app identity and content declarations and release tracks. Each part exists to protect users and to keep the store trustworthy. Understanding that purpose makes the forms feel less like busywork and more like a safety net for your users.
The console also separates the app itself from the store listing. The bundle carries the code and the resources and the version number. The listing carries the title and the description and the screenshots that users see first. You can update the listing without changing the code. You can also update the code without rewriting the whole listing. This separation gives you flexibility after launch.
Create Your Developer Account
Start by creating a developer account with a valid payment method and a verified identity. The account owner should be a person or an organization that can answer policy questions later. Use a professional email address that your team checks every day. Review messages often go to that address and a missed message can stall a release for days.
Choose an account name that matches the name you want users to see. Changing the developer name later is possible but it can confuse existing users. Keep your tax and payment details ready before you start the signup flow. A complete signup in one sitting avoids repeated identity checks and keeps your momentum strong.
Prepare Your App Bundle
Build a signed app bundle rather than a single APK for a modern release. The bundle lets the store generate optimized packages for each device. Sign the bundle with a release key that you store in a safe place. Losing that key creates serious problems for future updates so back it up in two separate secure locations.
Set a clear version code and version name before you build the final bundle. The version code must increase with every release. The version name is the human readable label that users see. Test the exact bundle you plan to upload rather than a debug build. A debug build behaves differently and can hide release only faults.
Complete The Store Listing
Write a short title that states what the app does in plain words. Write a short description that covers the main benefit in the first two lines. Write a full description that explains features and limits and device requirements. Avoid superlatives that you cannot prove because reviewers may ask for evidence.
Add screenshots that show real screens from the app rather than marketing mockups. Use the required sizes and keep text inside the images easy to read. Add a feature graphic that looks clean on large screens and on small phones. Add a privacy policy link that opens a working page. A broken privacy link is a common and avoidable rejection reason.
Set Pricing And Distribution
Decide whether the app will be free or paid before you create the release. Changing from paid to free later follows different rules than changing from free to paid. Choose the countries where you want the app to appear. Start with a small set of countries if you want to control support load during the first week.
Review device compatibility and content rating answers with care. The content rating questionnaire asks about violence and gambling and user interaction. Answer honestly even if a higher rating reduces your audience. An honest rating protects your account and builds trust with parents and with users who read the rating before install.
Test Before You Publish
Use an internal testing track first and invite a small group of trusted testers. Ask testers to install the app from the store link rather than from a file. Store installs test the real signing and the real delivery path. Ask testers to report crashes and confusing screens and permission prompts that feel unnecessary.
Fix the faults that testers report before you move to a wider track. Pay special attention to startup time and to the first screen that a new user sees. A slow start or a confusing first screen drives uninstalls within minutes. A short round of fixes at this stage is far cheaper than a public launch with a broken first impression.
- Check the app on a low end device with limited memory
- Check all permission prompts and explain each request in plain words
- Check offline behavior when the network drops during use
- Check the app after a fresh install and after an update install
- Check text size and contrast for users with low vision
- Check that every button leads somewhere useful and never to a dead screen
Submit For Review
Create a production release and attach the bundle you tested. Review the release notes and write a short summary of what changed. Reviewers read release notes to understand the scope of the update. Keep the notes factual and avoid promises about future features that are not in this build.
Submit the release and watch the dashboard for status changes. Review can take hours or days depending on the queue and on the app category. Do not submit repeated identical releases while a review is pending. Duplicate submissions can confuse the queue and can delay the original review. Wait for a clear decision before you act.
After Launch Checks
Check the store page on a real phone after the app goes live. Confirm that screenshots and text appear as you intended. Confirm that the install button works and that the app opens on first launch. Ask a friend to install the app without your help and to describe any step that felt unclear.
Monitor crash reports and user reviews during the first week. Respond to reviews with short and polite answers that address the specific problem. Plan a small patch for the most common fault rather than a large rewrite. Small steady updates show users that the app is maintained and that feedback leads to real fixes.
Planning Your Launch Week
Set a launch week plan that leaves room for review delays and for small fixes. Tell users a launch window rather than a single day when approval timing is uncertain. Prepare support answers for install problems and for account questions. A calm launch week protects your rating from early frustration.
Schedule the release for a morning when your team is available to respond. Avoid launching on a Friday evening when a fault would wait all weekend. Monitor the dashboard several times on launch day. Quick responses to early reports show users that the app is actively supported.
Working With A Small Team
Divide console tasks by strength rather than by habit. One person can own the listing and the screenshots. Another person can own the bundle and the testing track. A third person can own privacy answers and support replies. Clear ownership prevents two people from editing the same section at once.
Hold a short review meeting before you submit the release. Walk through the listing and the test results together. Ask each owner to confirm that their section is complete. A ten minute meeting catches mismatches that solo work often misses. Record decisions so the next release starts from a shared baseline.
Handling First User Feedback
Read every review in the first week and sort reports by frequency. A fault that many users mention deserves a fix before a new feature. Reply to reviewers with a short note that names the fix or the workaround. Users who feel heard often update a low rating after a patch.
Separate feedback about bugs from feedback about missing features. Bugs affect trust and they should come first. Feature requests need a longer view and a check against your roadmap. Thank users for both kinds of feedback. A respectful tone keeps the conversation useful even when you cannot build the requested feature yet.
Updating After Launch
Plan the first update before launch week ends. Fix the most common crash and the most confusing screen first. Keep the update small so testing stays fast. A small update also makes it easier to identify the cause if a new fault appears.
Write release notes that describe the fix in user language. Avoid internal codes and avoid vague phrases about improvements. Users read release notes when they decide whether to update. Clear notes increase update rates and they reduce repeat reports of a fault that is already fixed.
Common First Release Mistakes
A common mistake is uploading a debug build by accident. A debug build may work on your phone but fail signing checks in the store. Always verify the build type before upload. Another mistake is using placeholder text in the listing. Placeholder text looks unfinished and it can trigger a rejection.
A third mistake is skipping the privacy section because the app seems simple. Even a simple app may collect analytics or crash data. Declare that collection honestly. A fourth mistake is testing only on a flagship phone. Test on a modest device too because most users do not own flagship hardware.
Long Term Maintenance
Treat the first release as the start of maintenance rather than as the finish line. Schedule monthly checks of crash reports and of policy updates. Update libraries on a regular cycle rather than waiting for a forced change. Regular small updates keep the app compatible and keep the team familiar with the release process.
Keep a release diary with dates and version numbers and key decisions. Note which tests passed and which faults appeared after launch. A diary turns each release into a lesson for the next one. Over time the diary becomes a playbook that makes every future release faster and calmer.
For reference the snippet below shows the basic identity values that a first release needs.
applicationId = "com.example.myfirstapp"
versionCode = 1
versionName = "1.0.0"
minSdk = 24
targetSdk = 34
// Build a signed bundle for release
// Test this exact bundle on real devices
For more context read Google Play developer policy changes and compliance and app privacy policies and data safety declarations. You may also find common reasons for app rejection during review helpful for your next release.
The steps above follow the approach described in the official developer documentation for this platform. That guidance explains the same sequence in general terms. This article adapts those ideas into a practical workflow for independent developers and small teams.

