

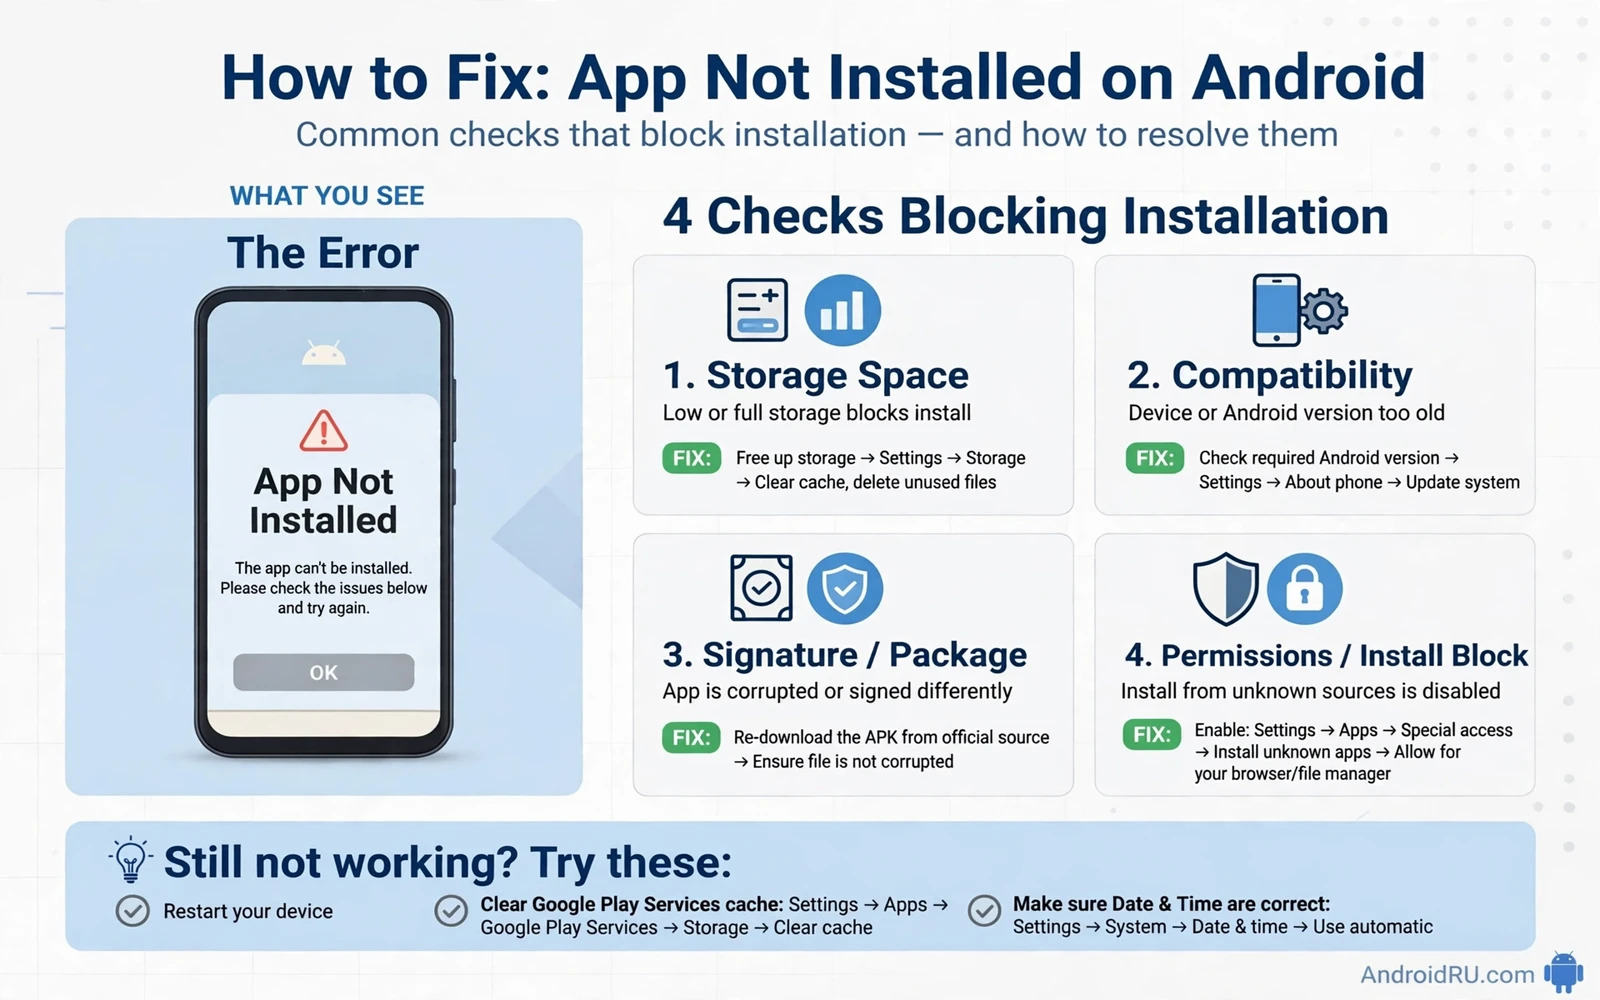
What The Error Means
The message App Not Installed appears when Android stops an install before the app can run. The install may stop at the last step even when the download looks complete. The phone is not necessarily broken when this happens. The error is a signal that one check failed during the install process. That check can involve storage space or file integrity or permissions or a conflict with an older version of the same app. Your job is to find which check failed and remove that blocker in a safe order. Rushing through random fixes can waste time and can hide the real cause. A calm sequence works better than deleting files at random. Start with the simplest checks first and move to deeper fixes only when the simple checks pass.
An install package is a single file that contains code and resources and a signature. Android checks the signature before it allows the install to finish. Android also checks that the package name does not clash with a system app in a way that the system cannot resolve. Android checks that the device has enough free space for the app and for its first run data. Android checks that the file is complete and not cut off during download or transfer. When any of these checks fail the system cancels the install and shows the same short message. The message does not tell you which check failed. That is why a step by step method matters. Each step in this guide removes one possible cause so the remaining cause becomes clear.
Many users blame the phone brand or the Android version first. Brand and version rarely cause this error on their own. A damaged file is far more common. A second common cause is an old version of the same app that was installed for a different user profile on the phone. A third common cause is a storage problem where free space looks large enough but the system partition for apps is nearly full. A fourth cause is a permission problem where the installer app cannot read the file or cannot write to the install location. A fifth cause is a package built for a different processor type or a different Android version than the phone supports. You can test these causes one at a time without root access and without risky tools.
Start With Safe Checks
Restart the phone first. A restart clears a stuck installer process and frees temporary locks on files. Press and hold the power button and choose Restart. Wait for the phone to fully boot before you try again. Do not try the install while the phone is still loading apps in the background. A clean boot gives the installer a clear path. If the error repeats after a restart then the cause is not a temporary lock. Move on to the next check with the same calm pace.
Check free storage in Settings and then Storage. Look at the total free space and also look at how much space apps already use. An app needs more than its download size. It needs space to unpack and space to create its first data files. Keep at least twice the app size free when you can. Delete large videos or move them to a computer or cloud storage if space is tight. Empty the trash in the file manager if your phone keeps deleted files for a time. Uninstall one app you no longer use if the phone is close to full. Storage pressure can also slow the whole phone so this step helps beyond the single install.
Check the file itself next. Look at the file size and compare it with the size shown by the place you got it from. A file that is much smaller than expected is incomplete. Download it again on a stable connection. Avoid switching networks in the middle of a download. If you moved the file from a computer then copy it again and wait for the transfer to fully finish before you disconnect the cable. A file that was renamed with the wrong extension can also fail. The file should end with the correct package extension and the name should not contain strange characters that the installer cannot read.
When a download keeps failing before you even reach the install step the problem sits earlier in the chain. A download that never finishes can leave a broken package behind and that broken package often triggers this same install failure so learning how to fix a Play Store download that stays stuck belongs early in the fix order. Fix the download first and then test the install again with a fresh file. Do not keep retrying the same damaged file. A fresh download removes doubt about file integrity and lets you focus on the next possible cause.
Remove Conflicts With Older Versions
Open Settings and then Apps and search for the app name. If an older version exists then uninstall it fully before you install the new version. Pay attention to work profiles and second user profiles on the phone. An app installed for another user can block a new install for the main user even when the main user cannot see the app on the home screen. Switch to each user profile and check for the same app. Remove it from every profile if you plan a clean install. This step solves many cases where the error appears only for one specific app.
System apps need extra care. Do not try to replace a system app with a version that uses the same package name but a different signature. Android will refuse that install to protect the system. If the app you want is a system app on your phone then update it through the store instead of installing a separate package. If you disabled the system app then enable it again before you update it. Forcing a mismatched system app install can create a loop where neither version works well. A store update is the safe path for system apps in almost every case.
Clear the installer cache when a conflict is not visible. Open Settings and then Apps and then Show system apps. Find the package installer entry for your phone. Tap Storage and then Clear cache. Do not tap Clear data for system installer apps unless you understand that it can reset installer settings. Clearing cache alone is safe and it removes stale data that can confuse a new install. Restart the phone after clearing the cache and try the install again. If the error stays then the cache was not the cause and you can move on without harm.
Check Permissions And Install Sources
Android requires permission for the app that performs the install. Open Settings and then Apps and then Special app access and then Install unknown apps. Find the browser or file manager you used to download the package. Make sure that app has permission to install apps. Without this permission the install will stop early. Grant permission only to apps you trust and only for the time you need it. You can turn the permission off again after the install finishes. This habit keeps the phone safer while still letting you install files outside the store when you truly need to.
Check storage permission for the file manager as well. The installer needs to read the package file. If the file manager cannot read the file then the installer may fail without a clear reason. Move the package to the Downloads folder where the installer can normally reach it. Avoid deep folders with long names and avoid files stored on a removable card that is failing. A failing card can corrupt a file during read even when the file looked fine on a computer. Copy the package to internal storage for the install test. Internal storage removes the card as a variable.
Check the Android version requirement for the app. Some apps require a newer Android version than the phone runs. The store normally hides incompatible apps. A direct package file does not hide itself. It simply fails at install time. Look for the minimum version in the app description before you install a package by hand. If the phone is too old for the app then no setting change will make the install safe. Updating the system software may help if an update is available for your model. Do not force an app onto an unsupported version by editing system files.
Deeper Fixes That Stay Safe
Clear the system cache partition only when the simple steps fail. The cache partition holds temporary system data. Clearing it does not delete your photos or messages or installed apps. The steps to reach recovery mode differ by phone model. Power off the phone fully first. Then hold the key combination for your model to enter recovery. Use the volume keys to move and the power key to select. Choose Wipe cache partition and confirm. Reboot the system when the wipe finishes. This process takes a few minutes and the first boot after a cache wipe can feel slow. That slowness is normal while the system rebuilds temporary data.
Learning the full cache partition process helps here because a stale system cache can block installs in ways that app cache clearing cannot reach. The steps for entering recovery and choosing the right wipe option matter and a wrong choice in recovery can delete data so reading how to clear the system cache partition safely before you enter recovery is worth the time. Read the steps twice before you press any key in recovery. Confirm the menu item name on screen before you select it. Never choose a factory reset item when you only mean to wipe cache. The two items sit close together on some phones and the difference matters a great deal.
Test the install in safe mode when you suspect another app is interfering. Safe mode loads only system apps. Press and hold the power button and then long press the Restart option or the Power off option depending on your phone. Choose Safe mode when the prompt appears. Try the install again in safe mode. If the install works in safe mode then a third party app is interfering. Restart normally and uninstall recent apps one at a time starting with security tools and cleaner apps and battery tools. Those categories interact with installs more often than simple games or media apps.
Check for a processor mismatch when the app comes from outside the store. Android phones use different processor types. A package built for only one type will fail on other phones. The store normally delivers the right build for your phone. A hand downloaded package may not match. Look for a universal build or a build that lists your phone model as supported. Do not install a package that was clearly built for a different device family. A mismatch can also cause crashes after install even when the install itself appears to succeed.
When The File Comes From Outside The Store
Packages from outside the store carry extra risk. Check the signature and the publisher before you install anything by hand. A package with a mismatched signature for an app you already own is a warning sign. Stop the install when the publisher name looks wrong or when the app asks for permissions that make no sense for its purpose. A flashlight app does not need access to messages. A wallpaper app does not need access to calls. Strange permission requests are a reason to delete the file and find a trusted version instead. Safety comes before getting one app to install.
Scan the file with the built in security tool on your phone when one is available. Run a scan before install and again after install if the tool supports it. Keep Play Protect enabled even when you install files by hand. Play Protect can warn you about known harmful packages. Do not disable security tools just to force an install to succeed. A forced install that bypasses a security warning can put accounts and photos at risk. The right answer to a security warning is a different trusted file not a disabled shield.
Keep a copy of the working file when you find one. Store it in a folder you can find again. Note the version number that worked. Future updates should come from the same trusted place. Mixing versions from different publishers can trigger the signature conflict again. Consistency in the file source prevents repeat install errors. When the store version becomes available later switch back to the store version for automatic updates and for simpler future installs.
Prevention And Final Checks
Prevention starts with storage habits. Keep free space above the level where the system starts warning you. Move large media files off the phone on a regular schedule. Uninstall apps you have not opened in months. Clear app cache for heavy apps from time to time through Settings. These habits keep installs smooth and keep the phone fast. A phone that always runs near full storage will show install errors more often and will also slow down during updates.
Prevention also means careful downloads. Use a stable Wi-Fi connection for large packages. Keep the screen on during a large download if your phone pauses background downloads aggressively. Check the file size after download before you tap install. Keep the installer permission limited to trusted apps. Update the system software when the maker releases a stable update for your model. System updates fix installer bugs and improve compatibility with newer apps.
Apps that freeze during an install attempt can block the installer in a similar way and the steps for handling a frozen app overlap with install troubleshooting so learning how to fix apps that freeze and force close unexpectedly can reveal a hidden blocker when the install file itself looks fine.
Work through this checklist before you try again. Restart the phone and confirm free storage. Confirm the file size and copy the file to internal storage. Remove older versions from every user profile. Confirm installer permission for the app that holds the file. Clear installer cache and try again. Clear the system cache partition only after the simpler steps fail. Test in safe mode when interference is likely. Check version and processor compatibility when the file came from outside the store. Each step removes one cause. The install will succeed when the last blocker is gone or the file will prove itself unusable for your phone and you will know why.
Frequently Asked Questions
Does App Not Installed mean the phone is damaged. No. The message usually means one install check failed. A damaged file or a conflict or a storage limit is far more likely than hardware damage. Work through the checks in order before you worry about hardware. Hardware damage normally shows other symptoms too such as random restarts or a failing storage card or a battery that swells. A single app install error alone points to software or file causes.
Should I root the phone to fix this error. No. Root access is not needed for the fixes in this guide. Root access adds risk and can break system updates and banking apps. It can also void support for some models. Try every safe fix first. If a safe fix fails then the file may simply be incompatible with your phone. Root access does not make an incompatible package safe to use.
Will clearing cache delete my photos. Clearing app cache does not delete photos. Clearing the system cache partition does not delete photos either. A factory reset does delete data. Keep these actions separate in your mind and on screen. Read each menu item before you confirm it. When in doubt back up photos to a computer or cloud storage before you touch recovery mode. A backup turns a mistake into a recoverable problem.
Why does the error affect only one app. A single app error points to that app file or to a conflict with an older version of that same app. Other apps install fine because their files pass every check. Focus on that one app file first. Try a fresh download from a trusted place. Check for an older version in another user profile. Check the minimum Android version for that app. One of these checks usually explains a single app failure.
What if nothing in this guide works. Note the exact app name and version and the place you got the file. Note your phone model and Android version. Try the store version of the app if one exists. Try the install on a different network to rule out a download problem. If the store version also fails then a system update or a maker support check may be needed. Do not install random fixer apps that promise to repair installs. Those apps often add ads or permissions without fixing the real cause.

