

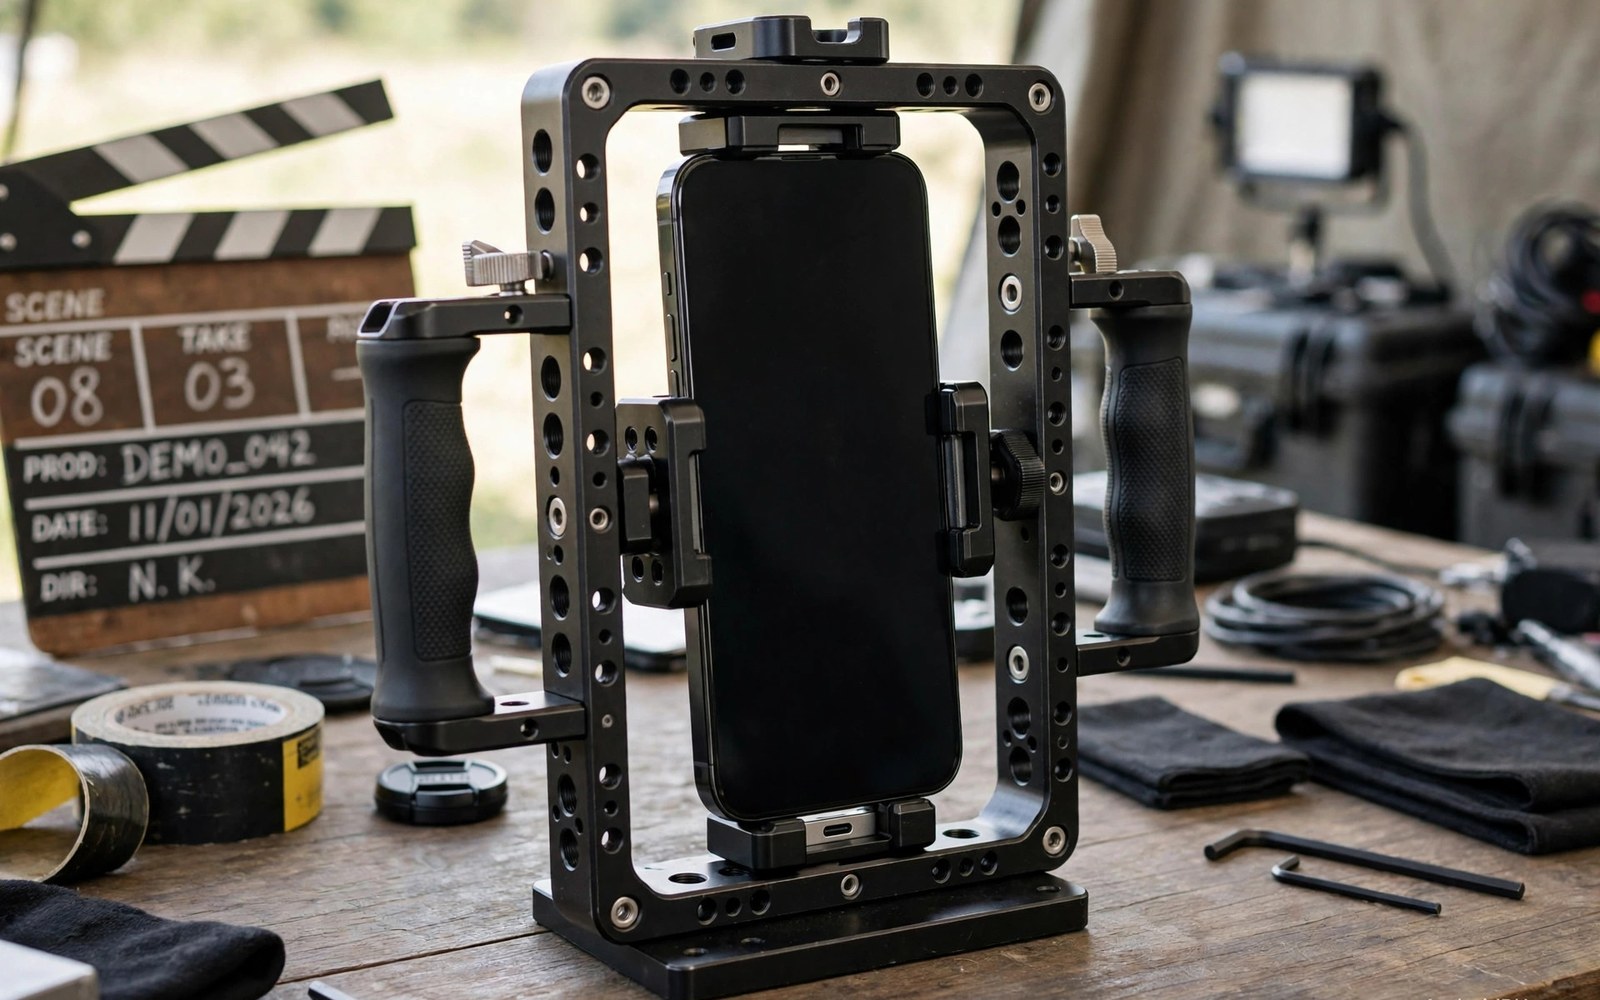
A camera cage is a metal frame that wraps around a phone and adds mounting points. Handles and lights and microphones and monitors bolt onto the frame instead of the phone. The phone becomes the centre of a small cinema rig rather than a bare handheld device. Filmmakers gain control and stability and accessory freedom in one frame.
Cages suit serious mobile video work where a bare phone limits the shoot. A documentary scene may need a shotgun microphone and a video light at once. A commercial clip may need smooth two-handed movement. A cage holds all of this together without tape or clamps slipping mid-take.
This guide explains cage fit and layout and balance for phone filmmakers. It covers handles and mounts and the habits that keep a rig usable across a long day. The goal is a rig that helps the story rather than distracting from it.
What a Cage Adds to a Phone
A cage adds threaded mounting points around the phone on all sides. Standard threads accept handles and lights and microphones and tripod plates. The phone itself carries no load from accessories because the cage takes the weight. Buttons and ports stay accessible through cutouts in most designs.
A cage also protects the phone during active shooting. The metal frame absorbs bumps that would otherwise hit the phone edges. A dropped rig still risks damage but the cage improves survival odds. Protection is a bonus rather than the main reason to buy a cage.
Two-handed shooting is the biggest handling gain. Handles on both sides let the operator hold the rig steady like a small camera. Pans feel smoother and tilts feel more controlled. Long takes tire the arms less because the load spreads across both hands.
A cage standardises the rig across shoots. Accessories stay in known positions and setup becomes repeatable. A crew can rebuild the same rig quickly on different days. Consistency matters when a project spans weeks of filming.
Cage Fit and Phone Compatibility
Cages are made for specific phone models or for adjustable universal fit. Model-specific cages fit tightly and align cutouts with buttons and lenses. Universal cages adjust to many phones but may block a button or sit loosely. Check cutout alignment for your exact phone before buying.
Case use complicates cage fit. Most cages require a bare phone or a very thin case. A thick case prevents the frame from closing properly. Plan to shoot without a case when using a cage and handle the bare phone with care between takes.
Lens position matters for clip-on accessories used with a cage. The cage must leave the camera area clear for filters or add-on lenses. Some cages include a filter mount over the lens area. Confirm clearance when you plan to use filters or anamorphic lenses with the rig.
Weight grows fast once accessories mount on a cage. A bare cage plus handles plus light plus microphone can double the handheld weight. Test the full rig weight on a practice shoot before a long day. A heavy rig that tires arms quickly hurts footage more than it helps.
Handles and Grip Layout
Side handles give the classic two-handed cinema grip. They bolt to the cage sides and often include cold shoe mounts on top. Wooden grips feel warm and comfortable on long days. Metal grips feel cooler and tougher but can chill hands in winter.
A top handle suits low angle shots and carrying the rig between setups. It also holds a monitor or a light above the phone. Top handles shift balance upward so use them with care during moving shots. A top handle plus side handles covers most shooting positions.
Grip position shapes balance more than grip material. Handles near the centre of mass reduce wrist strain. Handles far from the centre create leverage that tires arms. Slide handles along the cage rails until the rig hangs level in your hands.
Quick release handles speed up packing and transport. Remove handles for travel and refit them on location in seconds. Check that quick release levers lock firmly before a take. A handle that loosens mid-take can ruin a shot and endanger the rig.
Cold Shoes and Accessory Layout
Cold shoe mounts on a cage hold lights and microphones and receivers. Plan the layout before mounting anything. Put the microphone where it points at the subject without blocking the lens. Put the light where it lights the subject without flaring the lens.
Balance the rig front to back as accessories mount. A heavy light on top pulls the rig forward. A battery pack on the rear can restore balance. Balanced rigs pan smoothly while front-heavy rigs drift downward during tilts.
Cable management keeps a cage rig professional. Route microphone and light cables along the frame with clips or ties. Loose cables snag on clothing and pull accessories loose. A tidy rig also looks better when clients or subjects see it.
Leave the phone screen fully visible and touchable. A cage or accessory that blocks the screen slows focus and exposure control. Check every control you use often before finalising the layout. Filming with blocked controls forces awkward workarounds.
- Check cage cutouts against your exact phone model before buying any cage.
- Shoot without a thick case since most cages need a bare phone to close.
- Balance handles near the centre of mass to reduce wrist strain on long takes.
- Route cables along the frame so nothing snags during movement.
- Keep the screen and key controls fully reachable after accessories mount.
Rig Balance and Movement
A balanced rig moves like an extension of the operator body. Pans start and stop cleanly without overshoot. Tilts hold their end position without sagging. Balance testing takes a minute and pays back across every take of the day.
Test balance by holding the rig with one hand under its centre. It should hang level without tipping forward or back. Shift accessories or add a small counterweight until it levels. Record the layout so the next setup matches.
Walking with a cage rig still needs a steady gait. Bend the knees slightly and roll steps from heel to toe. A cage smooths handling but cannot replace good footwork. Practice walking shots in a hallway before filming them on location.
Tripod mounting a cage rig uses the base thread on the cage. The rig sits more securely than a phone clamp because the cage spreads the load. Use the cage thread for timelapses and interviews. The tripod plus cage combination gives the steadiest phone footage available.
CAGE RIG BUILD CHECK
1 Cage fits phone model with cutouts aligned
2 Handles placed near centre of mass
3 Microphone aimed at subject clear of lens
4 Light placed without lens flare
5 Cables clipped along the frame
6 Balance tested with one hand under centre
7 Screen and controls fully reachable
Building a Rig on a Budget
A budget cage rig starts with the cage itself and one handle. Add a microphone before a light because audio matters more than extra light. Add a light next when indoor shooting demands it. Staged buying spreads cost and reveals what you truly need.
Second-hand handles and mounts work well because metal accessories age slowly. Check threads for damage and locks for firm action before buying used gear. A used handle with clean threads performs like a new one. Save money on metal parts and spend on audio quality.
Avoid cheap plastic shoes and mounts that flex under load. Flexing mounts drift during takes and break without warning. Metal shoes cost more but hold accessories reliably for years. One solid mount beats three weak ones that fail mid-shoot.
Rig Audio: Shotgun vs Lavalier on a Cage
A shotgun microphone on a cage captures sound from the direction the camera points. It suits run and gun shooting where the subject moves with the camera. Wind protection is essential outdoors because shotgun microphones catch wind easily. A furry cover belongs on every outdoor shotgun.
A lavalier on the subject captures voice more closely than any cage microphone. It suits interviews where the subject stays near the camera. The lavalier receiver mounts on a cage shoe while the transmitter stays with the subject. Cable routing keeps the receiver clear of the lens.
Many cage rigs carry both microphone types and record both tracks. The shotgun track covers ambient sound and backup audio. The lavalier track carries clean primary voice. Editing chooses the best track per moment. Dual audio adds safety to important shoots.
Rig Transport and Packing
A built cage rig travels best in a padded case with compartments. Accessories stay mounted when the case allows it. Removing accessories for every trip wastes setup time and risks lost screws. A case that fits the built rig saves time daily.
Pack cables separately in a small pouch to avoid tangles. Label cables for microphone and light and power so setup stays fast. A tangled cable bag slows every shoot morning. Organisation is part of rig professionalism.
Check cage screws before packing and after unpacking. Transport vibration loosens small screws gradually. A quick screw check at both ends of a trip prevents mid-shoot failures. Carry a small tool set that fits every screw on the rig.
Cage Rig Lighting Positions
Cage lighting positions follow classic three-point lighting adapted to a small rig. The key light sits above the phone and slightly to one side. It defines the subject shape and provides main illumination. A cage shoe on top holds the key light securely. Key light angle matters more than key light brightness for flattering faces.
A fill light on the opposite side softens shadows created by the key light. Fill light should be dimmer than key light to preserve depth. A small panel on a side shoe serves as fill on a cage rig. Balance key and fill by checking shadow softness in the preview. Flat lighting from equal lights looks dull and should be avoided.
A back light or rim light separates the subject from the background. It sits behind the subject and points toward the camera. Cage rigs rarely carry rim lights because they need a second stand. A window or room lamp can serve as rim light in practice. Separation between subject and background elevates footage noticeably.
Filming Interviews with a Cage
Interview filming with a cage rig benefits from locked framing and clean audio. Mount the cage on a tripod for the interview itself. Handheld cage work suits b-roll better than long interviews. Tripod interviews keep framing steady while the conversation flows. Stable framing lets viewers focus on words rather than movement.
Position the cage so the interviewer sits near the camera but out of frame. Questions from just off-camera feel natural to viewers. The subject looks slightly off-lens rather than directly into it. This eyeline feels conversational rather than confrontational. Test eyeline with a short practice exchange.
Monitor audio continuously during interviews because audio failures ruin interviews completely. A cage-mounted receiver with visible level lights helps monitoring. Check levels between questions without interrupting the conversation. A backup audio recorder adds safety for critical interviews. Redundancy feels excessive until it saves a project.
For accessory mounting detail, see cold shoe mount adapters for lights and mics on phone rigs which explain shoe layout on a cage.
For better light on the rig, see ring lights and portable LED panels for mobile video shots and pick a panel that fits the cage.
For clearer voice on the rig, see external lavalier microphones that improve audio clarity in mobile vlogs and wire sound into the same setup.
The steps above follow the approach described in the official developer documentation and standard manufacturer guidance for camera rigs and mobile filmmaking. The fit checks and balance habits reflect common practice for caged phone rigs. Use them as a baseline and adapt the layout to your phone model and your shooting style.

