

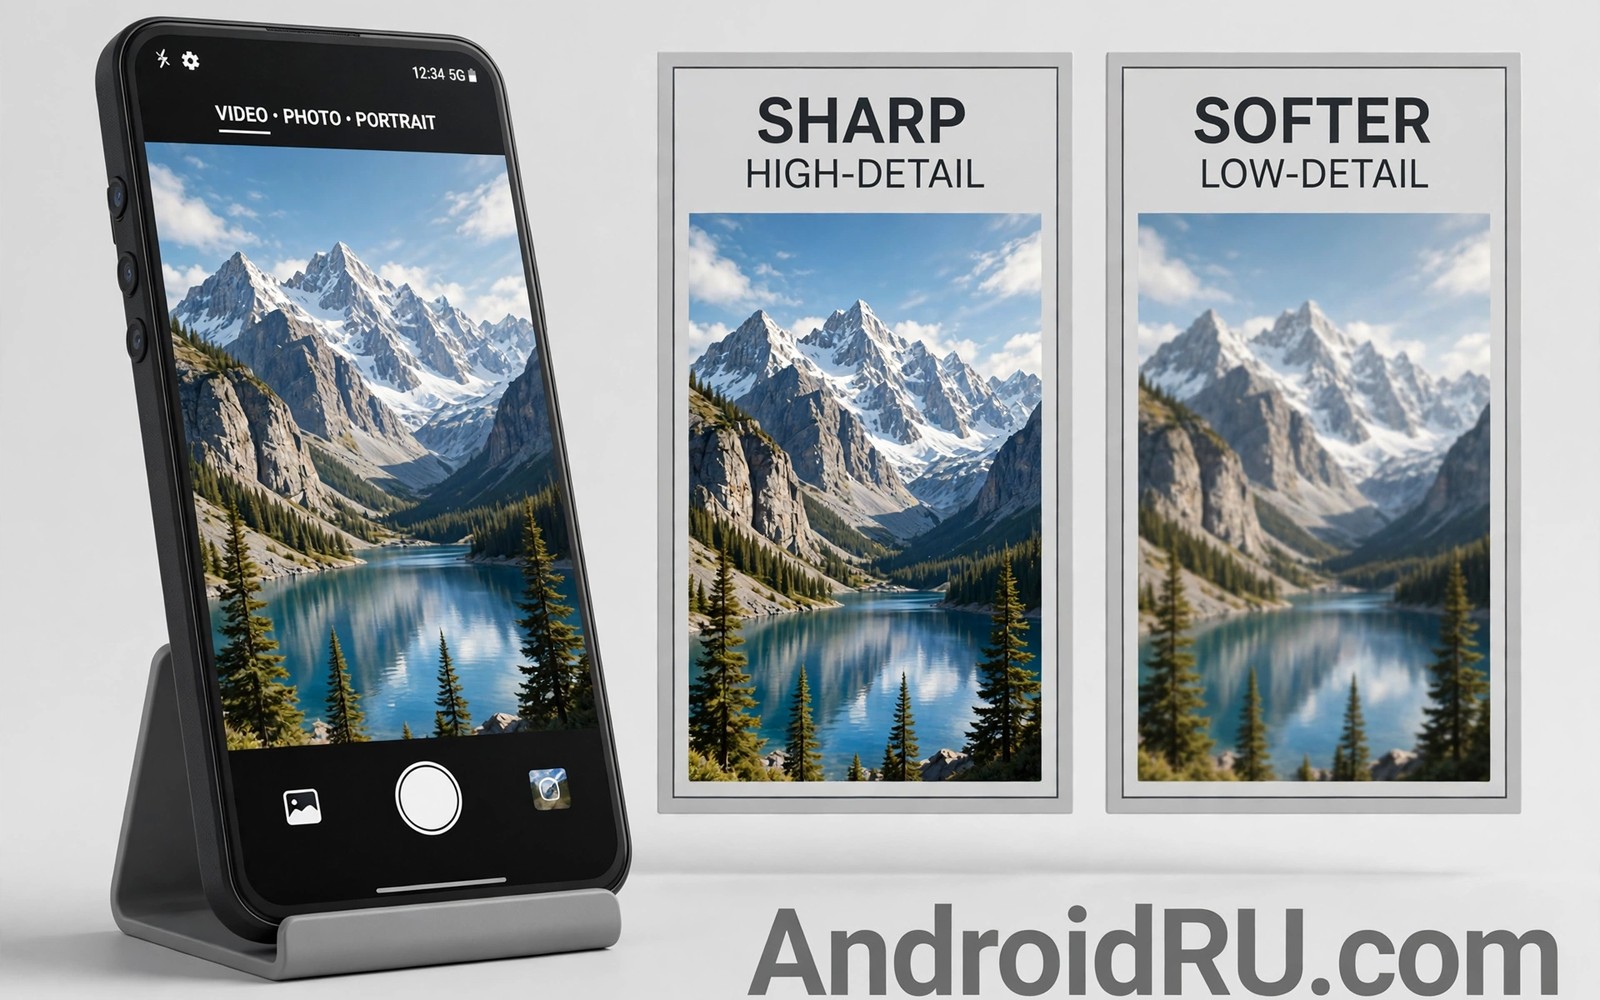
Stop Shooting 1080p: Why You Should Always Record Video in 4K
I switched my phone camera to 4K three years ago and I have never switched it back. The first clip that sold me was nothing special: my daughter running across a park on a grey afternoon. On the phone screen it looked fine in either resolution. On the living room television, the 1080p version looked soft around her hair and the grass turned into a green smear. The 4K version held every strand and blade. That gap is the whole argument in one evening. Phones now record 4K easily, televisions and laptop screens keep getting sharper, and sharing platforms squeeze every clip they receive. Starting from 4K is the cheapest insurance you can buy for footage you care about.
That said, this is not a claim that 1080p is unusable or that every clip on earth needs maximum resolution. A quick note to a friend, a clip of a whiteboard, or a ten-second check of a parcel at the door does not need 4K. The claim is narrower and stronger: for anything you might keep, rewatch, crop, stabilise, grade, or show on a big screen, 4K is the sensible default. The cost is real — bigger files, more heat, more battery — but every part of that cost has a practical answer, and this guide works through each one with settings, numbers, and a routine you can follow.
You will get a straight comparison of 1080p and 4K, the camera settings that matter most, a storage plan that stops the dreaded full-phone warning, heat control that actually works, and an editing workflow that runs on a normal phone. If you record family moments, travel, sport, or anything you plan to edit, read the comparison first, change one setting, and test it tonight.
1080p vs 4K Video on Android: The Real Difference in Pixels and Detail
The numbers are simple. A 1080p frame holds 1920 by 1080 pixels, about 2.1 megapixels. A 4K frame holds 3840 by 2160 pixels, about 8.3 megapixels. That is four times the picture information in every single frame, and at 30 frames per second that difference compounds into millions of extra pixels every second. On a phone screen held at arm’s length, much of that detail is hard to see. On a 55-inch television, a laptop, or a tablet propped on a table, it is obvious. Edges stay clean, text on signs stays readable, and textures like hair, fabric, leaves, and brick keep their structure instead of melting into flat colour.
Resolution is not the only thing that decides how good a clip looks. Bitrate, codec, sensor size, lens quality, and light all matter, and a badly shot 4K clip can look worse than a well shot 1080p clip. A shaky, noisy, badly exposed 4K video is still a bad video. What 4K does is raise the ceiling. Given the same light, the same steady hands, and the same phone, the 4K file carries more information into the edit and into the future. That is why the advice here is to fix the basics first — light, stability, exposure — and then let 4K preserve the result.
| Factor | 1080p video | 4K video |
|---|---|---|
| Pixels per frame | 1920 x 1080, about 2.1 MP | 3840 x 2160, about 8.3 MP |
| Detail on a large TV | Soft edges, textures blur | Sharp edges, textures hold up |
| Cropping headroom | Almost none before softness shows | Clean crop down to a 1080p frame |
| Stabilisation result | Stabilised output turns softer | Stabilised output stays sharp |
| File size per minute | Roughly 130 to 200 MB | Roughly 350 to 450 MB at 30fps |
| Sharing compression | Double compression hurts visibly | More starting detail survives the squeeze |
| Heat and battery | Low, comfortable for long takes | Higher, needs short takes and shade |
| Best use | Quick notes and throwaway clips | Memories, travel, events, anything edited |
What 8.3 megapixels per frame actually means
Think of each frame as a still photograph. A 2.1 megapixel still is fine for a small print and a phone screen. An 8.3 megapixel still is fine for a large print and a big screen. Video is just those stills flying past at 30 per second, so the same logic applies. When I filmed a street market in 4K, I could read shop signs in the background, count the weave in a basket, and see individual leaves on a stall canopy. The 1080p version of the same walk blurred those details into pleasant but vague colour. Both clips told the same story. Only one of them let me zoom in later and find a second story hiding in the background.
That extra detail also helps the software that processes your video. Noise reduction, sharpening, and colour grading all work better when they have more real information to work with instead of guessing. A colour grade applied to a 4K source holds skin tones and sky gradients more smoothly, with less banding. A grade applied to a thin 1080p source can push the same sky into visible stripes. If you ever plan to grade your footage, and Colour grading mobile footage with custom LUTs shows how much a good grade can add, start from the richest source you can capture.
Why 1080p still looks fine on a phone screen
Honesty requires saying this plainly: on a six-inch phone screen, a good 1080p clip looks great. Your eyes cannot resolve every pixel at normal viewing distance, and a clean 1080p file with a healthy bitrate is a pleasure to watch. If your videos never leave your phone, never get edited, and never play on a bigger screen, 1080p is a perfectly reasonable choice. The trouble is that almost nobody can promise that. A clip of a first birthday gets shown to grandparents on a television. A holiday clip gets edited into a film a year later. A funny moment gets cropped into a vertical clip for friends. Each of those uses punishes the lower resolution, and you cannot add detail back after the moment has passed.
Resolution numbers that matter when you export
Export size is where the maths becomes practical. A 4K master exported to 1080p for sharing looks sharper than a native 1080p recording, because the downscale averages four source pixels into one output pixel and that averaging cleans up noise. Editors call this oversampling, and it is the quiet reason professionals shoot higher than they deliver. Shoot 4K, edit in 4K, deliver 1080p for sharing, and keep the 4K master for the archive. You get the best of both worlds: a small friendly share file and a full-detail original that survives future screens.
Bitrate and codec: why resolution alone does not decide quality
Bitrate is the amount of data the camera spends per second, and it matters as much as resolution. A 4K clip at a starved bitrate can look worse than a 1080p clip at a generous one, because heavy compression throws away the very detail the extra pixels were meant to carry. Most Android phones record 4K at 30 frames per second with a bitrate in the range of 40 to 60 megabits per second, while 1080p sits nearer 15 to 25. Check your camera settings for a quality or bitrate option and choose the high setting for important shoots. Pair that with an efficient codec: HEVC, also called H.265, stores the same quality in a smaller file than H.264, though some older editors handle H.264 more smoothly. Test your editor with a short HEVC clip before a critical shoot so a compatibility surprise does not ruin the day.
Cropping, Reframing and Digital Zoom: Where 4K Pays for Itself
Cropping is the strongest practical reason to shoot 4K, and it is the reason I notice most in real use. A 4K frame contains enough pixels to cut away half the picture and still deliver a clean 1080p frame. That means a subject that sat too far to the left can move to the centre in the edit. A distracting bin at the edge can disappear. A wide safety shot of a whole stage can become a tight shot of one performer. Do the same crop to a 1080p clip and you are left with roughly a 960 by 540 image stretched back up, and the softness shows on any screen larger than a phone.
Wildlife, sport, and children benefit most, because you cannot always get closer. I filmed a heron across a lake in 4K and the bird was a small grey shape in the wide shot. Cropped in the edit, it filled the frame with feather detail intact. The same move on a 1080p file would have produced a grey smudge. Digital zoom while recording works the same way: a modest push-in on a 4K clip holds up, while the same push on 1080p turns mushy at once. The rule is simple. When you cannot control the distance, control the resolution.
How a 1080p crop from 4K stays sharp
The maths is forgiving. Cutting a 3840 by 2160 frame in half in each direction leaves 1920 by 1080, which is exactly a full 1080p frame. You can reframe by 50 percent with zero loss at 1080p delivery, and even a 25 percent crop leaves a frame well above 1080p that downscales cleanly. That freedom changes how you shoot. You can frame wide for safety, knowing the edit can tighten the shot later, instead of gambling on a tight frame in the moment and missing the action at the edges. Wide and safe beats tight and risky when the moment will not repeat.
Reframing vertical clips for short video from one 4K take
Short vertical video is the other place this pays off. A horizontal 4K clip contains enough width to cut a vertical 1080 by 1920 slice out of it and still look sharp, which means one take can serve both a television and a phone feed. Film the scene wide in 4K, then in the edit cut a vertical version that follows the subject. You never have to choose between formats while recording, and you never have to film the same moment twice. For creators who publish in both formats, that single habit saves more time than any other change in this guide.
4K Video Stabilisation: Why a Sharp Source Stabilises Better
Software stabilisation works by cropping the edges of the frame and shifting the picture to cancel shake. Every stabilised clip loses pixels around the border, and the amount lost depends on how shaky the original was. A 4K source gives the stabiliser pixels to spare: after the crop, the remaining frame still carries more detail than a native 1080p clip. A 1080p source has no spare pixels, so the same stabilisation leaves a softer result, and aggressive stabilisation can leave it visibly mushy. Walking shots need stabilisation most, and walking shots therefore benefit most from 4K capture.
Hardware helps even more than software. A small tripod for static shots and a gimbal for walking shots transform 4K results, because high detail reveals shake more clearly than low detail does. A shaky 4K clip honestly looks worse than a steady 1080p clip, so stability is not optional at this resolution. My rule is blunt: if I am walking and filming in 4K, I use a gimbal or I brace the phone with both hands and walk slowly. If I am standing still, the phone goes on a mini tripod. The hardware costs little and the difference on a big screen is large.
Electronic stabilisation and the pixels it eats
Check what your phone actually does before you rely on it. Some phones apply electronic stabilisation only in certain modes, and some switch it off at 4K 60 frames per second. Test your exact combination before an important shoot: record a short walking clip in each mode, play it back on the largest screen you own, and note which mode stays steady and which one judders. A television reveals shake and compression that a phone screen hides, so always judge stabilisation on the biggest screen available. The best setting is the one that stays smooth on that screen, not the one with the biggest number on the spec sheet.
4K Camera Settings That Matter: 30fps, 24fps, HDR and Bitrate
Open your camera app, switch to video, and look at the resolution and frame rate controls. Most Android phones offer 1080p and 4K at 30 or 60 frames per second, and some offer 24. My default is 4K at 30 frames per second, and it should probably be yours too. Thirty frames is smooth enough for everyday life, it keeps files and heat manageable, and it matches the frame rate of most televisions and sharing platforms. Sixty frames is for fast action — sport, running children, a dog sprinting — where slow motion or extra smoothness genuinely helps. Shooting everything at 60 doubles the heat and the file size for a benefit most clips never use.
Frame rate also shapes the feel of a clip. Twenty-four frames per second gives the slight motion blur people associate with cinema, and Enabling cinematic 24fps video walks through turning it on and using it well. That filmic look suits travel films, interviews, and quiet scenes. It suits fast sport badly, because the motion blur turns into smear. Pick the frame rate for the subject, not for the spec sheet, and keep 30 as the home base you return to.
4K at 30fps as the everyday default
Make the change once and leave it there. Set video resolution to 4K, frame rate to 30, and turn on grid lines and a level if your camera offers them. Straight horizons and level framing matter more at 4K, because the extra detail makes a tilted horizon easier to spot. Lock exposure on your main subject by tapping and holding on it, so the brightness does not hunt up and down while you film. Auto exposure hunting shows more clearly in high detail video than in low detail video, and a stable exposure looks professional even in imperfect light. A hunting exposure distracts even when the light is good.
When 60fps earns its extra heat and file size
Sixty frames earns its cost in exactly three cases: fast action you want to slow down, sport where you want to study movement, and clips where you know the smooth look matters to the viewer. In those cases the extra temporal detail is real. In every other case it is a tax. I filmed a football match at 4K 60 and the slow-motion replay of a goal was worth every megabyte. I filmed a birthday lunch at the same setting and gained nothing except a hotter phone and a fuller memory card. Match the setting to the subject and the phone will thank you.
HDR10, 10-bit colour and log profiles on phones
Many modern phones offer HDR video, 10-bit colour, or a flat log profile alongside 4K. HDR captures more range between the brightest highlights and the darkest shadows, which helps in mixed light like a bright window behind a person indoors. Ten-bit colour records finer steps between colours, which reduces banding in skies and skin when you grade. A log profile records a flat, washed-out image that holds more range for grading later but looks dull straight out of camera. My advice is to use HDR for important clips when your editor handles it well, skip log unless you genuinely grade every clip, and test HDR playback on your television before a family screening, because HDR that looks great on the phone can look dark or odd on an older screen.
4K File Sizes and Storage Planning for Android Phones
Storage is the honest objection to 4K, so let me give you honest numbers. At typical phone bitrates, one minute of 4K at 30 frames per second takes roughly 350 to 450 megabytes, while one minute of 1080p takes roughly 130 to 200 megabytes. An hour of 4K is therefore around 21 to 27 gigabytes. That sounds alarming until you compare it with modern phones: a 256 gigabyte phone holds roughly nine hours of 4K at that rate, and a 512 gigabyte phone holds roughly eighteen. The problem is not the total capacity. The problem is that photos, apps, and messages already live on the same memory card, and a full phone at an event is a real problem.
The answer is a routine, not a bigger phone. Move clips to a computer or a portable drive every week, delete failed takes on location while you still remember which ones they are, and keep only the keepers on the phone long term. A weekly transfer takes ten minutes and it prevents the full-phone surprise completely. For long shooting days, carry a fast portable drive and transfer clips during a lunch break. A midday transfer frees space for the afternoon, and it also protects you: a clip that exists in two places cannot be lost to one dropped phone.
How many minutes of 4K fit on 128GB, 256GB and 512GB
Usable space is always less than the number on the box, because the system and your apps take their share first. As a working guide, treat a 128 gigabyte phone as holding about two hours of 4K after everything else, a 256 gigabyte phone as holding about five to six hours, and a 512 gigabyte phone as holding about twelve hours. Those are rough figures and your phone will differ, so check the free space figure in settings before a big day rather than trusting memory. If free space is below 20 gigabytes on a shooting day, transfer first and shoot second. Running out of space halfway through a ceremony is the one 4K failure that is entirely avoidable.
HEVC vs H.264: file size, quality and editing compatibility
HEVC, or H.265, is the efficient choice: it stores the same quality in a file roughly 30 to 40 percent smaller than H.264, which is a large saving across a day of 4K. The trade-off is compatibility. Some older editors, older televisions, and some sharing tools handle H.264 more smoothly, and a file your editor cannot read is worse than a larger file it can. Before a critical shoot, record a thirty-second HEVC test clip, import it into your editor, and export it. If every step works smoothly, use HEVC everywhere. If anything stutters or refuses the file, use H.264 for that project and accept the larger files. Compatibility is a workflow decision, not a loyalty test.
Recording 4K Video Without Overheating Your Phone
Heat is the second honest objection, and it is real. Recording 4K asks the processor and the image sensor to work hard without a break, and phones have no fan. In direct sun on a hot day, many phones warn about heat after ten or fifteen minutes of 4K at 60 frames per second, and some stop recording to protect themselves. At 4K 30 in the shade, the same phone may record for an hour without complaint. The difference between those two situations is not luck. It is frame rate, sun, case, and take length, and you control all four.
The simplest heat routine is also the most effective. Shoot in 4K at 30 as the default, take the phone out of its thick case before a long take, keep the phone out of direct sun between takes, and film in short takes of a few minutes instead of one endless recording. Short takes also edit better: they force you to think about each shot, and they make it easy to delete the failures. Recording 4K video without overheating covers the same ground with extra tricks for long sessions, including shade, airflow, and when to let the phone rest between clips.
Why phones heat up in 4K and where the heat comes from
Three parts of the phone generate the heat: the image sensor capturing 8.3 million pixels thirty times a second, the processor encoding that stream into a compressed file in real time, and the screen if you leave it at full brightness while recording. A thick case traps that heat against the body, and direct sun adds heat from outside at the same time. That is why the same phone behaves so differently indoors and outdoors. Indoors, with the screen dimmed and the case off, 4K is easy work. Outdoors in summer sun, with a case on and the screen blazing, it is hard work. Change the conditions and you change the result.
A practical heat routine for long 4K takes
Here is the routine I use on hot days, in order. First, set 4K at 30 and close every other app, because background work adds heat for no benefit. Second, remove the case and dim the screen to the lowest level you can still frame with. Third, film in takes of three to five minutes, then lower the phone into shade for a minute while you plan the next shot. Fourth, if a heat warning appears, stop at once, move to shade, and let the phone cool for ten minutes rather than forcing it — a forced phone shuts down mid-take and loses the clip. Fifth, carry a small power bank, because a charging phone generates extra heat, so charge between takes, never during a long one. Follow that routine and heat stops being a reason to avoid 4K.
Editing 4K on Android: Proxies, Timelines and Exports
Editing 4K on a phone sounds demanding, and on a weak phone it can be, but two techniques make it comfortable on almost any modern device. The first is proxy editing. A proxy is a low-resolution stand-in file that your editor uses for smooth timeline playback, while the final export still uses the full 4K sources. With proxies on, the timeline scrubs smoothly even on a modest phone, and the export quality is untouched. If your editor offers proxies, turn them on before you import a 4K project. If it does not, the second technique matters more: edit in short sequences rather than one long timeline.
Short sequences export faster, crash less often, and keep phone memory use manageable. Cut the holiday film into one sequence per day, finish each one, then join the finished pieces at the end. That method also encourages tighter storytelling, because a short sequence forces you to keep only the best shots. Tight sequences hold a viewer’s attention far better than a long ramble through every clip you recorded. When the edit is done, export two masters: a 1080p share master that uploads fast and plays smoothly everywhere, and a 4K archive master that preserves full detail for the future. A single master forces a compromise, and two masters serve two purposes well.
Proxy editing explained for modest phones
Proxies confuse people the first time they meet them, so here is the plain version. Your editor creates small, easy files that look like your clips but carry far less data. You cut, trim, and arrange using those small files, and the timeline stays smooth. When you press export, the editor goes back to the original 4K files for the real work, so nothing about the small files touches the final quality. The only cost is a little time while the proxies generate and a little extra space while they exist. Delete them after the export and the space comes back. It is the single best trick for editing 4K on a phone that is not a flagship.
Export settings: a 1080p share master and a 4K archive master
Export the share master at 1080p, 30 frames per second, with a healthy bitrate, because that file will survive the sharing platform’s compression and still look clean. Export the archive master at full 4K with the highest quality your editor offers, and name it clearly with the date, the place, and the subject, so you can find it in a large archive years later. A clear name takes seconds on transfer day while the memory is fresh, and it saves hours later. A lost clip is as bad as a deleted clip, and a clear name is the cheapest insurance against losing one.
Frequently Asked Questions About Shooting 4K Video on Android
Does 4K drain battery much faster than 1080p?
Yes, 4K uses more processing power and more battery, because the sensor and the encoder work harder on every frame. The difference is manageable at 30 frames per second: expect roughly 20 to 30 percent faster battery use than 1080p, not double. Short takes, a dimmed screen, and closed background apps shrink the gap further. Carry a power bank for long 4K days and charge between takes rather than during them, and the battery cost becomes a footnote rather than a reason to avoid 4K for important clips.
Can older phones handle 4K editing?
Many older phones record 4K but edit it slowly, and the fix is the proxy workflow described above. Use proxy editing for smooth timelines, edit in short sequences, and export a 1080p share version for speed while keeping the 4K master for the archive. If your phone still stutters, transfer the project to a computer for the heavy edit and keep the phone for capture. The capture is the irreplaceable part; the edit can happen on any screen.
Is 4K worth it for social media clips?
Yes, for any clip you might reuse, because sharing platforms compress uploads heavily and a 4K source survives that compression with more detail than a 1080p source. It also lets you crop one horizontal take into a vertical version without a second shoot. For a quick throwaway note that nobody will keep, 1080p is fine and faster. The test is simple: if you would be annoyed to lose the clip, shoot it in 4K.
Should I shoot 4K at 60fps for everything?
No. Use 4K at 60 only for fast action you want to slow down or study, such as sport and running children. For everything else, 4K at 30 gives you the detail without the heat, the battery cost, and the doubled file sizes. A phone that overheats in 4K at 60 may run cool at 30, and most everyday video needs only 30 frames per second. Default choices matter more than maximum specs, and 30 is the default that earns its keep every day.
Your Next Shoot in 4K Starts Today
Change one setting before your next outing: switch video resolution to 4K and frame rate to 30, then leave it there for a week. Film something ordinary — a walk, a meal, a child playing — and watch it on the largest screen you own next to a 1080p clip of the same scene. The difference will settle the argument better than any article can. Then set up the weekly transfer routine, delete the failed takes on location, and keep the 4K masters of the clips that matter. A year from now, when those clips play on a screen sharper than the one you own today, you will be glad the detail is already there. The weekly transfer routine and the 4K at 30 frames per second default are the two habits that make the whole system work, and the proxy editing workflow is what keeps it comfortable on a normal phone.

