

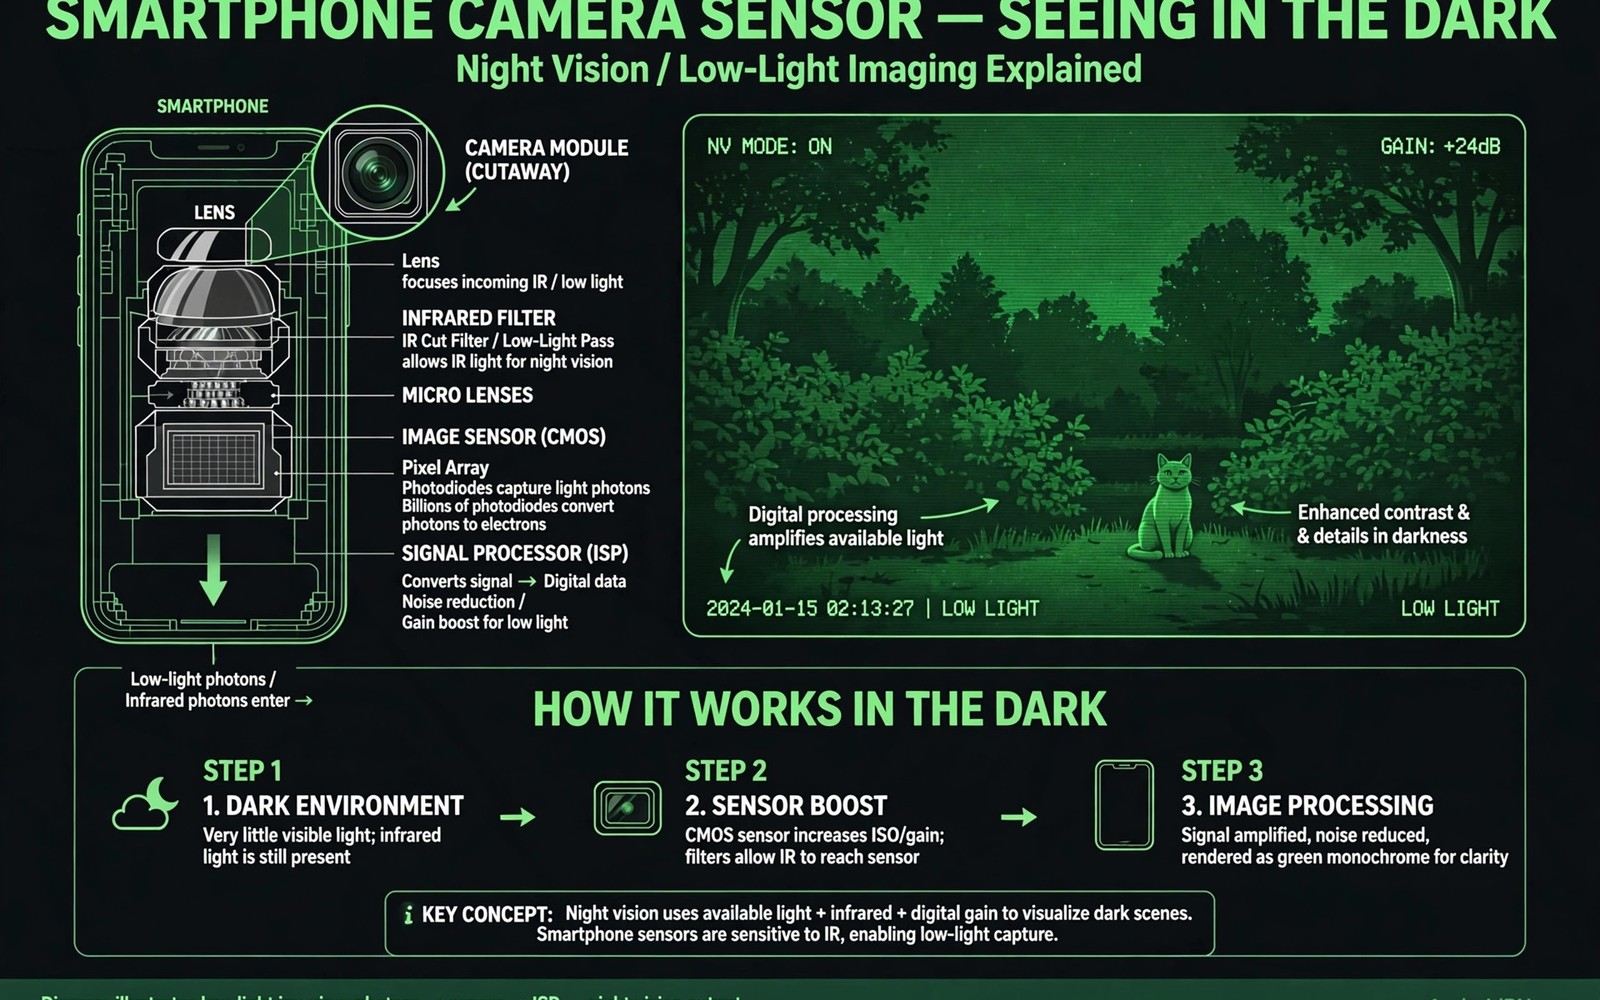
Cheap camera sensors can see in the dark better than many owners realise because silicon sensors respond to infrared light that human eyes cannot see. Phone makers add infrared filters to block that light for normal colour accuracy. Even with a filter some infrared sensitivity remains and clever techniques exploit it. Long exposures and infrared illumination turn an ordinary phone into a useful night vision tool.
True military night vision uses specialised sensors and intensifiers that phones cannot match. Phone night vision means usable images in very low light rather than perfect green night vision from films. Set expectations honestly and the techniques in this guide will impress you. Readers who want general night improvement should also read night shots that stay sharp without a tripod for stability foundations.
Start by testing your phone sensor in a dark room with a television remote control. Point the remote at the camera and press a button while watching the preview. Many phones show the infrared LED as a bright glow that eyes cannot see. That simple test proves your sensor responds to infrared light already.
Understand infrared and sensor limits
Infrared light sits just beyond red in the spectrum and silicon sensors detect it naturally. Phone manufacturers place a filter over the sensor to block most infrared for accurate daylight colours. That filter reduces but rarely eliminates infrared sensitivity completely. Some cheap phones use weaker filters and therefore show stronger infrared response than flagship phones.
Removing the infrared filter requires opening the phone and risks permanent damage so this guide does not recommend it. External techniques work without hardware surgery and they keep your warranty intact. Infrared illuminators and long exposures exploit remaining sensitivity safely. Accept that results will vary by phone model because filter strength differs.
Colour accuracy suffers in infrared assisted photos because infrared light tints images pink or purple. That tint is normal and it signals that infrared light contributed to the image. Convert infrared assisted photos to black and white for a classic night vision look. Monochrome conversion hides tint and emphasises detail that colour tint distracts from.
Use infrared illumination safely
Infrared illuminators are small LED lights that emit invisible infrared light for cameras to see. They work like a flashlight that humans cannot see but phone sensors can detect. Place an illuminator near your phone and point it at the subject in darkness. The phone preview will brighten dramatically as infrared light reflects back.
Choose an illuminator with a wavelength near 850 nanometres because many phone sensors respond well there. A faint red glow may be visible from the LED itself at close range but the beam remains largely invisible. Avoid shining infrared lights directly into eyes for long periods because invisible light still carries energy. Use illuminators responsibly and briefly for photography rather than continuously.
Test illuminator range in a dark garden before relying on it for a real subject. Infrared light falls off with distance like visible light so close subjects work best. A subject within a few metres illuminates well while distant subjects stay dark. Plan night vision shots for close subjects such as pets or garden wildlife.
Combine long exposure with night mode
Night mode on phones already stacks frames to brighten dark scenes without extra hardware. Combine night mode with a tripod for the longest cleanest exposures in very low light. Stillness matters because long stacks blur with any movement. A tripod turns a cheap sensor into a capable low light camera for static scenes.
Manual pro mode offers even longer exposures on some phones when you set shutter speed directly. A shutter of several seconds gathers far more light than a normal photo. Use a tripod and a timer delay to avoid shake at the start of a long exposure. That combination reveals scenes that look pitch black to the eye.
Light painting adds selective illumination during a long exposure by moving a dim light across the scene. A small torch moved slowly can reveal a whole garden during a ten second exposure. Keep the light moving to avoid hot spots and practise the movement before a real shot. Light painting turns long exposure into a creative night vision technique.
Try thermal style apps with honesty
Some apps claim thermal vision but phones without thermal sensors cannot measure heat directly. Those apps usually apply a false colour filter to a normal low light image. That filter looks like thermal imaging but it does not detect temperature. Understand the difference before trusting an app for safety or inspection work.
False colour apps can still help visualisation by emphasising brightness differences in dark scenes. Use them for fun and for spotting bright objects in darkness rather than for serious thermal diagnosis. A bright object in a false colour view may simply reflect infrared light rather than emit heat. Honest labelling matters when sharing such images.
adb shell dumpsys media.camera | grep -i infrared
adb shell settings put system camera_night_mode 1
adb shell ls /sdcard/DCIM/Camera/ | head -20
The commands above follow the standard Android developer workflow for checking infrared and night camera behaviour from a computer. Credit for this method belongs to the wider Android developer community that explores these tools for everyday infrared and night checks.
Build a simple night vision setup
Mount your phone on a small tripod and attach an infrared illuminator beside it with a clamp. That rig keeps light and camera aligned for consistent results. Power the illuminator with a small battery pack for portable night work. Test the rig in your garden at night before taking it to a wildlife location.
Use a remote shutter or timer to avoid touching the rig during capture. Touching the rig shifts alignment between illuminator and subject. A stable rig produces cleaner images than a handheld attempt in darkness. Stability remains the most important factor even with infrared help.
Review night vision photos in monochrome because colour tint from infrared light distracts from detail. Convert to black and white in any editor and adjust contrast gently. Monochrome night vision photos look professional and they hide the pink tint completely. That conversion is the final step in a convincing night vision workflow.
Use night vision for wildlife watching
Wildlife watching suits phone night vision because animals often appear at dusk and dawn in low light. Set up a tripod near a garden feeding spot and wait quietly with an infrared illuminator ready. Animals ignore infrared light far more than visible light so they behave naturally. Patience and silence matter more than camera settings for wildlife success.
Garden birds and hedgehogs appear reliably at feeding spots after dark in many areas. Place food in a consistent spot and let animals learn the location over several nights. Photograph them from a hide or a window to avoid disturbing their routine. Consistent feeding spots produce repeated photo opportunities over a season.
Nocturnal insects around a porch light also make fascinating night vision subjects. A porch light attracts moths that rest on walls in large numbers. Photograph moths with a tripod and a long exposure for detailed wing patterns. That simple setup turns an ordinary porch into a night nature studio.
Security and home monitoring can use phone night vision for checking a garden or driveway after dark. Mount the phone temporarily on a window sill with an infrared illuminator outside. Review photos the next morning for animal visitors or unexpected activity. Phone night vision will not replace a dedicated security camera but it works well for occasional checks.
Night vision for stargazing support helps you navigate a dark observing site without ruining night vision with white light. Use a dim infrared light to read charts while your eyes stay dark adapted. That trick preserves your natural night vision for telescope viewing. Phone night vision complements rather than replaces dark adapted eyes.
Camping trips benefit from phone night vision for checking tents and paths after dark without waking others with bright lights. A brief infrared assisted photo shows whether a path is clear or a tent flap is open. That quiet check respects fellow campers while keeping you safe. Pack an infrared illuminator as part of a camping kit for these checks.
Common mistakes
The biggest mistake is expecting film style green night vision from a phone without specialised hardware. Phone night vision produces usable monochrome low light images rather than military grade vision. Set honest expectations and you will enjoy the real results.
Another mistake is shining infrared light into eyes or using it to invade privacy in darkness. Infrared photography still photographs real people and places. Respect privacy and local laws when using night vision techniques anywhere.
People also forget that infrared illuminators have limited range and then blame the phone for dark distant subjects. Keep subjects close and test range before important shots. Range limits are physics rather than phone failure.
Frequently asked questions
Can my phone really see infrared light?
Most phone sensors retain some infrared sensitivity despite filters. Test with a television remote in a dark room to see the infrared glow on your preview screen.
Do I need to remove the infrared filter?
No. This guide uses external illuminators and long exposures without opening the phone. Filter removal risks damage and voids warranty for most users.
Is phone night vision legal?
Using night vision for personal photography is generally legal but privacy laws still apply. Do not photograph people in private spaces without consent regardless of light type.
Conclusion
Cheap camera sensors become useful night vision tools through infrared illumination and long exposures and tripod stability. Test your sensor with a remote control and build a simple rig for close subjects. Convert results to monochrome for a classic night vision look.
Your concrete next step is to test your phone with a television remote tonight in a dark room. If you see the infrared glow then try a night photo with a small infrared light tomorrow. Readers who love dark sky work will enjoy Pixel astrophotography mode on unsupported phones and Night Sight hacks instead of flash as natural follow-ups.

