

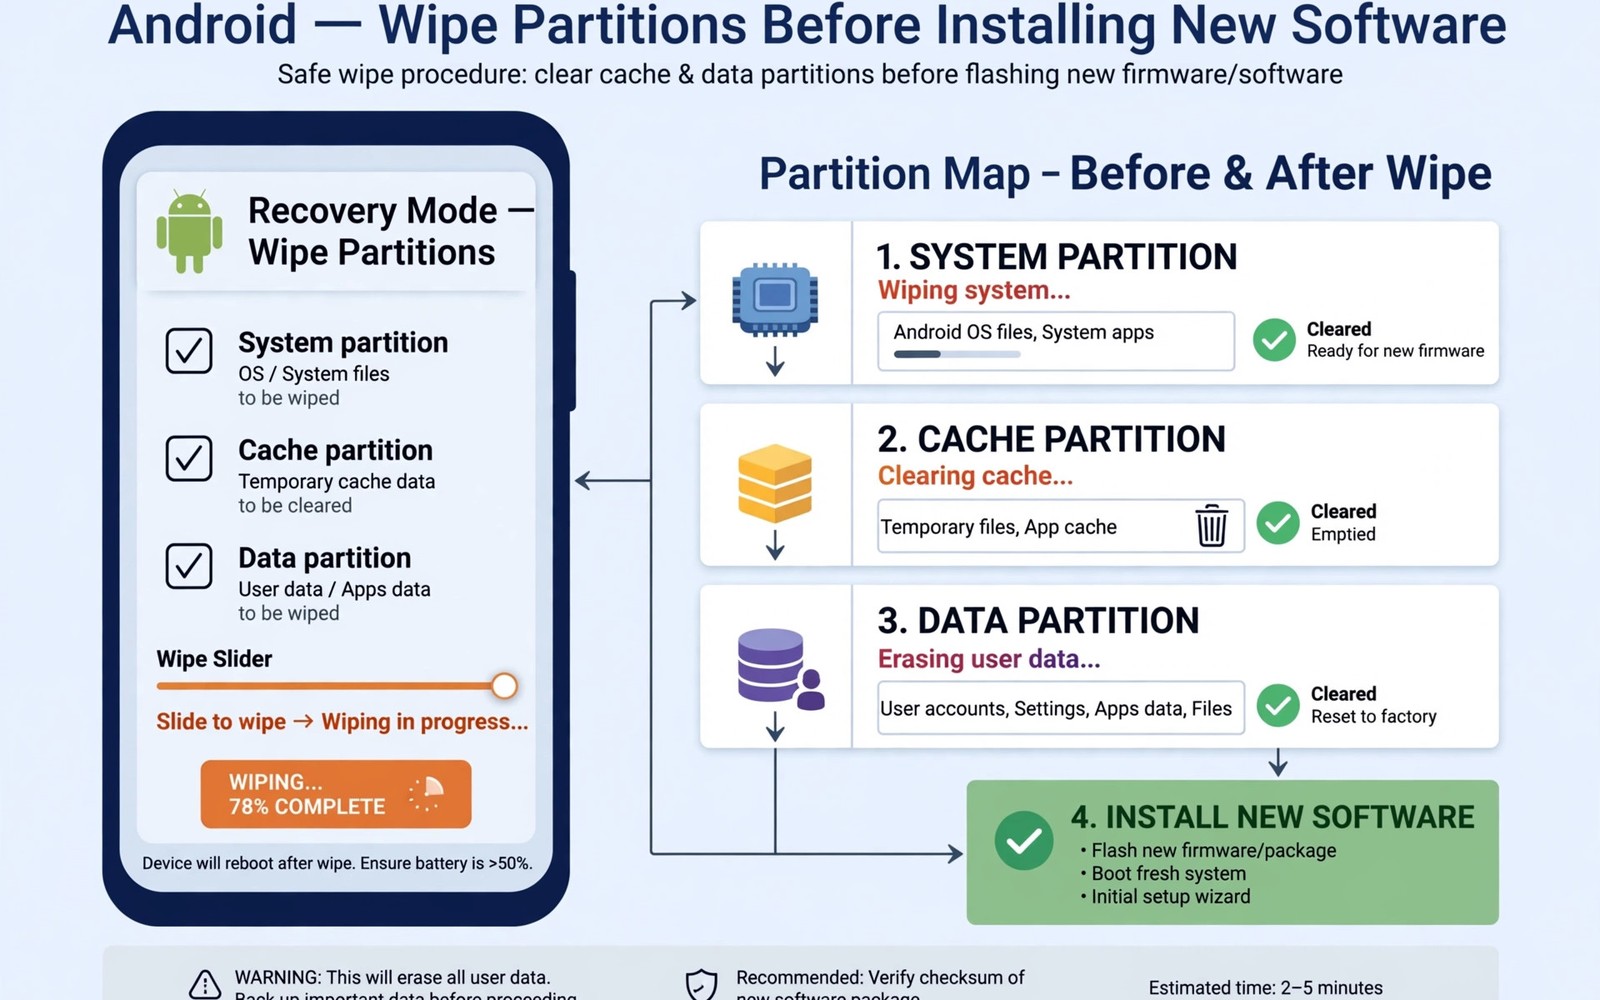
Wiping is the most misunderstood step in flashing. Many users wipe everything out of caution. Others wipe nothing and wonder why the new system crashes. Correct wiping sits between those extremes. Each partition has a purpose and wiping it has a specific effect.
This guide defines each common wipe and when to use it. It also explains clean flashes and dirty flashes in plain terms. By the end you can choose a wipe set with confidence. You will also know which wipes threaten personal files.
What Each Partition Holds
System holds the operating system and built in apps. Cache holds temporary files that apps and the system regenerate. Data holds your installed apps and settings and personal files. Dalvik cache holds optimized app code that rebuilds on boot. Vendor holds hardware support files on many devices.
Internal storage is often part of data but recovery may treat it separately. Some wipes erase internal storage files like photos. Others leave internal storage untouched while erasing app data. Read the wipe description on screen before confirming. The label matters more than the general advice in any guide.
- System wipe removes the operating system but not personal files by itself
- Cache wipe removes temporary files and is safe in most cases
- Data wipe removes apps and settings and usually personal files too
- Dalvik wipe removes optimized code that rebuilds automatically
Cache and Dalvik Wipes
Cache wipes fix many small glitches after updates. Stale temporary files can cause app crashes or slow behavior. Wiping cache forces fresh temporary files on next boot. Personal data stays untouched by a cache wipe. That safety makes cache the first wipe to try for minor issues.
Dalvik wipes work similarly for optimized app code. After a system change old optimized code may mismatch the new system. Wiping Dalvik forces reoptimization on the next boot. First boot after a Dalvik wipe takes longer than usual. That delay is normal and not a fault.
Neither wipe fixes deep system corruption or bad data settings. They help with temporary and optimization problems only. If crashes persist after cache wipes then look deeper. A data issue or a system issue likely needs a stronger step.
System Wipes
A system wipe removes the operating system before a fresh install. ROM installers often wipe system themselves as part of flashing. Manual system wipes prepare a clean target for a new ROM. Without a system wipe old system files can linger and clash. Clean installs therefore usually include a system wipe.
Never wipe system unless you have a ROM or backup ready to install. A phone without a system cannot boot Android. Recovery can still rescue it by flashing a new system. But a system wipe with no install plan turns a working phone into a project. Always stage the next install before wiping system.
Data Wipes and Factory Resets
A data wipe is the destructive step in most flash workflows. It removes apps and settings and accounts from the device. On many recoveries it also removes internal storage files. Photos and downloads can vanish with a data wipe. Back up everything important before confirming one.
Data wipes are required when switching ROM families. Old app data from one ROM can crash a different ROM. Data wipes are also required after major version jumps in many cases. Updates within the same ROM family often skip data wipes. The ROM update notes state the requirement for each release.
Formatting data differs from a simple data wipe on encrypted devices. Formatting removes encryption keys and fully clears the partition. A simple wipe may leave encryption metadata behind. When changing encryption state or fixing lock issues, format is the stronger tool. Use it only when you accept total data loss.
Clean Flash Versus Dirty Flash
A clean flash wipes system and data before installing a new ROM. It gives the new system a fresh environment with no old settings. Clean flashes fix the widest range of strange bugs. They cost setup time because apps and settings must be restored. That cost is worth paying when switching ROM families.
A dirty flash installs a new version over the old install without wiping data. It preserves apps and settings across an update. Dirty flashes work best within the same ROM family and version line. They can carry over bugs from old data as well. When a dirty flash misbehaves, a clean flash is the next step.
ROM flashing order and package choice matter alongside wiping. You can review flashing custom ROM zip files and GApps packages to pair wipe choices with install steps. Wipe and flash form one workflow rather than separate tasks.
Choosing a Wipe Set
For a new ROM family choose system and data and cache and Dalvik. That set is the standard clean flash. For an update in the same family choose cache and Dalvik only. That set preserves data while clearing stale temporary files. For a minor glitch try cache and Dalvik first before stronger wipes.
Always back up before a data wipe of any kind. Copy the backup off the device when possible. A backup on internal storage may vanish with the wipe itself. External storage or a computer copy avoids that trap. The backup habit makes bold wiping safe rather than scary.
adb reboot recovery
adb shell ls /sdcard/
adb pull /sdcard/backup ./backup-copy
The commands above help verify backup storage before wiping. Confirm the backup folder exists on safe storage first. Only then proceed with destructive wipe choices. A verified backup changes wiping from a gamble into a routine step.
Common Wiping Mistakes
Wiping internal storage by accident is the most painful mistake. Users tap advanced wipe options without reading labels. Internal storage holds photos that no ROM reinstall restores. Read every selected partition before swiping to confirm. Untick anything you did not intend to erase.
Wiping system without an install ready is another classic error. The phone then has no operating system to boot. Recovery can fix it but the scare is avoidable. Stage ROM files on storage before any system wipe. A ready install turns a wipe into a short step.
Skipping data wipes when switching ROM families causes the opposite problem. Old settings clash with the new system and apps crash. Users then blame the ROM for a wipe mistake. Follow the ROM notes on data wipes exactly. When notes are unclear, choose a clean flash.
Queue order also affects wipe timing in multi package installs. Learn about managing flashable zip install queues so wipes happen before installs and not between packages. Order discipline prevents half installed states.
After a good wipe and install, capture a baseline backup right away. The guide to creating full Nandroid backups in recovery explains how to preserve the fresh setup. That baseline makes future wipes painless.
Advanced Wipe Options Explained
Advanced wipe screens list partitions individually for manual selection. System and vendor and data appear alongside cache and Dalvik. Internal storage may appear as a separate advanced option. Selecting internal storage erases photos and downloads directly. That option demands extra attention before confirmation.
Some recoveries offer a format data button separate from wipe data. Format data removes encryption keys and fully clears the partition. Wipe data may preserve encryption metadata on some setups. Format suits encryption state changes and lock repairs. Wipe suits routine clean flashes within the same encryption state.
Vendor wipes deserve caution on modern devices. Vendor holds hardware support files tied to the ROM version. Wiping vendor without a matching ROM ready breaks hardware support. ROM installers usually handle vendor correctly by themselves. Manual vendor wipes belong to advanced workflows only.
Recovering From a Wrong Wipe
A wrong wipe feels catastrophic but recovery often saves the day. Wiping system alone is fully recoverable with a ROM flash. Wiping cache alone is harmless because caches rebuild automatically. Wiping data alone is the painful case for personal files. Backups and cloud sync decide how painful that case becomes.
After a wrong system wipe, flash the intended ROM immediately. The phone returns to working order with data intact in many cases. After a wrong data wipe, restore the newest backup available. Cloud restores can refill contacts and photos partially. Accept partial recovery gracefully and rebuild the rest.
Prevention beats recovery for wipe mistakes every time. Read each selected partition aloud before swiping confirm. Untick internal storage unless you truly intend to erase it. A five second review prevents hours of restoration work. Slow wiping is safe wiping in practice.
- Format data differs from wipe data on encrypted devices
- Vendor wipes need a matching ROM ready to install
- System wipes recover fully with a ROM flash
- Review every ticked partition before confirming
Wiping in Special Situations
Switching encryption states requires stronger wiping than routine flashes. Format data clears encryption keys that simple wipes leave behind. Use format when moving between encrypted and unencrypted setups. Use format also when lock credentials change encryption behavior. Simple wipes leave metadata that can confuse new setups.
Selling or giving away a phone demands a thorough wipe as well. Format data plus a stock system restore protects personal files. Encryption plus format together make old data practically unrecoverable. Verify the phone boots to setup wizard afterward. A setup wizard screen confirms personal data removal.
Returning a phone for warranty service may need stock restoration too. Flash stock software and relock the bootloader when policy requires it. Keep records of the restoration steps taken. Warranty reviewers appreciate clear restoration history. Stock state plus format data satisfies most return requirements.
The steps above follow the approach described in the official developer documentation for this platform. That documentation explains partition roles and factory reset behavior in general terms. It also covers encryption effects that change wipe outcomes. Combine it with ROM notes for your exact device build.

