

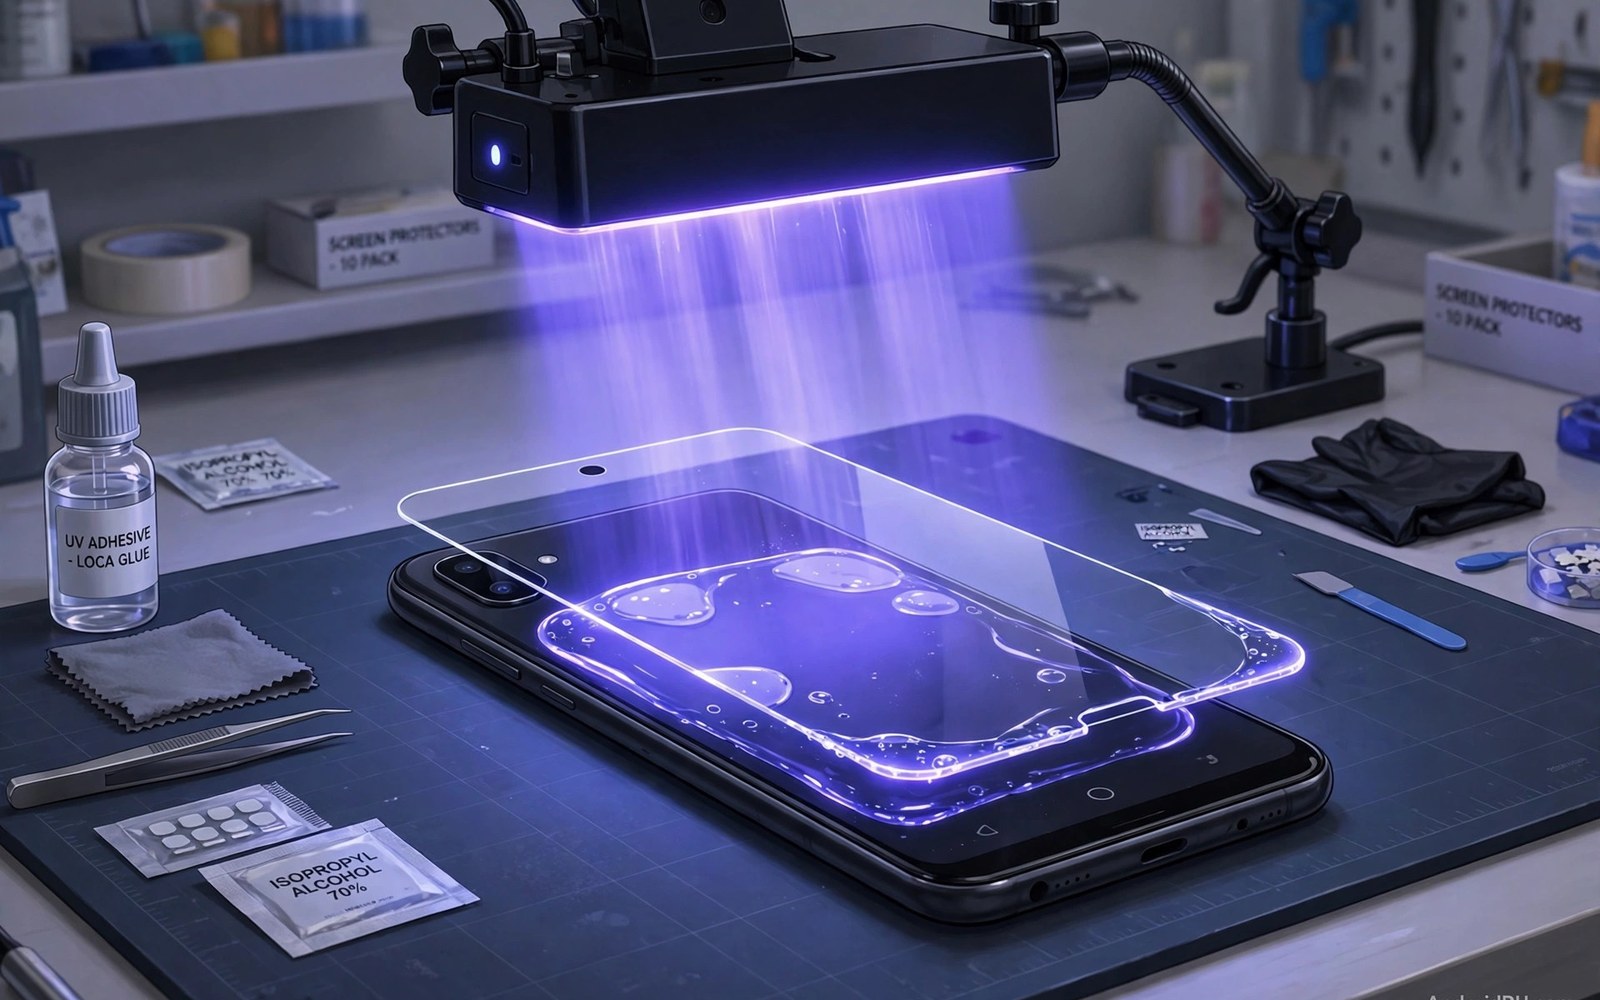
Curved screens are hard to protect with standard glass. Flat glass cannot follow a curved edge. It lifts at the sides and it leaves a halo gap. UV liquid adhesive glass solves this problem. It uses liquid glue that fills the full screen curve. A UV lamp then hardens the glue into a firm bond.
The result is a glass protector that sticks across the whole screen. Touch response stays even at the curved edges. The protector looks almost like part of the screen. Fitting needs more care than standard glass. The liquid step adds risk if handled badly. This guide covers fitting and removal in safe detail.
Read the full guide before opening the packet. The process has timed steps that cannot pause midway. Prepare every tool in advance. If you need a basic fitting method first, see the bubble-free screen protector application guide for core cleaning and alignment skills.
What Is In The Kit
A UV kit contains a glass sheet and a small tube of liquid adhesive. It contains a UV lamp for curing. It contains cleaning wipes and dust stickers. It also contains speaker and port covers. Those covers stop liquid from entering openings. Use every cover supplied. Liquid in a speaker grille is hard to remove.
The adhesive is a clear liquid resin. It stays fluid until UV light hits it. The lamp triggers hardening within a minute or two. The bond becomes firm and transparent. It also fills tiny gaps under the glass. That full contact is why curved screens feel responsive with UV glass.
Check the kit matches your exact phone model. Camera holes and edge curves differ by model. A wrong kit leaves gaps or covers a sensor. Check the lamp battery or charging state before starting. A lamp that dies mid cure ruins the bond. Charge the lamp fully the night before.
Preparation Steps
Cover the earpiece and side buttons with the supplied stickers. Cover the charging port as well. Liquid flows easily into small openings. A blocked speaker sounds muffled after fitting. Prevention takes two minutes. Repair takes far longer and it may need a service visit.
Clean the screen fully with the wet wipe and the cloth. Check under angled light for dust. Use a dust sticker as a final pass. Place the phone flat on a stable table. A tilted phone lets liquid pool to one side. Level placement gives an even glue layer.
Place the glass sheet nearby with its backing ready. Know exactly how you will lower it. Practice the motion once without glue. A rehearsal prevents hesitation during the real step. Hesitation lets glue spread unevenly. Confidence comes from one dry run.
Applying The Liquid And Glass
Squeeze the adhesive tube onto the centre of the screen. Use the full tube amount stated in the instructions. Too little glue leaves dry patches under the glass. Too much glue spills over the edges. Follow the kit amount exactly. Different kits use different volumes.
Lower the glass slowly from one edge. Let the liquid spread ahead of the glass edge. The spreading line pushes air out as it moves. Do not press the centre down first. Centre pressure traps air in a ring around it. Slow edge lowering gives a clean spread.
Wait for the liquid to reach all edges. It should form a thin even line at the border. Wipe excess liquid from the edges with a cloth. Do not cure yet if bubbles remain. Small bubbles can be coaxed to the edge with light pressure. Cure only when the spread looks even and bubble free.
Curing With The UV Lamp
Place the lamp over the screen as directed. Cure in short passes across the surface. Move slowly so every area gets light. Most kits need one to two minutes of total curing. Follow the kit time exactly. Under curing leaves soft glue that shifts later.
Cure the edges with extra care. Edge glue hardens slower if the lamp sits high. Hold the lamp close to the border for a few seconds. Check that the glass no longer slides when touched lightly. A firm glass means curing worked. A sliding glass needs more lamp time.
Remove the port and speaker covers after curing. Check openings for stray glue. Wipe the phone edges clean. Test touch response across the screen. Test edge swipes and the fingerprint sensor. Re-register fingerprints if the sensor feels slower than before. Scanner behaviour is explained in how protectors interact with fingerprint scanners for sensor trouble after fitting.
Fixing Common Problems
A bubble under cured glass is hard to fix. Prevention matters more than repair. If curing has not started, push bubbles to the edge gently. If curing has finished, leave small bubbles alone. Many tiny bubbles fade as glue settles. Large bubbles may need a full replacement.
Glue in a speaker grille needs care. Do not poke it with a sharp tool. A soft brush may clear surface glue. Hardened glue inside a grille may need professional cleaning. Covering openings before fitting prevents this problem fully. Never skip the cover step to save time.
A lifted edge after curing means uneven glue or a case conflict. Press the edge and cure it again with the lamp. A tight case can lift edges within days. Use a case friendly UV glass width. Wait a day before fitting a tight case. That wait lets the bond reach full strength.
- Cover every speaker port and button before pouring glue.
- Charge the UV lamp fully before starting.
- Lower glass slowly from one edge to push air out.
- Cure fully and cure edges with extra lamp time.
- Wait a day before fitting a tight case.
- Never cure until the glue spread looks even.
Safe Removal
Removal needs patience and gentle heat. Warm the glass edge with a hair dryer on low heat. Heat softens the adhesive bond slightly. Lift a corner with a plastic card. Work slowly around the edges. Forcing a corner can crack the glass into shards.
Peel the glass away at a shallow angle. Keep pressure low and steady. Wipe remaining glue with a soft cloth. A little screen cleaner helps dissolve residue. Do not scrape the screen with metal tools. A plastic card and patience remove glue safely.
Check the screen after removal for any residue. Clean it fully before fitting a new protector. Inspect the earpiece and ports for stray glue. A clean screen gives the next fitting a fresh start. UV glass removal is slower than standard glass removal. The extra effort buys curved screen coverage that standard glass cannot match. Material choice is compared in tempered glass compared with TPU film if you weigh UV glass against simpler options.
UV Lamp Safety And Eye Protection
UV lamps cure glue with ultraviolet light. That light can harm eyes with direct exposure. Never stare into a curing lamp. Keep the lamp aimed at the phone screen only. Shield eyes with distance during curing. Most kit lamps are low power and short duration. Low power does not mean zero risk. Brief accidental glances rarely cause harm. Deliberate staring is unwise for any UV source. Treat the lamp with the respect any light tool deserves.
Skin exposure during curing is minimal. Hands hold the phone edges away from the lamp. Short curing times limit skin dose further. Users with light sensitivity should take extra care. Gloves add a simple shield during curing. A pair of thin gloves costs nothing and it removes worry. Keep children away during the curing step. A calm adult only workspace suits UV fitting best. Safety habits matter more than lamp power figures.
Lamp quality varies between kits. Weak lamps cure slowly and unevenly. Uneven curing leaves soft glue patches. Soft patches shift under a case within days. Strong lamps cure fast and evenly. A lamp that feels warm after a minute is working well. A lamp that stays cold may be weak or faulty. Test the lamp on a spare glue drop if the kit allows. A cured test drop turns firm and clear. An uncured drop stays liquid and sticky.
Warranty And Service Considerations
UV glue fitting can affect warranty claims in rare cases. Glue in a speaker or port may be blamed for a fault. Makers may refuse service for glue damaged openings. Covering openings before fitting prevents this dispute. Keep the covers on until curing finishes. Photograph the covered phone before pouring glue. Photos prove careful preparation if a claim arises later. Careful documentation protects both phone and warranty.
Service centres remove UV glass routinely now. They know the gentle heat method well. A phone with UV glass rarely faces service refusal. A phone with glue in ports faces harder questions. Prevention is therefore worth the two minutes covers take. Never skip covers to save time. A saved minute can cost a warranty argument later. Professional removal is cheap if you doubt your own skill. A shop can remove UV glass safely in minutes.
Keep the kit instructions after fitting. They state glue type and curing time. Service staff may ask about glue type during repair. Instructions also help the next fitting. A second UV fit goes smoother with the first kit notes at hand. Store instructions with spare protectors. That habit turns a complex job into a familiar routine over time.
Kit quality varies more than price suggests. Expensive kits may include a weak lamp. Cheap kits may include excellent glue. Read reviews that mention curing results specifically. A kit with many soft glue complaints deserves avoidance. A kit with firm even cures earns trust. Lamp strength matters more than glue brand in most kits. A strong lamp cures any decent glue well. A weak lamp ruins even premium glue. Prioritise lamp reviews when comparing kits.
Reusing a UV lamp across kits saves money over time. Most lamps work with any standard UV glue. Keep the lamp after the first kit finishes. Buy glue only refills for later fittings. Refills cost less than full kits. Check glue compatibility before mixing brands. Standard resins usually mix safely. Unusual resins may cure at different wavelengths. A matched refill avoids curing surprises. Lamp reuse turns UV fitting into an affordable routine.
UV fitting steps:
1. Cover speaker, ports, buttons
2. Clean screen, dust sticker pass
3. Phone flat and level
4. Pour full glue tube at centre
5. Lower glass slowly from one edge
6. Push bubbles out, wipe excess
7. UV cure 1-2 minutes, edges extra
8. Remove covers, test touch and sensor
The steps above follow the approach described in the official developer documentation for device care and accessory testing. The method draws on standard UV adhesive practice for curved screens. Results vary with kit quality and screen shape. Never rush the liquid step or skip opening covers.

