

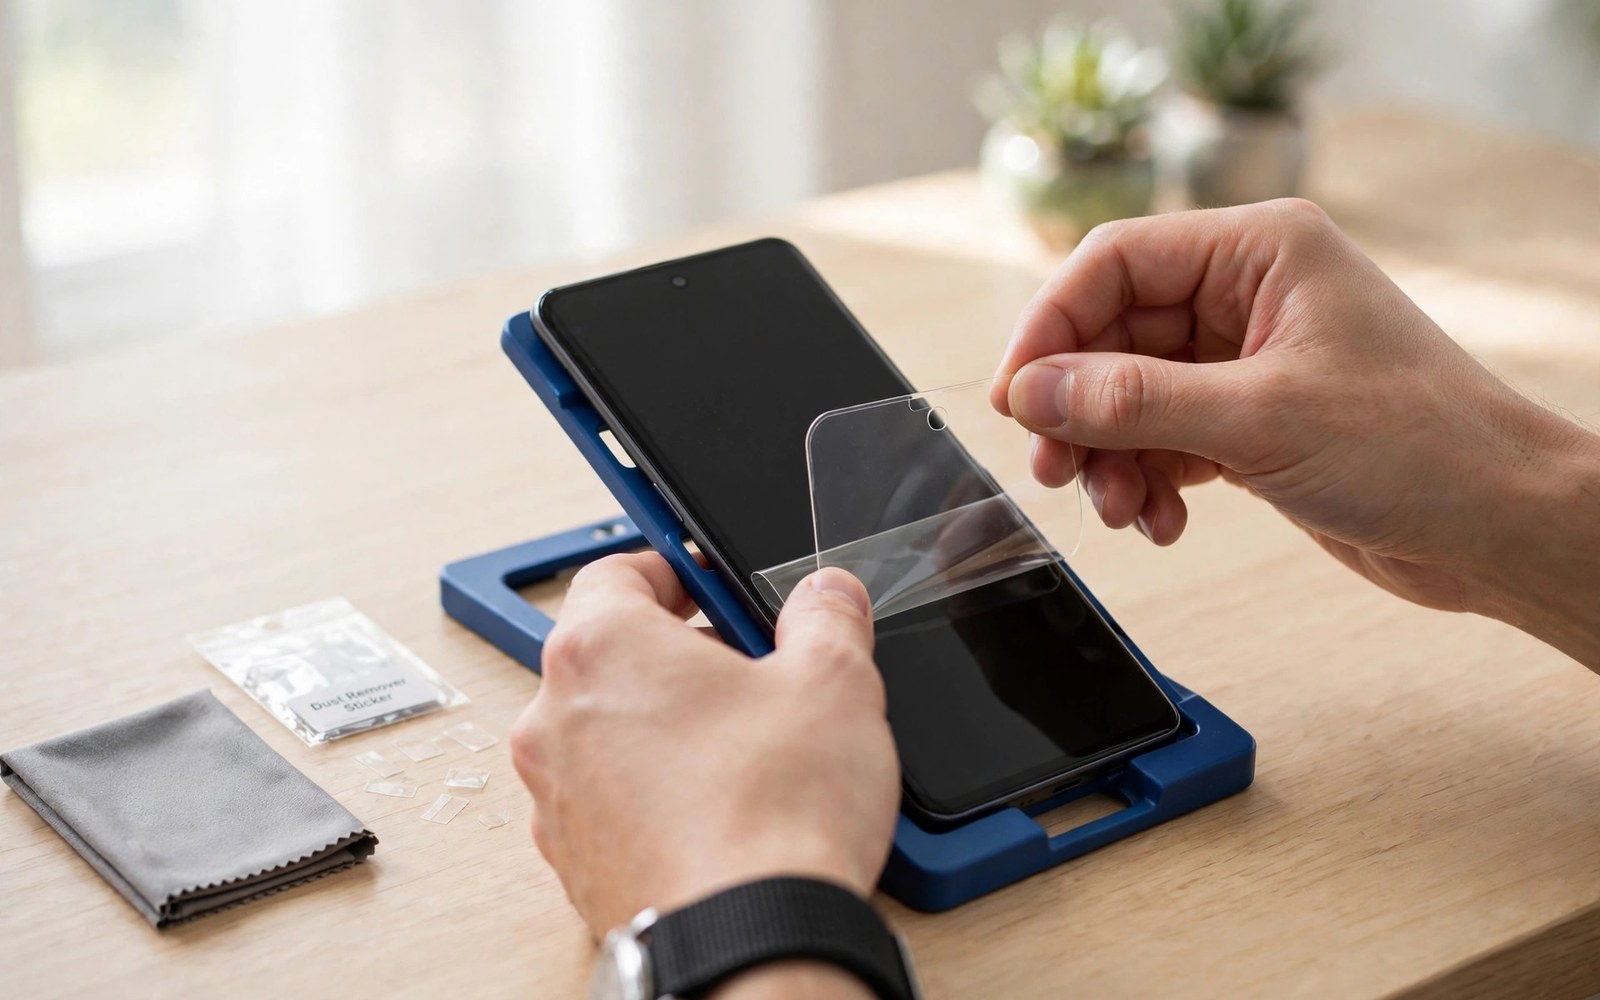
Screen Protector Application Guide: How to Apply Without Air Bubbles
A perfect screen protector fitting looks simple. The glass sits flat and the screen looks untouched. A bad fitting shows bubbles and dust at once. The difference is rarely luck. It is preparation and patience. This guide walks through a method that works for glass and film alike, step by step, so your first fitting looks like a shop fitting.
Most bubbles come from dust or from rushed placement. Dust lifts the protector and traps air around itself. Rushed placement traps large air pockets under the sheet. Both problems are avoidable. A clean surface and a slow lowering motion solve most cases, and the rest of this guide shows each step in order. Set aside ten quiet minutes for the job. Do not fit a protector in a rush before leaving home. A calm room and clean hands matter more than fancy tools. If you are choosing between materials first, compare tempered glass with TPU film to pick the right type for your phone.
Prepare Your Workspace Before You Touch the Screen
Choose a clean table near good light. Wipe the table so dust cannot drift upward. Close windows and turn off fans for a few minutes, because moving air carries dust onto a bare screen. A bathroom after a hot shower works well: steam settles dust from the air and leaves a calm space. That trick costs nothing and it is the single best way to get a dust-free fitting at home.
Wash your hands with soap and dry them fully. Oily fingers leave marks that cause bubbles. Lay out every tool before you start: a microfibre cloth, a dust sticker, the cleaning wipe from the packet, and the guide stickers or the alignment frame if one is supplied. Remove the old protector first if one is fitted. Lift a corner with a fingernail or a plastic card, peel slowly so the adhesive comes away cleanly, and clean the bare screen fully after removal. Old adhesive residue causes new bubbles, so a fresh start gives the best result.
Clean the Screen Properly: The Step That Decides Everything
Wipe the screen with the wet wipe from the packet. Use slow strokes from top to bottom, and pay attention to the edges and the earpiece area, because dust hides near edges and camera holes. A single speck near an edge can lift the whole protector. Dry the screen with the microfibre cloth, using light pressure and covering the full surface. Check the screen under bright light at an angle. Angled light reveals dust that head-on light hides, so repeat the wipe if you see any specks. Patience here saves a ruined fitting later.
Press a dust sticker across the screen as a final pass. Roll it gently over the whole surface: it lifts tiny fibres that cloths miss. Do not touch the screen after this pass, because fingerprints return fast. Keep the phone flat and move straight to alignment. The time between the dust sticker pass and the fitting should be seconds, not minutes, because dust settles continuously.
How to check a screen is truly clean
Hold the phone under a bright lamp and tilt it slowly. A clean screen shows an even reflection with no specks, smears, or lint. If you see a speck, lift it with the corner of a dust sticker rather than wiping the whole screen again. Wiping again can add new fibres, while a sticker lifts the speck without touching the rest of the surface.
Align Before You Commit: Frames, Hinges, and Dry Runs
Hold the protector above the screen without removing its backing fully. Line up the top edge with the earpiece and the camera cutout, and check the side gaps are even. A protector that sits crooked looks bad and may peel at one edge. Alignment frames solve this step for many models: the frame clips onto the phone and the glass drops into exactly the right place.
Use hinge stickers for glass without a frame. Stick one edge down with tape as a hinge, so the protector can lower like a door onto the screen. This method keeps alignment fixed while you work, and it keeps your fingers off the adhesive side. Tape hinges are the best trick for first-time fitters, and they cost nothing.
Wet films vs dry films: follow the packet method
For film protectors, follow the packet method closely. Some films use a wet spray and a squeegee. Others use a dry peel and a slow roll. Wet films need drying time before a case is fitted, and dry films need steady pressure from the centre outward. Rushing either method traps bubbles that are hard to remove, so read the packet once fully before you start rather than discovering step three halfway through.
How long a wet film takes to dry
A wet film looks cloudy until the solution dries fully, which takes several hours in normal air and up to a full day in humid weather. Do not judge the result until the cloudiness clears, and do not fit a tight case until the film is fully dry, or the case can shift the film out of place.
Why a dry run matters more than speed
A thirty-second dry run, holding the protector in place with the backing still on, tells you exactly where the cutouts sit and how the edges line up. That rehearsal prevents the most common first-timer error: peeling the backing, then realising the protector is upside down. Never skip the dry run.
Lower and Settle the Protector Without Air Bubbles
Lower the protector slowly from the hinge edge. Let the adhesive meet the screen in a moving line. Do not drop the whole sheet at once: a moving line pushes air ahead of it, while a dropped sheet traps air underneath in large patches. Slow motion is the whole secret of a bubble-free fit, and it is the step where patience pays most.
Once contact starts, press gently from the centre outward. Use a finger wrapped in the microfibre cloth. Push small bubbles toward the nearest edge. Most small bubbles vanish on their own within a day, because air escapes through the adhesive over time. Do not press hard enough to crack glass. Check the edges last: run a finger around the full border and press any lifted edge down with light, steady pressure. A case fitted too soon can lift a fresh edge, so wait an hour before fitting a tight case. That wait lets the adhesive bond fully to the screen.
Fix Bubbles, Dust, and Lifting Edges
Small air bubbles often fade within 24 hours. Leave them alone for a day before judging the fit, because pressing them repeatedly can add fingerprints under the edge. If a bubble stays after a day, push it gently to the nearest edge. A plastic card wrapped in cloth helps with stubborn bubbles. Dust bubbles look different from air bubbles: they have a solid speck at the centre. Lift the nearest edge with a dust sticker, slide the sticker under the protector to catch the speck, and lower the edge again slowly. Repeat only for visible specks, because repeated lifting weakens adhesive and invites more dust.
Lifting edges usually mean a case conflict or a curved screen. Try a case-friendly protector with a narrower width, clean the edge, and press it down for a minute. If the edge lifts again within a day, replace the protector: a protector that will not stay down cannot guard the screen. Scanner issues after fitting are covered in how protectors interact with fingerprint scanners if your sensor acts up after a fresh fitting.
When to refit and when to replace
Refit timing matters after a protector fails. Remove a failed protector at once rather than living with it. A cracked glass sheet can scratch a finger during calls, and a peeling film collects pocket lint under its edge, which scratches the screen coating slowly. A prompt replacement protects both finger and screen. Keep the fitting tools from the first packet, because reused tools work fine for a second fitting. A spare protector plus old tools makes refitting fast.
Wet Application Films in Detail
Wet films need a spray solution to position the sheet. The solution lets the film slide on the screen during alignment, and that sliding window forgives small alignment errors. It also adds drying time after fitting: the film looks cloudy until the solution dries fully, which takes several hours in normal air. A case fitted too soon can shift a wet film, so wait a full day before fitting a tight case over a wet film. Patience is the main skill wet fitting demands.
Squeegee technique decides wet film quality. Start from the centre and push solution toward the edges, using slow, firm strokes with a wrapped card. Fast strokes trap solution pockets under the film. Those pockets look like bubbles for a day, but most dry out cleanly if the edges seal well. A sealed edge lets solution escape slowly without dust entry, while an unsealed edge lets dust in during drying. Seal edges firmly right after squeegeeing for the best result.
Wet films suit curved screens better than dry films. The solution lets the film follow gentle curves, and the film stretches slightly during placement. That stretch covers curves without lifting. Dry films resist stretching and lift at curves, so a curved-screen owner should favour wet film or UV glass, while flat-screen owners can choose either method freely. Match the method to your screen shape for the easiest fit. If you fit at home, use UV liquid adhesive protector installation tips only when your screen is curved and you have practised the steps. Standard glass suits most home fitters better than UV kits.
Case-Friendly Widths, Aftercare, and a Spare Kit
Case-friendly protectors leave a small border around the screen edge. That border gives a case room to grip without lifting the protector. Full-width protectors look neater without a case, but they lift quickly under a tight case edge. A lifted protector collects dust under its border, and that dust spreads inward over days. A case-friendly width avoids the whole problem. Choose width by your case rather than by looks alone: a neat protector that lifts is worse than a narrow one that stays down.
Aftercare keeps a good fit good. Keep the phone out of dusty pockets for the first day, because lint can creep under a fresh edge. Clean the protector with a soft cloth only: harsh cleaners can damage coatings on glass, while a damp microfibre cloth handles most smudges. Dry the surface right after cleaning. Watch the edges during the first week and press down any corner that starts to lift. Early care prevents a small lift from growing. Replace the protector once a crack crosses the viewing area. A cracked protector still guards the screen, but it distracts the eye and it can cut a finger.
Store a spare protector in its packet at home. A spare turns an accident into a ten-minute fix. Keep the fitting tools with the spare, and pack a travel fitting kit for trips: a spare protector, a microfibre cloth, dust stickers, and a small plastic card. A hotel bathroom after a shower offers a dust-free space, because steam settles airborne dust quickly there. Fit the protector in the evening when calm. A rushed airport fitting invites bubbles, while a calm hotel fitting succeeds far more often. Dispose of old protectors responsibly after removal: wrap glass shards in paper to protect waste handlers, and check local recycling rules for glass pieces.
Screen Protector Fitting: Your Questions Answered
How do I apply a screen protector without air bubbles?
Clean the screen twice, check it under angled light, align with a frame or a tape hinge, then lower the protector slowly from one edge so air escapes ahead of the sheet. Small bubbles left over usually fade within 24 hours. The two things that matter most are a dust-free screen and a slow lowering motion, not expensive tools.
Why do bubbles keep appearing under my screen protector?
Bubbles come from dust specks, rushed placement, or a lifting edge. Dust bubbles have a solid speck at the centre and need the speck removed. Air bubbles from rushed placement usually fade within a day. Lifting edges usually mean the case is pushing the protector up, and a case-friendly narrower protector solves that. Work in still air with clean hands and a wiped table, and the problem mostly disappears.
Should I use a wet film or a dry glass protector?
Flat screens suit either method, so pick glass for the best feel and scratch protection. Curved screens suit wet film or UV liquid glass, because dry glass lifts at the curves. Wet films take hours to dry and a full day before a tight case, so choose them when you can wait. If you want the simplest home fitting, standard tempered glass on a flat screen is the easiest option.
How long should I wait before putting a case on after fitting?
Wait at least one hour before fitting a tight case over a dry glass protector, and a full day over a wet film. The adhesive needs that time to bond, and a case fitted too soon can lift a fresh edge. If the edge lifts after you fit the case, remove the case, press the edge down for a minute, and wait longer before trying again.
Your Fitting Checklist: Seven Steps to a Bubble-Free Screen
Clean the table, close the windows, and wash your hands. Remove the old protector, wipe the screen wet then dry. Do a dust sticker pass and check under angled light. Align with a frame or tape hinge before removing the backing. Lower slowly from the hinge and press from the centre outward. Push bubbles to the edge and wait 24 hours before judging. Wait an hour before fitting a tight case. Follow those seven steps in a calm room and your next fitting will look like a shop fitting, because good fitting is a skill that improves with practice, and your second fitting will feel far easier than your first.

