

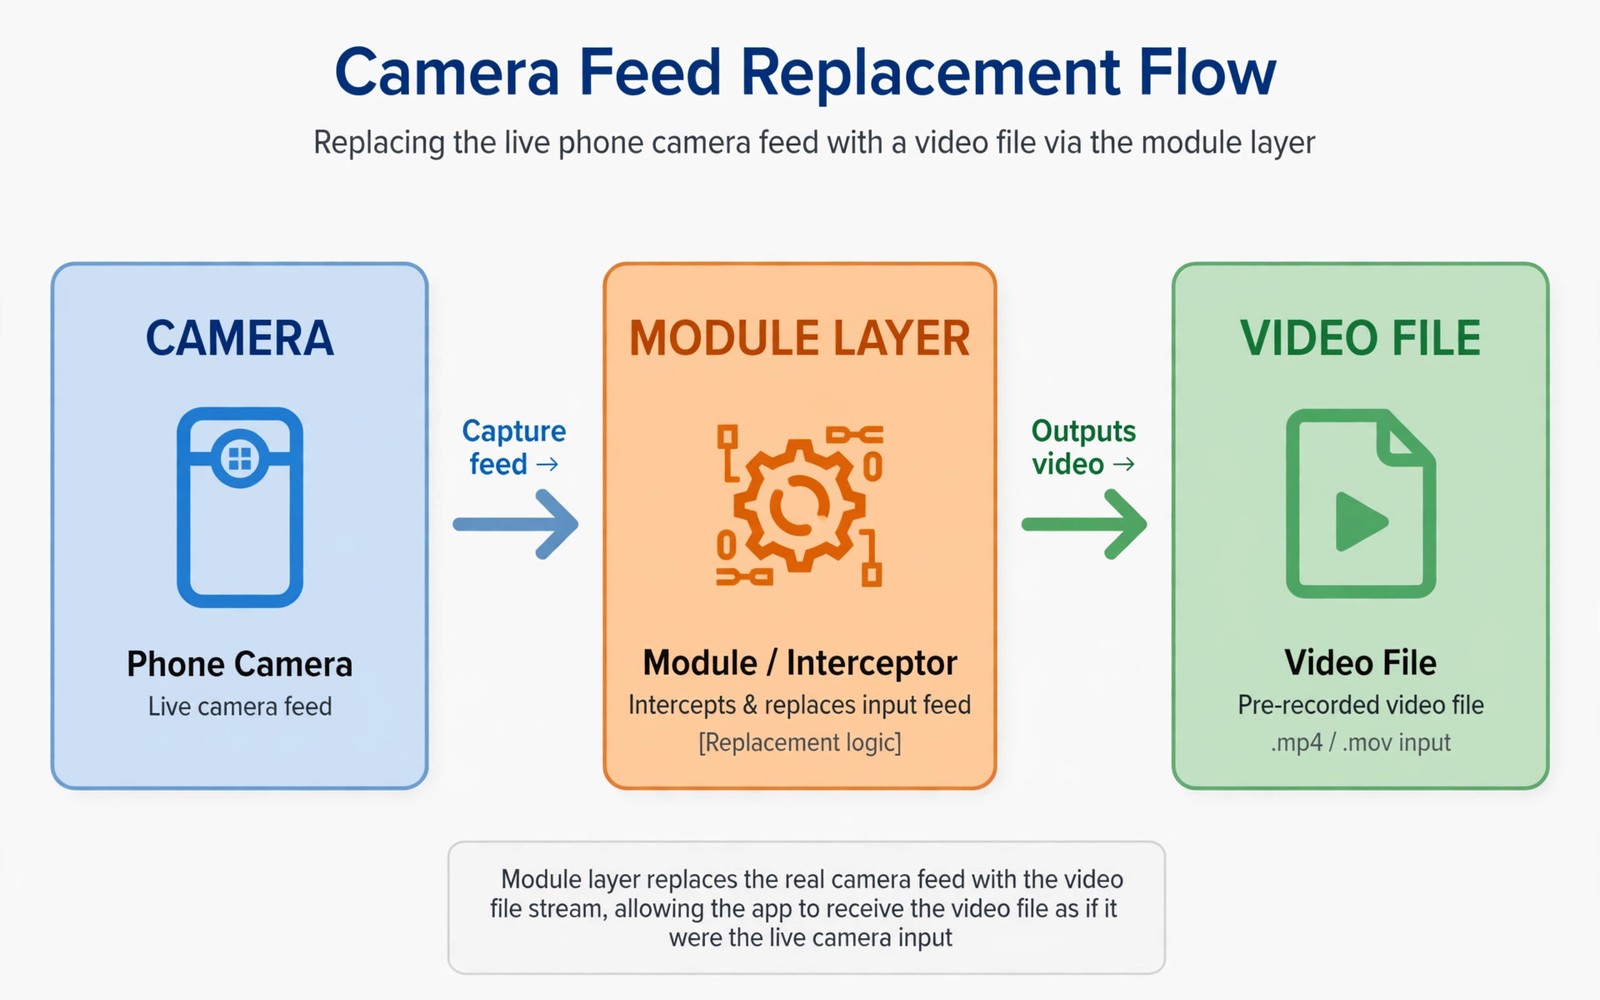
Replacing a hardware camera feed with a video file is a powerful testing technique. It lets an app receive a video as if it came from the camera. Developers use it to test video calls without a real scene. Testers use it to repeat the same video in every test. Creators use it to feed a prepared clip into an app that normally needs a live camera. LSPosed can do this by hooking the camera pipeline at the right layer.
This technique has legitimate uses and clear limits. It works best for testing and for controlled demos on your own device. It does not work perfectly for every app because camera pipelines differ. Some apps use native camera code that Java hooks cannot reach. Some apps check for virtual feeds and refuse them. Understanding the pipeline helps you pick apps where replacement can work.
This guide explains the camera replacement idea in plain steps. You will choose a suitable video and a suitable module approach. You will scope hooks narrowly to one target app. You will test with a simple app before trying a complex video call app. You will also learn ethical limits because feeding a fake camera into a live service can mislead other people. Use this technique for testing on your own accounts and with consent.
Understand The Camera Pipeline First
An Android app usually asks the camera system for frames through a camera API. The system returns frames from hardware. A Java level hook can intercept that request and return frames from a video file instead. That interception works when the app uses the Java camera API. It fails when the app uses a native camera path that bypasses Java hooks. Knowing which path an app uses saves hours of failed attempts.
Video format matters as much as the hook. The video should match the resolution and frame rate the app expects. A very high resolution video can lag the pipeline. A very low resolution video looks blurry in the app. Intercept live API calls explains the hook technique behind this replacement. A matched video and a correct hook layer are both needed for a smooth feed.
Choose A Video And Prepare It
Pick a short video with a clear subject and steady lighting. A ten second loop works well for testing because it repeats cleanly. A long video with scene changes can confuse a test that expects a stable scene. Trim the video to the resolution the target app uses most often. A 720p video suits most video call tests while a 1080p video suits a quality test.
Store the video in a folder the module can read. Keep the file name simple with no spaces. Test the video in a normal player first to confirm it plays smoothly. A corrupt or variable frame rate video will stutter in the camera feed as well. A clean source video is the foundation for a clean virtual feed.
Camera feed replacement checklist
1. Pick a target app that uses the Java camera API
2. Prepare a short clean video at a matching resolution
3. Scope the module to that app only
4. Enable the module and reboot
5. Test with a simple preview app first
6. Test the target app with your own account
7. Disable the module after testing
The example above was written for this guide as a plain summary of the steps in the sections before it. It uses only the menus and options described above and it needs no extra tool to understand. Follow the steps in order so you can see which change helps most. If one step makes things worse then undo that step alone and keep the rest.
Scope The Hook To One Target App
Scope the camera module to the single app you want to test. Never scope a camera hook to every app because it can break the system camera and other apps that need a real feed. Enable the module and reboot so the hook attaches cleanly. Open the target app and start its camera preview. The preview should show your video instead of the live scene.
If the preview still shows the live camera then the app may use a native path or a different camera API. Intercept audio streams with hooks shows how deep hooks differ from Java hooks. A native camera path needs a different approach or a different test app. Do not force a Java hook onto a native app by broadening scope. That only breaks more apps.
Test With A Simple App First
Test camera replacement with a simple camera preview app before a video call app. A simple app uses a standard camera API and gives clear feedback. If the simple app shows your video then the hook works. If it does not then the hook layer or the video format is wrong. Fix the simple case before tackling a complex app.
Once the simple test passes then try the target app with your own test account. Join a test call alone or with a consenting colleague. Check that audio still works because camera replacement should not break the microphone path. Bypass screenshot blocks is a different LSPosed trick that also needs narrow scope. Keep each LSPosed job separate so a failure stays easy to trace.
Respect Limits And Use Cases
Use camera replacement for testing and demos on your own device and accounts. Do not use it to mislead people in a live call or to fake identity in a verification flow. Verification systems may detect a virtual feed and block the account. Misleading a live service can also break trust and violate terms. A testing tool becomes a problem when it deceives another person.
Keep the module disabled when you are not testing. A camera hook left on can surprise you in a real call. Disable the module and reboot before normal camera use. That habit keeps your daily camera reliable and your testing controlled. A tool that is off by default is safer than a tool that is always on.
Video Formats For Camera Replacement
Video format choices affect how smooth a virtual feed looks. A video encoded with a constant frame rate behaves better than a variable frame rate video. A variable rate video can stutter when the pipeline expects a steady frame time. Re-encode a variable rate source to a constant rate before testing. A constant rate source gives the hook a predictable frame stream.
Codec choice also matters. A widely supported codec plays smoothly on most devices. An exotic codec may decode slowly and lag the feed. Use a common codec at a moderate bitrate for testing. A moderate bitrate keeps quality good without overloading the decoder. Test the same video at two bitrates and keep the lower one if quality looks the same in the app.
Camera Replacement For Accessibility Testing
Camera replacement helps accessibility testing because a tester can repeat the same visual scene for every test. A tester can feed a high contrast scene to check how an app handles it. A tester can feed a low light scene to check readability. Repeating the same scene makes test results comparable across app versions. That repeatability is hard to achieve with a live camera in changing light.
Accessibility testers should document the video used for each test. Note the resolution and frame rate and lighting in the test report. Another tester can then repeat the test with the same video. A documented virtual feed turns a casual check into a reproducible test. Keep test videos in a shared folder with clear names so the team can find them later.
Camera Replacement And Video Call Quality
Video call quality with a virtual feed depends on network and encoding as well as on the video file. A high quality video file can still look poor over a weak network. The call app compresses the feed before sending it. That compression can blur details that looked sharp in the source file. Test virtual feeds over the same network you will use for real calls. A test over strong Wi-Fi may not predict quality over mobile data. Network conditions are part of the test setup and should be noted in test reports.
Lighting in the source video affects call quality more than resolution alone. A well lit video compresses cleanly and looks natural after call encoding. A dark video with noise compresses poorly and can look blocky. Choose source videos with even lighting and a clear subject. Avoid videos with rapid movement because fast motion also compresses poorly. A steady well lit video gives the call encoder an easier job. Test the same video at different network speeds to see how quality degrades. That test reveals whether the feed remains usable under realistic conditions.
Audio synchronisation deserves checking in virtual feed tests. Video frames from a file and audio from a microphone can drift apart if timing is off. Speak during a test call and check whether lip movement matches sound. A small drift may be acceptable for a test while a large drift can confuse participants. Note drift in test reports so developers can address it. A virtual feed test that ignores audio sync is incomplete. Test both video and audio together for a complete picture of call quality.
Common mistakes
One common mistake is scoping a camera hook to every app. That breaks the system camera and other apps. Scope to one target app only. Another mistake is using a high resolution video that lags the pipeline. Match the resolution the app expects. A third mistake is leaving the module on during normal use. Disable it after testing so real calls use the real camera.
FAQ
Does camera replacement work for all apps?
No because apps using native camera paths bypass Java hooks. Simple apps using standard camera APIs work best. Complex apps may need a different approach or may block virtual feeds.
Can I use a video with sound as a camera feed?
Camera replacement usually covers video frames only. Audio comes from the microphone path separately. Test audio in the target app because a camera hook should not change microphone behaviour.
Will an app detect a virtual camera feed?
Some apps check for virtual feeds or for hook frameworks. A detection may block the feed or the account feature. Test with your own account and stop if the app warns about modification.
Conclusion
Pick a simple camera preview app today and prepare a short clean video at a matching resolution. Scope a camera module to that app only and test the preview after a reboot. If the simple test passes then try your target app with your own test account. Disable the module after testing so normal camera use stays reliable. That controlled method gives you a useful testing tool without misleading anyone or breaking daily camera use.
Document your camera replacement test setup for future testers on your team. Note the module version and the video file and the target app version. A documented setup lets another tester repeat your results exactly. Repeatability is the difference between a casual demo and a professional test. Store the test video with the documentation so nothing is lost when team members change. That discipline makes a clever trick into a reliable testing method.

