

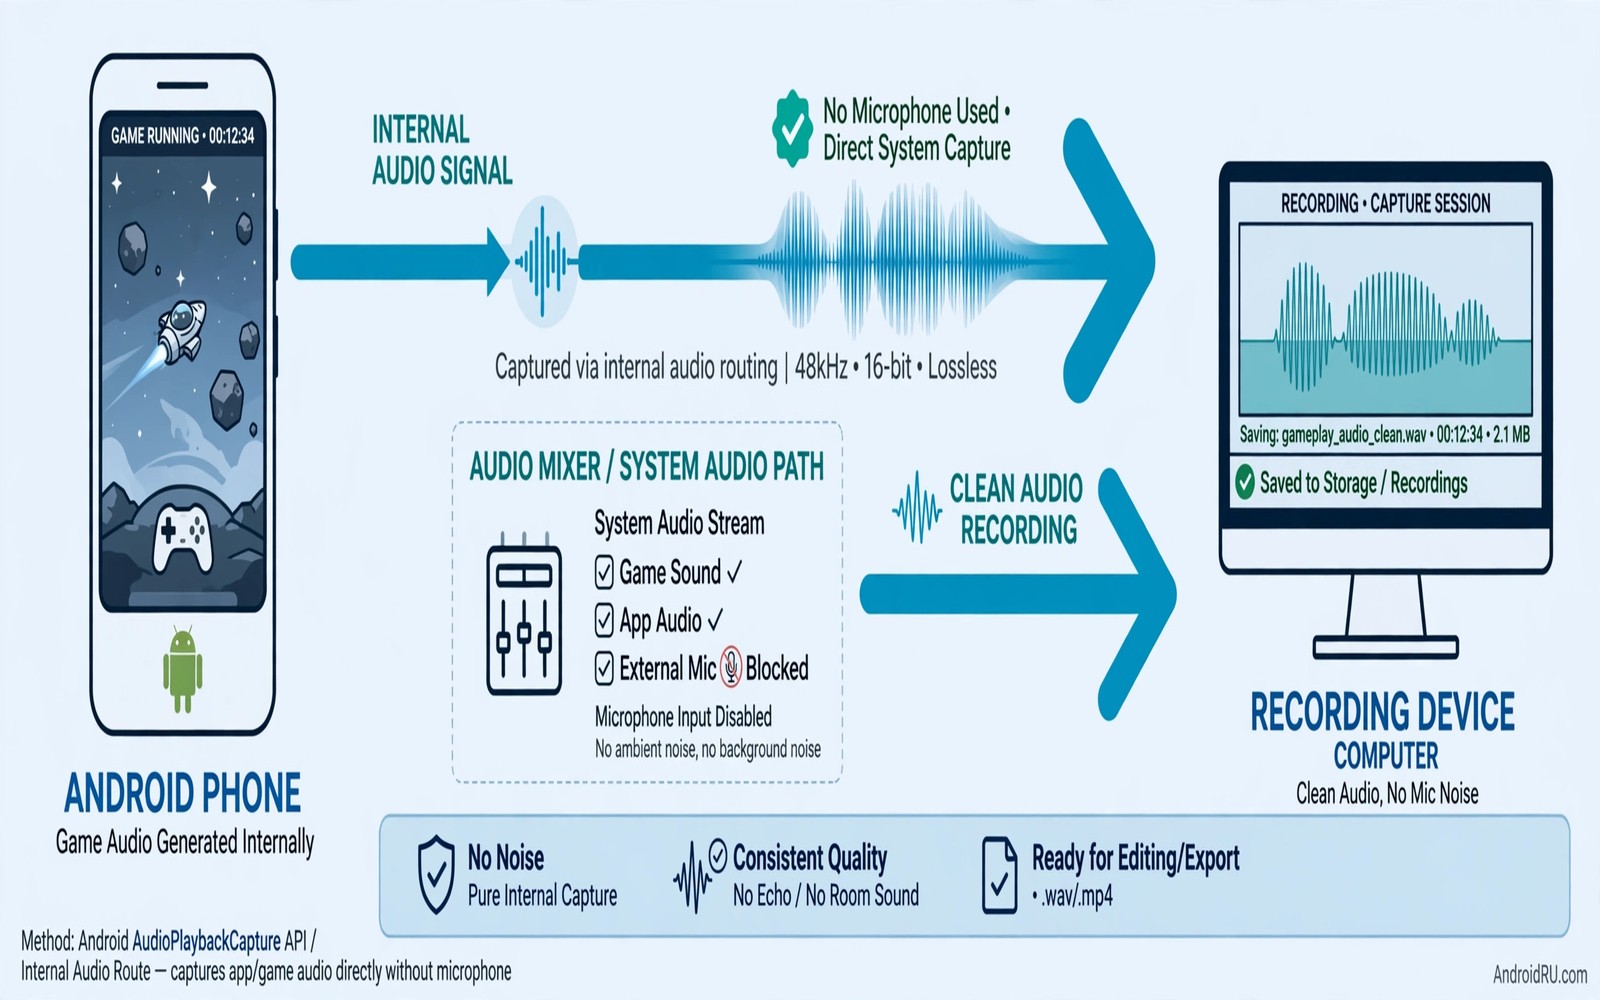
Game recordings fail when microphone noise pollutes the gameplay sound. Room echo and keyboard clicks and fan noise all enter through the microphone. Internal audio capture solves the problem by recording the game sound directly from the system. The microphone stays out of the mix unless you deliberately add commentary.
Android supports internal audio capture for apps that request it correctly. A screen recorder with internal audio support can capture game sound cleanly. The game must allow capture and the recorder must choose internal audio rather than microphone audio. That choice is the key step that many recordings miss.
This guide walks through internal capture setup and testing. You will learn how to choose the right recorder. You will learn how to keep commentary separate when you want it. You will learn how to test sync and levels before a long session.
Choose a recorder with true internal audio
Open the recorder settings and look for an audio source option. Choose internal audio or game audio rather than microphone. Some recorders label the option as internal sound or system audio. If no internal option exists then the recorder cannot give a clean game mix.
Check the Android version requirement for internal capture. Newer Android versions support internal capture more reliably. Older versions may fall back to microphone capture silently. Test a short clip and listen for room noise to confirm which source was used.
Grant only the permissions the recorder needs for screen and audio capture. A recorder that asks for broad unrelated access deserves caution. Read recent reviews for reports of watermark or quality limits on your phone model.
Set game volume and recorder levels first
Set game volume to a comfortable level before recording starts. Game audio that clips during recording cannot be repaired later. Aim for peaks below the maximum on the recorder meter if a meter is shown. A slightly lower game volume with clean peaks beats a loud clipped recording.
Turn off notification sounds during the session or enable do not disturb. A message tone during a boss fight will appear in the internal recording. Do not disturb keeps the game mix pure. Remember to turn it off after the session so you do not miss later messages.
Close background music apps before recording. A background track will mix into the internal capture and confuse the game sound. A clean session has only the game running plus the recorder. That simplicity gives the cleanest result.
Keep commentary separate when you want voice
Some recordings need voice commentary over game sound. Record commentary on a separate track when the recorder supports it. Separate tracks let you balance voice and game sound later. A mixed single track locks the balance at recording time and it cannot be fixed well later.
If separate tracks are not available then record commentary in a second pass. Play the game recording and speak over it in a quiet room. That method gives full control over voice level. It takes extra time yet it produces a far cleaner final mix.
For live commentary use a headset microphone close to your mouth. A close microphone picks up less room noise than the phone microphone at a distance. Keep the headset volume moderate so voice sits above game sound without shouting. For call microphone habits read about five hacks that improve microphone sound quality on calls.
Test sync and quality with a short clip
Record a thirty second clip with clear game actions. Use a jump or a shot with an instant visual and sound pair. Play the clip back and check whether sound matches the visual action. A small sync offset becomes obvious in a short test and it is easy to fix early.
Listen for hiss and clipping in the test clip on headphones. Internal capture should sound clean with no room noise. If room noise appears then the recorder used the microphone source. Return to settings and choose internal audio again before a long session.
Check file size and format after the test. A high quality recording uses more storage yet it preserves game detail. Choose a format that your editing app handles well. A guide to low latency gaming audio settings helps keep game sound in sync during play.
Record a full session with a checklist
Start the recorder before the game session begins. A few seconds of pre roll gives editing room at the start. Keep the phone steady and avoid touching it during play. Handling noise can still enter through vibration even with internal audio.
Monitor the first minute on headphones if possible. A quick monitor check catches a wrong audio source early. It is far easier to restart a one minute clip than to redo a full hour of gameplay. That habit saves the most time of any in this guide.
Recorder source: internal audio only
Game volume: peaks below maximum
Notifications: do not disturb on
Background apps: music apps closed
Test clip: thirty seconds with sync check
The checklist above is an original illustration created for this guide. It uses only general screen recording practice and standard Android setting names. It is meant as a pre session check rather than a specification for any single recorder app.
Handle copyright and game capture rules
Some games include licensed music that cannot be shared freely. Internal capture records that music exactly as played. Check the game terms and the platform rules before publishing a recording with licensed music. A private recording for personal review faces different rules than a public upload.
Use game audio settings to lower music volume if you plan to publish gameplay. A lower music level still gives atmosphere without dominating the recording. Some games offer a streamer mode that replaces licensed tracks. That mode exists to help creators share gameplay safely.
Keep original recordings private until you have checked the rules for each game. A private file can be edited later if a track causes a problem. A public upload with a flagged track is harder to fix. Caution at the start saves trouble after publishing.
Edit game audio for a watchable final video
Editing should balance game sound with any commentary and keep peaks clean. Lower game audio slightly under voice sections and raise it during action without voice. That ducking pattern guides viewer attention naturally. A flat game level throughout can bury voice or bore viewers during quiet moments.
Trim silent or loading sections that add nothing to the video. Long loading screens test viewer patience and they waste storage. Keep the pacing tight while preserving key gameplay moments. A tight edit respects viewer time and it shows the game at its best.
For latency work that keeps live play in sync read about best settings for low latency gaming audio. That guide helps live sound stay tied to action. Clean capture plus low latency play gives a professional result.
Improve game recordings with simple editing
Simple editing improves a game recording more than complex effects. Trim the start and end to remove setup noise. Normalise the overall level so viewers do not need to adjust volume constantly. Those two steps alone make a recording feel professional.
Add a short title card or spoken introduction to orient viewers. A brief introduction explains the game and the goal of the session. Viewers who understand the goal stay longer. An introduction also gives the audio a clean starting point.
Export the final video in a widely supported format for easy sharing. A format that plays on phones and computers without special software reaches more viewers. Test the export on a phone before publishing. A phone test catches sync or level problems that a desktop preview hides.
Archive the original recording separately from the edited export. An archive lets you re-edit later with better tools or different goals. Storage is cheap compared with replaying a long game session. An archive protects your work for future use.
For voice recording lessons that help commentary read about recording high fidelity audio notes without hiss. That guide covers room choice and gain that commentary needs. Clean commentary plus clean game audio makes a complete video.
Common mistakes
The most common mistake is leaving the audio source on microphone. That setting captures room noise by design and no later filter fully removes it. Always confirm internal audio in settings and in a test clip. A thirty second test prevents a ruined long recording.
Another mistake is recording with notifications on. A single message tone can ruin an otherwise perfect gameplay moment. Do not disturb is a simple protection that costs seconds to enable. Use it for every important session.
People also record game audio too loud. Clipped game peaks sound harsh and they cannot be repaired by lowering volume later. Keep peaks below maximum during recording. A clean slightly quiet recording can be raised safely in editing.
Frequently asked questions
Why does my recording still include room noise?
Room noise means the recorder used the microphone source rather than internal audio. Check the audio source setting and record a new test clip. If internal audio is unavailable on your phone version then a wired headset can reduce room noise as a partial workaround.
Can I add commentary without mic noise in the game track?
Yes record commentary on a separate track when possible. A separate voice track keeps game sound clean and lets you balance levels later. A single mixed track forces a compromise that is hard to undo in editing.
Does internal capture work for every game?
Most games allow internal capture yet some games block it for copyright or privacy reasons. A blocked game may record silence or fall back to microphone audio. Test each game with a short clip before planning a long recording session.
Conclusion
Clean game audio comes from internal capture and careful session setup. Choose a recorder with a true internal audio source. Set game levels below clipping and enable do not disturb. Test sync with a short clip before a long session.
Your concrete next step is to record a thirty second internal audio test clip today in your favourite game and listen for room noise on headphones. If the clip is clean then you are ready for a full session. For sync during play continue with best settings for low latency gaming audio.

