

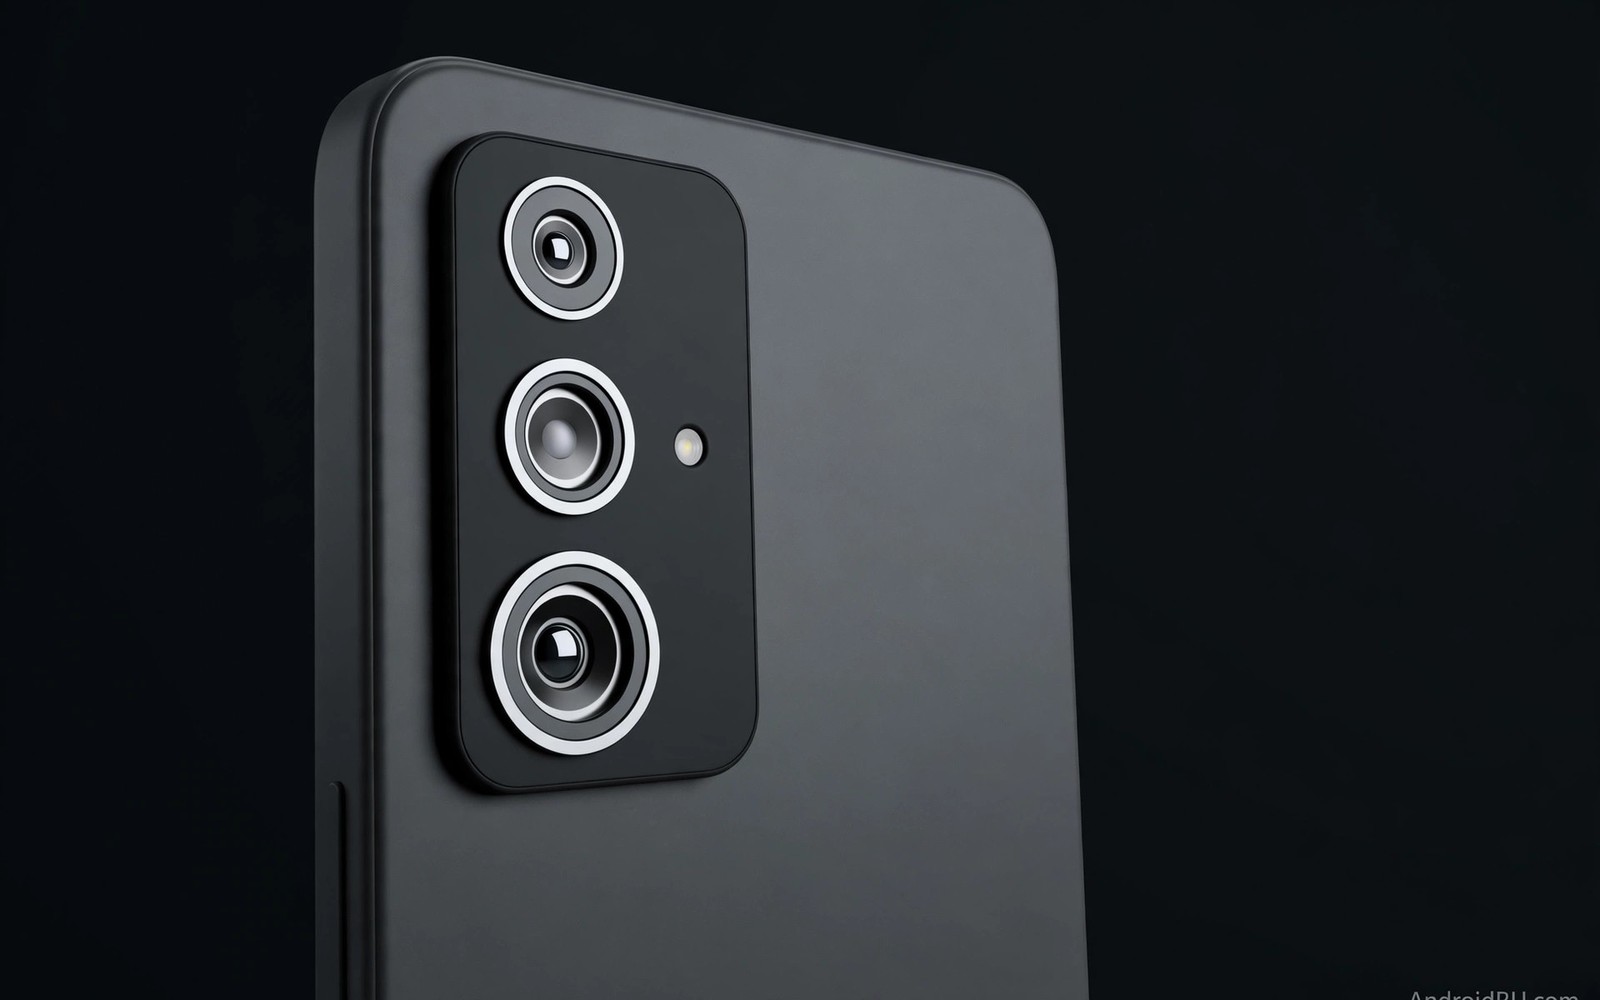
How Camera2 API Framework Manages Multi-Lens Hardware Switching
Modern Android phones carry more than one rear camera. A single phone can hold a wide lens, an ultrawide lens and a telephoto lens at the same time. The user sees one viewfinder and one zoom slider. The system behind that simple view is far more complex. The Camera2 API framework manages multi-lens hardware switching so the change feels instant and stable, and this guide explains how that framework works and how a developer can use it well.
A phone camera is not a single sensor in the modern sense. Each lens sits on its own sensor, and each sensor has its own field of view and its own focal length. The Camera2 framework groups these physical cameras into one logical camera when the hardware allows it. An app opens the logical camera and asks for a frame. The framework then decides which physical camera should supply that frame. That decision can change as the user zooms in or out, and the app does not need to close one camera and open another in most cases.
The logical camera idea matters because it hides hardware detail from app code. A developer writes code against one camera identifier. The framework maps that identifier to the best physical device for the current zoom ratio, focus distance and capture request. That mapping is where most of the real work happens, and it is also where most bugs come from when developers assume the mapping is simple. This article walks through the whole chain: how the framework discovers lenses, how it groups them, how it switches between them, what it costs in latency, and what to do when the switch goes wrong.
How the Camera2 API Sees Multi-Lens Hardware
The Camera2 API, available since Android 5.0 (API level 21), exposes cameras through CameraManager. An app calls getCameraIdList and receives a list of string identifiers. On a multi-lens phone that list contains both logical cameras and physical cameras, and telling them apart is the first skill a camera developer needs. A logical camera is a group. A physical camera is one lens and one sensor. The framework presents the group as a single camera so the app can treat three lenses as one device.
Behind the API sits the camera hardware abstraction layer, usually called the HAL. The HAL talks to the image signal processor and the sensors, and it reports what the hardware can do. Camera2 reads the HAL capabilities and turns them into CameraCharacteristics, a read-only map of keys and values for each camera ID. When the HAL reports that several physical cameras can work as one unit, the framework builds a logical camera for them and marks it with the capability REQUEST_AVAILABLE_CAPABILITIES_LOGICAL_MULTI_CAMERA.
One viewfinder, several sensors
The user-facing promise is one viewfinder. The app builds one preview surface, one capture session and one repeating request. The framework feeds that pipeline from whichever physical camera fits the current request. At 1x zoom the wide lens usually supplies the frame. At 0.5x the ultrawide takes over. At 3x or 5x the telephoto steps in. The app never closes the session during these changes, and the preview surface never gets rebuilt. That is the key difference between logical multi-camera switching and the old approach of closing one camera and opening another, which cost hundreds of milliseconds and showed a black frame in between.
Each physical camera has its own characteristics: focal length, field of view, sensor size, available aperture range and supported output sizes. The logical camera reports a combined set, and the framework picks a physical camera whose characteristics fit the request. The app can ask for the zoom ratio it wants through CONTROL_ZOOM_RATIO, and the framework translates that ratio into a physical camera choice plus a digital crop. The crop matters: at zoom ratios between the physical lenses, the framework uses the nearest lens and crops digitally, which is why image quality dips slightly between switch points rather than exactly at them.
What the HAL contributes to switching
The HAL decides what is physically possible. It reports which physical cameras exist, which of them can stream at the same time, and which combinations the image signal processor can handle. Some phones can run two physical cameras at once for a smooth crossfade between lenses. Others can only run one at a time, so the switch is a hard cut that the framework hides with a short blend or a held frame. The HAL also reports the zoom ratio ranges for the logical camera, which tell the app where the switch points sit. A developer who reads those ranges can draw an honest zoom slider instead of guessing where the lenses change.
Why focal length alone does not pick the lens
Focal length is the obvious way to pick a lens, but the framework weighs more than that. It considers the requested zoom ratio, the focus distance, the exposure target, the current frame rate and whether the capture is a still photo or a video stream. A telephoto lens may be the right pick for zoom, yet the wrong pick for a close focus distance, because telephoto lenses often cannot focus as close as a wide lens. In that case the framework may stay on the wide lens and crop, even though the user asked for a high zoom ratio. That choice looks like a bug to a developer who only checks focal length, but it is the framework protecting image quality.
Logical Cameras vs Physical Cameras: What Really Happens
A logical camera is a CameraDevice that the app opens like any other camera. A physical camera is a member of that group, and the app normally never opens it directly. The distinction matters because the two kinds of camera have different IDs, different characteristics and different rules. The logical camera ID is what getCameraIdList returns for the group, and it is the ID the app passes to openCamera. The physical IDs live inside the logical camera characteristics under LOGICAL_MULTI_CAMERA_PHYSICAL_IDS, as a set of strings.
When the app opens a logical camera, the framework opens the underlying physical cameras as needed. It may open one physical camera at first and bring a second one online as the user zooms towards its range. On devices that support concurrent streaming, it may keep two physical cameras warm so the switch between them is fast. On devices that do not, it opens the next physical camera just before the switch and closes the old one just after. Either way, the app sees one CameraDevice, one session and one stream of frames.
How a logical camera groups physical cameras
Grouping happens at the HAL level and is exposed through characteristics. The logical camera reports the capability LOGICAL_MULTI_CAMERA, and its physical ID set lists the members. The members usually share a lens facing, so a rear logical camera groups rear physical cameras, while the front camera stays separate. A phone with a wide, an ultrawide and a telephoto rear setup typically exposes one rear logical camera with three physical members, plus a front camera that may itself be logical on phones with two front sensors.
The group also shares a sensor orientation and a set of common output sizes. The logical camera reports the intersection of what its members can do, so an output size that only one member supports may not appear on the logical camera at all. That is a common surprise: a developer asks the logical camera for a 4K stream at 60 frames per second, finds the size missing, and assumes the phone cannot do it, when in fact one physical camera can. The fix is to check the physical characteristics directly when a specific combination matters.
When the framework picks a different physical camera
The framework re-evaluates its physical camera choice on every capture request, but it only switches when the new choice is clearly better. The main trigger is the zoom ratio. Each physical camera covers a zoom range, and the ranges overlap slightly so the switch point is not a cliff. When the requested zoom ratio crosses into a range where another physical camera gives a better result, the framework switches. Focus distance is the second trigger: a request to focus very close may pull the framework back to the wide lens even at a high zoom ratio. Exposure and frame rate can also block a switch, because a physical camera that cannot hold the requested frame rate at the current light level will not be picked.
Zoom thresholds and the switch point
Every logical camera publishes its zoom ratio range, and the physical cameras publish their own ranges inside the logical characteristics. The switch point between two lenses usually sits where their ranges cross, often around 0.6x for ultrawide to wide and around 2x or 3x for wide to telephoto, though the exact numbers vary by device. A good camera app reads these ranges at startup and marks the switch points on the zoom slider, so the user understands why the image changes character at a certain point. A bad camera app draws a smooth slider and lets the user discover the switch by accident.
Reading physical camera IDs from CameraCharacteristics
The physical IDs are the key to understanding which lens produced a frame. The app reads them from the logical camera characteristics, and it can also read them from CaptureResult after a frame arrives. The result key LOGICAL_MULTI_CAMERA_ACTIVE_PHYSICAL_ID tells the app which physical camera supplied that specific frame. Logging that value during development is the fastest way to see when switches happen and whether they happen where you expect them.
CameraManager manager =
    (CameraManager) context.getSystemService(Context.CAMERA_SERVICE);
String[] ids = manager.getCameraIdList();
for (String id : ids) {
    CameraCharacteristics chars = manager.getCameraCharacteristics(id);
    Integer facing = chars.get(CameraCharacteristics.LENS_FACING);
    int[] caps = chars.get(CameraCharacteristics.REQUEST_AVAILABLE_CAPABILITIES);
    boolean isLogical = false;
    if (caps != null) {
        for (int cap : caps) {
            if (cap == CameraCharacteristics
                    .REQUEST_AVAILABLE_CAPABILITIES_LOGICAL_MULTI_CAMERA) {
                isLogical = true;
            }
        }
    }
    if (isLogical) {
        Set<String> physicalIds = chars.get(
            CameraCharacteristics.LOGICAL_MULTI_CAMERA_PHYSICAL_IDS);
    }
}
That snippet is the starting point for any multi-lens work. It separates logical cameras from standalone ones and gives you the physical members of each group. Run it once at startup, keep the result in a small data structure, and use it every time you build a session or draw a zoom control.
CameraManager and CameraCharacteristics: Reading the Hardware Map
CameraManager is the entry point for everything in Camera2. It lists cameras, opens them and reports availability changes when another app takes the camera. CameraCharacteristics is the read-only description of one camera. Together they form the hardware map that a multi-lens app must read before it opens anything. Skipping this step is the most common cause of multi-lens bugs, because the app then assumes a lens exists that the phone does not have, or it assumes a zoom range the hardware cannot cover.
The first thing to read is the lens facing and the capability list. LENS_FACING tells you whether a camera looks forward or backward. REQUEST_AVAILABLE_CAPABILITIES tells you what the camera can do, including whether it is a logical multi-camera. The second thing to read is the zoom ratio range, CONTROL_ZOOM_RATIO_RANGE, which gives the minimum and maximum zoom the logical camera supports. The third is the physical ID set, which tells you how many lenses sit behind the logical camera and what their individual characteristics are. Read all three before you build any UI, because the UI should reflect the hardware rather than a fixed idea of what a phone camera looks like.
Keys that matter for multi-lens devices
Several characteristic keys carry the information that decides switching behaviour. LOGICAL_MULTI_CAMERA_PHYSICAL_IDS lists the members of the group. Each physical camera has its own characteristics, reachable through getPhysicalCameraCharacteristics, and those carry the real focal lengths and field-of-view values. LENS_INFO_AVAILABLE_FOCAL_LENGTHS gives the focal length of each physical camera, and LENS_INFO_AVAILABLE_APERTURES gives the aperture range. SENSOR_INFO_PHYSICAL_SIZE gives the sensor size, which explains why the telephoto image looks different from the wide image even at the same zoom ratio. SCALER_STREAM_CONFIGURATION_MAP lists the output sizes and frame rates, and it exists per physical camera too, so a combination that the logical camera hides may still be available on one member.
Two more keys deserve attention. CONTROL_ZOOM_RATIO_RANGE on the logical camera tells you the full zoom span, while the same key on a physical camera tells you the span that member covers well. REQUEST_AVAILABLE_CAPABILITIES_LOGICAL_MULTI_CAMERA is the flag that marks a logical camera at all. If that flag is absent, the camera ID is a standalone physical camera, and opening it gives you exactly one lens with no framework switching behind it.
Checking zoom ratio ranges before you build the UI
The zoom slider is where users meet the switching logic, so it should be built from the hardware data rather than from a fixed 1x to 10x assumption. Read CONTROL_ZOOM_RATIO_RANGE from the logical camera, then read the physical ranges to find the switch points. A phone with a 0.5x ultrawide, a 1x wide and a 5x telephoto will show switch points near 0.6x and 3x, and the slider can mark those points with a small tick or a label. Users who see the tick understand the change in the image. Users who do not see it report the switch as a glitch.
A quick capability check you can run at startup
Run a small capability check when the app starts, before the preview opens. List the cameras, find the rear logical camera, read its physical IDs and zoom ranges, and record whether the device supports concurrent physical streams. That check takes a few milliseconds and it answers every question the rest of the app will ask: which lenses exist, where they switch, and whether the framework can keep two of them warm at once. Cache the result in memory for the session. Re-running the check on every frame is wasteful, and reading characteristics is not free.
Opening a Logical Camera and Building a Capture Session
Opening a camera in Camera2 is asynchronous. The app calls openCamera with an ID and a CameraDevice.StateCallback, and the framework calls back when the camera is ready, disconnected or in error. For a logical camera the ID is the group ID, and the callback behaves the same as for a standalone camera. The difference is hidden: opening the logical camera may open one or more physical cameras underneath, and the framework manages their power and streaming state without the app intervening.
Once the camera is open, the app builds a capture session. The session binds output surfaces, such as a preview Surface from a TextureView or SurfaceView and an ImageReader surface for still captures, to the camera. On Android 10 and later, the app can use SessionConfiguration with OutputConfiguration objects that name a physical camera ID, which tells the framework that a particular surface should always come from a particular physical lens. That is the tool for apps that need a guaranteed lens, such as a portrait mode that must use the telephoto. Used carelessly it defeats the framework switching, so it should be reserved for cases where the lens choice is part of the feature, not the default.
StateCallback and the cost of opening the wrong camera
StateCallback has three methods that matter: onOpened, onDisconnected and onError. onOpened is where the app builds the session. onDisconnected is where the app cleans up because another app took the camera. onError is where the app handles a failure, including the case where the camera is in use by a higher-priority app. Opening the wrong camera ID is a common mistake: an app that opens the first ID in the list may open a front camera or a standalone physical camera instead of the rear logical camera. The fix is simple and often skipped: pick the camera by facing and by the logical multi-camera capability, not by position in the list.
Opening a physical camera directly is possible on some devices, and it is almost always the wrong move. A directly opened physical camera bypasses the framework switching, so zoom stops working the way the user expects, and the app loses the combined characteristics of the group. There are narrow cases where direct opening is right, such as a specialist app that needs raw access to one sensor, but a general camera app should open the logical camera and let the framework choose. If you find yourself opening a physical ID, stop and check whether a physical OutputConfiguration on the logical camera gives you the same result with the switching intact.
Building a session with physical outputs
A session with physical outputs names the physical camera for one or more surfaces while the rest of the session stays logical. The preview can stay logical, so the framework switches it freely, while a still capture surface is pinned to the telephoto for a portrait feature. That split is the most useful pattern in multi-lens development: let the framework manage the preview, and pin only the surfaces where the lens choice is a deliberate product decision. The code below shows the shape of it, using the modern SessionConfiguration path.
List<OutputConfiguration> outputs = new ArrayList<>();
OutputConfiguration previewOutput =
    new OutputConfiguration(previewSurface);
outputs.add(previewOutput);
OutputConfiguration stillOutput =
    new OutputConfiguration(stillSurface);
stillOutput.setPhysicalCameraId(telephotoId);
outputs.add(stillOutput);
SessionConfiguration sessionConfig = new SessionConfiguration(
    SessionConfiguration.SESSION_REGULAR,
    outputs,
    executor,
    sessionCallback);
cameraDevice.createCaptureSession(sessionConfig);
That pattern keeps the preview flexible and the still capture predictable. It also makes the code honest about its intent: any reader can see which surface is pinned and why, instead of guessing from a camera ID chosen three methods earlier.
Camera work must follow the app lifecycle closely, or the app will crash when the user leaves and returns. Open the camera when the UI becomes visible, close it when the UI pauses, and never hold the camera across a configuration change without a plan. The guide to handling lifecycle state changes without crashes covers the same discipline in general terms, and every point in it applies twice to camera code, because a camera held at the wrong moment blocks other apps and drains the battery. A clean pattern is to open in onResume, close in onPause, and treat every callback after close as a signal to stop, not as an error to retry.
Closing the camera when the activity pauses
Closing matters as much as opening. When the activity pauses, close the session first, then the camera device, in that order, and clear any pending capture requests. A session left open after the camera closes will report errors on the next open. A camera left open after the activity pauses will hold the hardware while the user is in another app, and the system may kill your process for it. The close path should be short, synchronous where possible, and safe to call twice, because lifecycle callbacks do not always arrive in the order you expect.
How Lens Switching Works During Zoom and Capture
The zoom slider is the main control that triggers switching, and the framework handles it through the capture request. The app sets CONTROL_ZOOM_RATIO on a repeating request, and the framework decides which physical camera should serve that ratio. The app does not switch cameras itself. It asks for a zoom level, and the framework answers with frames from the best lens. That separation is the whole design: the app describes what it wants, and the framework owns the hardware.
Switching during a repeating preview request is the common case, and it is designed to be invisible. The framework brings the next physical camera online before the switch point, aligns exposure and focus as closely as it can, and then changes the source. The user sees a small change in perspective and field of view, because a different lens sees the world differently, but the preview does not go black and the session does not restart. Switching during a still capture is different: the capture request carries the zoom ratio and the framework picks the lens for that single frame, which is why a photo taken at 2.9x may come from a different lens than the preview showed at the same ratio a moment earlier.
Zoom ratio ranges and the hand-off between lenses
The hand-off between lenses is not a single point but a small overlap zone. Each physical camera covers a zoom range, and the ranges overlap so the framework can choose either lens inside the overlap. The framework picks the lens that gives the better result for the current light, focus distance and frame rate, which means the switch point can move slightly between a bright outdoor scene and a dim indoor one. An app that logs the active physical ID will see the switch happen at 2.1x in one scene and 2.4x in another, and that movement is normal behaviour rather than a bug.
Between switch points the framework uses digital zoom on the nearest physical camera. At 1.5x on a phone with a 1x wide and a 5x telephoto, the wide lens supplies the frame and the framework crops it. Image quality at 1.5x is therefore worse than at 1x, and better than a naive crop would suggest, because the framework applies its own sharpening and noise handling to the cropped frame. Developers who promise users lossless zoom at every ratio are promising something the hardware cannot deliver, and the honest approach is to mark the optical switch points in the UI so users can aim for them.
What CaptureResult tells you after a switch
Every frame the framework delivers comes with a CaptureResult, and that result carries the evidence of which lens produced it. LOGICAL_MULTI_CAMERA_ACTIVE_PHYSICAL_ID names the physical camera for that frame. CONTROL_ZOOM_RATIO reports the ratio the framework actually used, which may differ slightly from the requested ratio when the framework clamps it to a physical range. SENSOR_SENSITIVITY and SENSOR_EXPOSURE_TIME report the exposure the physical camera used, and those values often jump at a switch point because the lenses have different apertures and sensor sizes.
Reading these results is the most reliable way to debug switching. Log the active physical ID, the zoom ratio and the exposure values for a few seconds while you move the slider, and the switch points will show up as steps in the log. If the active ID never changes, the framework is not switching, which usually means the app opened a standalone physical camera by mistake or the device does not expose a logical camera at all. If the ID changes at unexpected ratios, check the physical zoom ranges rather than assuming the switch points from another phone model.
Keeping preview stable while the hardware changes
Preview stability is the user-visible test of switching. The framework works to keep the preview continuous, but the app can help or hurt. The app helps by keeping the repeating request simple during a switch: one preview surface, a steady frame rate and no competing capture requests. The app hurts by firing a still capture at the exact moment of a switch, by changing the zoom ratio in large jumps, or by rebuilding the session while the user is zooming. A zoom slider that sends a new request on every pixel of movement will flood the framework with requests, and the switch will stutter. A slider that sends requests at a steady pace, or that snaps to the nearest optical point when the user lifts their finger, gives the framework room to switch cleanly.
Why the preview can flicker at the switch point
A short flicker at the switch point usually has one of three causes. The first is exposure: the new lens has a different aperture, so the first frame from it is brighter or darker until auto-exposure converges. The second is focus: the new lens starts from a different focus position, so the first frame is soft until autofocus catches up. The third is a device that cannot stream two physical cameras at once, so the framework holds the last frame from the old lens while the new one starts, and the held frame looks like a freeze. The first two causes fade within a few frames and are normal. The third is a hardware limit, and the only honest response is to keep the switch points visible in the UI so the user expects the change.
Latency, Focus and Exposure: The Trade-Offs of Switching Lenses
Switching lenses is not free. Every switch costs time, and the cost shows up as latency, a focus hunt or an exposure jump. The framework hides most of it, but a developer who understands the costs can design around them instead of discovering them in user complaints. The trade-off at the centre is simple: the framework can switch fast, or it can switch well, and on most phones it picks a point between the two.
Focus and exposure after a switch
Each physical camera has its own autofocus and auto-exposure state. When the framework switches lenses, the new lens starts with its own focus position and exposure estimate, and both need a few frames to converge on the scene. During those frames the image may look soft or slightly wrong in brightness. The framework reduces the effect by warming up the next lens before the switch, pre-setting its focus near the current distance and its exposure near the current level, but the warm-up is only an estimate. A scene with strong backlight or a close subject will still show a visible adjustment after the switch.
Apps can reduce the pain by avoiding switches at the worst moments. Do not switch lenses in the middle of a still capture burst, because each frame in the burst may come from a different lens with different focus. Do not switch while the user is recording video and the scene is dark, because the exposure jump will be visible in the recording. And consider locking the lens during a video recording session, accepting a digital crop instead of a physical switch, when the recording matters more than the last bit of image quality. That lock is a product decision, and it should be offered as a setting rather than imposed silently.
Measuring switch latency on real devices
Switch latency is the time between the app requesting a new zoom ratio and the first frame from the new lens reaching the preview. On phones that can stream two physical cameras at once, that latency is often under 100 milliseconds, because the next lens is already warm. On phones that cannot, it can reach 200 to 400 milliseconds, because the framework must start the new sensor, wait for its first frames and then hand over. The only way to know the number for a target device is to measure it: log the timestamp of the zoom request and the timestamp of the first frame whose active physical ID changes, and repeat the test in bright light and in dim light, because low light makes every part of the chain slower.
Measure on the devices your users actually own, not only on the flagship you develop with. Mid-range phones often have the same number of lenses with weaker concurrent streaming support, and their switch latency is where users notice the difference. A switch that feels instant on a flagship can feel like a stumble on a mid-range phone, and the app should be tuned for the slower case.
When to lock the lens instead of letting the framework choose
Locking the lens means pinning a surface to a physical camera ID and refusing to switch, and it is the right call in a few clear cases. Video recording is the main one: a visible switch in the middle of a clip is worse than a slightly softer digital zoom, so many video apps lock the lens for the duration of a recording. A second case is a burst capture where every frame must match, such as a panorama or a bracketed exposure set. A third is a specialist feature such as macro mode, where only the wide lens can focus close enough and any switch would ruin the shot. In each case the lock should be visible to the user, through a label or an icon, so the zoom slider behaves honestly while the lock is on.
Common Pitfalls and How to Avoid Them
Multi-lens bugs share a pattern: the app assumes something about the hardware that is only true on the developer phone. The fixes are also shared, and they mostly come down to reading the characteristics, testing on more than one device, and respecting the lifecycle. These are the pitfalls I see most often, and the ones that cost the most time when they reach users.
Opening a physical camera directly by mistake
The most common pitfall is opening a physical camera ID as if it were a normal camera. It happens when an app opens the first ID in the list, or when it filters by lens facing without checking the logical capability flag, and lands on a physical member of a group. The symptom is a camera that works but never switches lenses, a zoom slider that only crops digitally, and a user report that zoom feels broken. The fix is to select the camera by facing plus the logical multi-camera capability, and to treat physical IDs as members to read about, not cameras to open. If a physical ID is ever passed to openCamera, that line of code deserves a comment explaining why, because the next developer to read it will assume it is a bug.
Forgetting background limits when the camera runs long
Camera work often continues past the visible session: a long video upload, a batch of photos to process, or a capture that finishes after the user leaves the app. Background execution limits mean that work cannot simply run forever in the background, and an app that tries will be stopped by the system without warning. The right approach is to hand long-running work to the system scheduler instead of holding a background thread, and the guide to managing WorkManager tasks under background limits explains that handoff in detail. The same thinking applies to notifying the user when background work finishes: rather than keeping the app alive to watch for completion, the guide to implementing push notifications with Firebase shows how a server message can wake the app at the right moment. Camera code that respects these limits is camera code that survives a real phone, not only a test device with the screen on.
Assuming every phone switches the same way
The second most expensive assumption is that the switch points, the latency and the concurrent streaming support are the same on every phone. They are not. One phone switches at 2x, another at 3x. One phone keeps two lenses warm, another cannot. One phone exposes a logical camera, another exposes only standalone physical cameras for the same lens count. An app that hard-codes any of these values will be right on one model and wrong on the rest. Read the values from characteristics at runtime, log them during testing on each target device, and keep a small table of what you measured so the next person on the project does not have to guess.
Testing deserves a real device lab, even a small one. An emulator cannot show you a lens switch, because it has no lenses. A single flagship cannot show you the mid-range behaviour that most users will see. Borrow two or three different phones, run the same zoom test on each, and compare the active physical ID logs. The differences will teach you more about the framework than any documentation can.
Frequently Asked Questions About Camera2 Multi-Lens Switching
Can I force the Camera2 API to use a specific physical lens?
Yes, in two ways, and each has a cost. You can pin an OutputConfiguration to a physical camera ID when you build the session, which fixes that surface to that lens while the rest of the session stays logical. You can also open a physical camera directly, which gives you that lens and nothing else. The first way is usually right, because the preview keeps switching while the pinned surface stays fixed. The second way removes framework switching entirely, so zoom becomes a digital crop and the app owns every consequence. Force a lens only when the feature needs it, such as a portrait mode that must use the telephoto, and show the user that the lens is locked.
Why does my preview jump when I zoom past 2x?
The jump is usually the physical switch itself. At 2x the framework hands the preview from the wide lens to the telephoto, and the two lenses see the scene from slightly different positions with different fields of view. The image shifts, the perspective changes, and the exposure may jump because the lenses have different apertures. A small jump is normal and the framework tries to hide it with a warm-up and a short blend. A large jump, or a black flash, points to a device that cannot stream two physical cameras at once, or to an app that rebuilds the session during the zoom. Log the active physical ID while you zoom: if the ID changes at the jump, it is the switch. If it does not, look at your own session code.
Does logical multi-camera work on every Android phone?
No, and the difference matters. Logical multi-camera needs HAL support, and older phones or phones with a single rear lens simply do not expose it. On those devices getCameraIdList returns standalone physical cameras, and the app must handle zoom with digital cropping alone. Even among phones that do expose it, the details differ: the number of physical members, the zoom ranges and the concurrent streaming support all vary. Check for the REQUEST_AVAILABLE_CAPABILITIES_LOGICAL_MULTI_CAMERA flag at runtime, and design the app so it works well with or without it. An app that requires a logical camera will fail on a large share of real devices.
How do I know which physical camera produced a frame?
Read LOGICAL_MULTI_CAMERA_ACTIVE_PHYSICAL_ID from the CaptureResult of that frame. It names the physical camera that supplied the frame, and it can change from frame to frame as the user zooms. Log it during development alongside the zoom ratio and the timestamp, and you will see exactly when switches happen. For still captures, read the same key from the result of the capture request. That value is also the right thing to record in your own metadata if you need to explain later why two photos at similar zoom ratios look different: they may have come from different lenses.
Putting It Together: A Practical Checklist for Multi-Lens Apps
Multi-lens switching feels like magic to the user and like plumbing to the developer, and that gap is the point of the framework. The app describes what it wants, the framework owns the hardware, and the user sees one camera. Getting there takes a short list of habits rather than a large amount of code.
Start by reading the hardware map: list the cameras, find the rear logical multi-camera, read its physical camera IDs and its zoom ratio ranges, and build the zoom UI from those numbers instead of fixed assumptions. Open the logical camera, build one session, and let the framework switch the preview while you pin only the surfaces where the lens choice is a deliberate feature. Tie open and close to the lifecycle, measure switch latency on the devices your users own, and log the active physical ID whenever a switch looks wrong. Test on more than one phone, because the switch points and the streaming support change between models, and an emulator will never show you a real switch.
The next step is a small one: run the capability check from this article on your own target device, log the physical IDs and zoom ranges, and move the zoom slider slowly from 0.5x to 5x while watching the active physical ID change. That single test will show you the switch points, the latency and the exposure behaviour of the phone in your hand, and it will tell you more about your app than another hour of reading. Once you have seen the switch happen in the log, every other part of the framework falls into place.

