

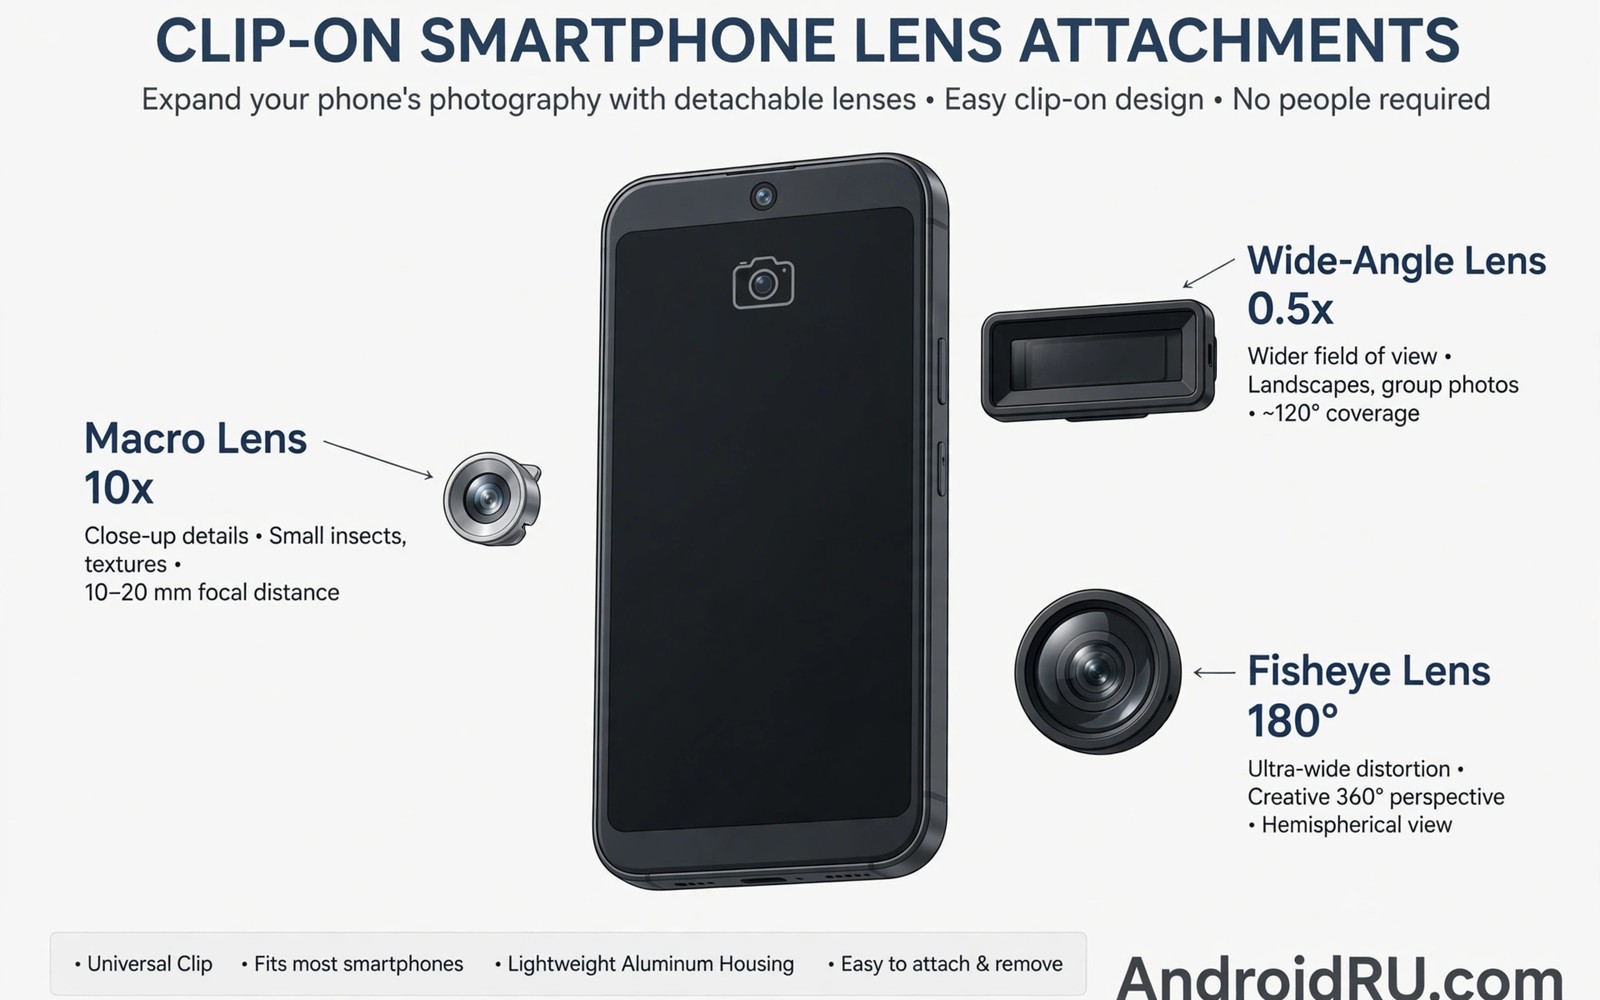
External lenses clip over a phone camera to change its view. A macro lens magnifies tiny subjects like insects and flowers. An anamorphic lens squeezes a wide cinematic frame onto the sensor. A fisheye lens bends the world into a round playful view. These add ons cost little compared with a new phone. Used well they expand what a phone can shoot. Used poorly they create soft dark corners and frustration.
Start with alignment because it decides everything. A clip on lens must sit exactly over the phone camera lens. Even a small offset creates blur on one side. A large offset creates a dark crescent in the frame. Centre the lens carefully before every shoot. Check the preview corners for darkness. Recentre until corners stay bright. Alignment takes seconds and saves many ruined frames.
Choose a lens that matches your main camera only. Most clip lenses align with the main wide camera. They rarely align well with ultra-wide or telephoto cameras. Use the main camera for all external lens work. Lock the phone to that camera before mounting. Switching cameras mid shoot breaks alignment. A main camera habit keeps external lens work consistent.
Mount A Macro Lens Correctly
Mount a macro lens with a sturdy clip and a clean phone lens. Clean the phone lens first with a soft cloth. Dust between clip lens and phone lens softens every macro frame. Clip firmly but gently to avoid scratching the phone. Check that the clip does not cover a flash or a sensor. A covered flash creates uneven macro light. A covered sensor can confuse focus.
Focus a macro lens by moving the phone rather than by tapping focus alone. Macro depth of field is extremely shallow. A millimetre of movement changes focus completely. Move the phone slowly toward the subject until detail sharpens. Hold breath and press gently when sharpness peaks. A tripod or a small stand helps greatly for static macro subjects. Handheld macro needs patience and many tries.
Light macro subjects from the side for texture. Direct front light flattens tiny detail. Side light reveals ridges and hairs and petal veins. Use a small LED panel at low power. Keep the light close but soft with a diffuser. Watch for your own shadow falling on the subject. A shadow from your hand ruins a macro frame instantly. Move the light rather than the subject when shadows appear.
Shoot Cinematic Anamorphic Video
An anamorphic lens squeezes a wide scene horizontally. Software then stretches it back to a cinematic widescreen ratio. The result shows wide landscapes with a filmic feel. It also creates horizontal lens flares from bright lights. Those flares look blue and streaky in a pleasing way. Anamorphic video suits landscapes and city nights and car scenes. It suits portraits less because faces stretch during setup.
Mount the anamorphic lens horizontally with care. A rotated anamorphic lens distorts the frame badly. Check the lens orientation marks before mounting. Keep the lens level during a shot. A tilted anamorphic frame looks wrong in a way that is hard to fix. Use a tripod or a gimbal for anamorphic video. Stable anamorphic footage looks cinematic. Shaky anamorphic footage looks like a mistake.
Desqueeze footage in an editor that supports anamorphic ratios. A common cinema ratio is wider than standard phone video. Set the desqueeze factor to match your lens. A wrong factor leaves faces too wide or too narrow. Test desqueeze on a short clip before a long shoot. A short test prevents a whole project in the wrong ratio. Export at the final cinema ratio for the intended screen. Manual focus for super sharp macro close-ups helps with precise anamorphic focus pulls.
Avoid Vignetting And Soft Edges
Vignetting means dark corners from a misaligned or narrow lens. Check corners in the preview before every external lens shot. Recentre the clip when a corner darkens. Try a different clip position for a thick phone case. A thick case can push the lens too far from the camera. Remove the case for critical external lens work. A case free phone aligns more accurately.
Soft edges come from cheap glass and wide apertures. Stop down in bright light when your phone allows it. Use the sharpest central area for the subject. Place the subject near the centre for critical detail. Let edges soften on background areas only. Centre placement hides edge softness well. Edge placement exposes it. Compose for the lens you own rather than an ideal lens.
Clean external lenses before every use. Fingerprints on a tiny lens ruin contrast badly. Carry a microfiber cloth in the lens pouch. Blow dust off before wiping to avoid scratches. Store lenses in separate pouches to prevent glass contact. Scratched external glass cannot be repaired cheaply. Clean storage protects a small investment for years.
Choose Quality Over Quantity
Buy one good macro lens rather than a cheap multi lens kit. Cheap kits often include several weak lenses. One good lens gives sharp centres and clean colours. A weak lens gives soft frames that no edit fixes. Read reviews that show full frame samples. Samples with only centre crops hide edge problems. Full frame samples reveal true quality.
Check lens thread and clip compatibility with your phone model. Some clips fit thin phones poorly. Some clips block a camera button or a microphone. Test fit before a trip. A clip that slips during a shoot loses moments. A clip that fits firmly gives confidence. Compatibility testing at home prevents venue frustration.
Budget for a case and a cleaning kit alongside the lens. A padded pouch prevents scratches in a bag. A cleaning cloth keeps contrast high. A small tripod helps macro work greatly. These accessories cost less than a second lens. They improve every lens you own. A protected lens lasts longer than a neglected expensive lens. Shooting DSLR quality portraits on a budget phone shows how add ons compare with phone upgrades.
Practice With Everyday Subjects
Practice macro with coins and fabric and leaves first. Coins show fine engraved detail clearly. Fabric shows weave and thread structure. Leaves show veins and edge texture. These subjects sit still for patient practice. Still subjects let you learn focus distance slowly. Moving insects come later after still practice succeeds.
Practice anamorphic with a street at dusk. Street lights create classic horizontal flares. A wide street fits the cinema ratio naturally. Walk slowly with a gimbal for smooth motion. Stop at viewpoints for static wide frames. Static frames show the ratio best. Moving frames show flare behaviour best. A dusk street practice session teaches both.
Practice fisheye only for playful scenes if you own one. Fisheye suits skate parks and interiors with humour. It distorts faces badly in portraits. Use it sparingly for a fun feed post. A feed full of fisheye frames tires viewers fast. One fisheye frame in a set adds surprise. Many fisheye frames feel like a gimmick.
Test external lenses in a shop or with a return window when possible. A short home test reveals fit and corner quality fast. Shoot a brick wall for distortion and edge checks. Shoot a newspaper for centre sharpness checks. A wall plus newspaper test exposes most lens flaws. Return a lens that fails those tests promptly. A tested lens earns its place in your kit.
external_lens = main camera only
external_align = centre over lens
external_focus = move phone slowly
external_clean = cloth before use
external_check = corners bright
The snippet above is an original external lens checklist written for this guide. It lists only standard camera steps for your own Android phone. It does not copy instructions from any outside source.
Share external lens results with settings noted for other photographers. Note lens type and phone model and distance used. Other photographers learn faster from complete notes. Complete notes also help you repeat a successful setup later. A setup you cannot repeat is a lucky accident. A setup with notes is a repeatable technique. Build a small notebook of lens setups that worked.
Label your lens pouches clearly for fast selection on location. A macro pouch and an anamorphic pouch look similar in a bag. Clear labels prevent mounting the wrong lens in a hurry. A wrong lens mounted in a hurry wastes a moment. Labels cost nothing and save moments. Pack lenses in the order you expect to use them.
Store lens notes with sample photos for each lens you own. A sample plus a note recalls the best distance fast. Future shoots start from proven distances. Proven distances save test time on location. A small sample library is a personal lens manual. Build it one subject at a time.
Common Mistakes
One common mistake is to mount a lens over the wrong camera. Telephoto and ultra-wide cameras misalign with most clips. Use the main camera only. Another mistake is to ignore corner darkness in the preview. Dark corners signal misalignment. Recentre before shooting rather than after.
A third mistake is to buy a cheap multi lens kit for quantity. Cheap glass softens every frame. Buy one good lens instead. A fourth mistake is to touch focus only for macro work. Macro focus needs physical movement. Move the phone slowly until detail peaks. Why ultra-wide lenses distort portraits explains lens geometry that also affects add on lenses.
Frequently Asked Questions
Do clip-on lenses work on all phones?
Most clips fit phones with a single main camera near an edge. Very large camera modules can complicate fit. Test fit before buying when possible. Remove thick cases for best alignment. A good clip fits firmly without covering sensors.
Is an anamorphic lens worth it for casual video?
Anamorphic suits planned cinematic projects best. Casual clips need desqueeze editing extra work. A casual shooter may prefer standard wide video. A planned project gains a distinct filmic look. Buy anamorphic only when you will edit the ratio properly.
Can macro lenses damage a phone camera?
A clean clip used gently does not damage a phone lens. A dirty clip can scratch glass over time. Clean both lenses before mounting. Avoid forcing a tight clip. Store lenses separately to prevent scratches.
Conclusion
Clean your main camera lens today and mount a macro lens for a still subject test. Move the phone slowly until detail peaks and check the corners for darkness. Repeat the test with a second subject at a different distance. That patient practice will turn a cheap add on into a serious creative tool.

