

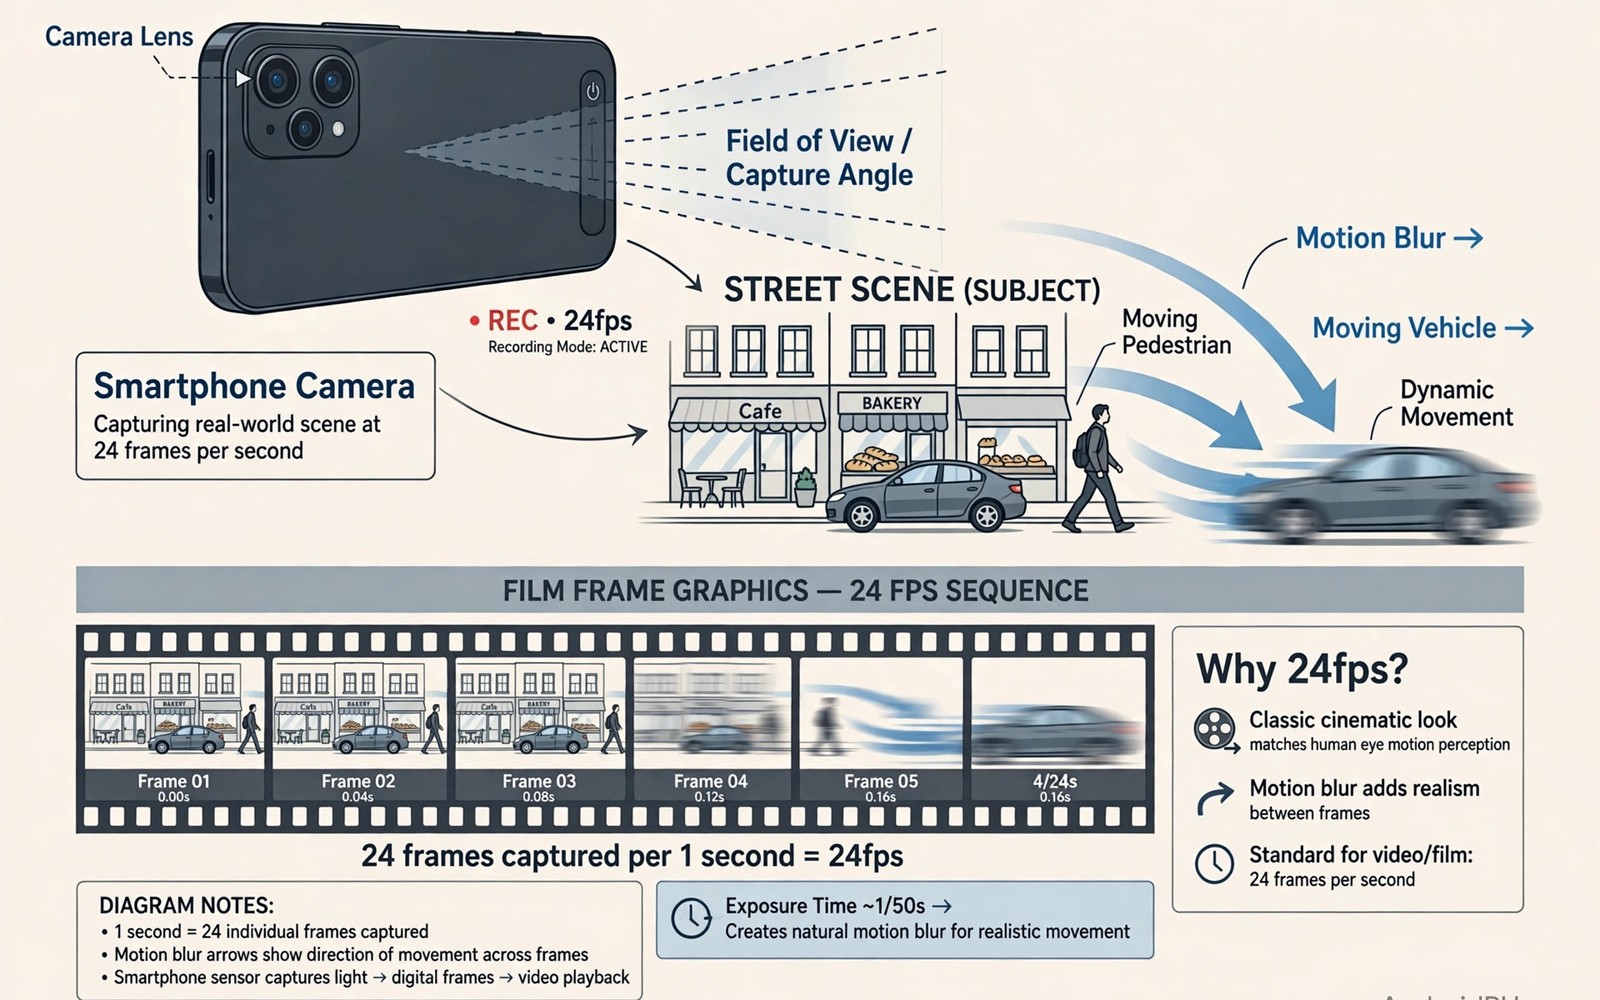
Standard phone video at 30 frames per second looks like television news because that frame rate carries a crisp realistic motion. Cinema at 24 frames per second looks like film because the slightly lower rate creates a gentle motion blur that the brain reads as story. That difference explains why many phone videos feel ordinary even when the scene looks beautiful. Switching to 24 frames changes the mood before any editing begins.
Enabling 24fps is usually simple but using it well needs a few extra habits around shutter speed and movement. Fast pans at 24fps judder badly while slow deliberate pans look smooth and intentional. Bright light also needs control because the correct shutter speed for 24fps lets in more light than a standard video shutter. Readers who want steadier footage should also read smooth handheld video without expensive gimbals because stability matters even more at film rates.
Start by checking whether your stock camera app offers a frame rate menu in video mode. Many phones hide frame rate under resolution settings or under a pro video mode. Third party camera apps can unlock 24fps on phones where the stock app hides it. Test a short clip after enabling it and watch movement on a larger screen before committing to a full project.
Enable 24fps in your camera app
Open video mode and look for resolution and frame rate options near the top of the screen. Select 4K at 24fps when your phone supports that combination for the best quality. Choose 1080p at 24fps when storage or heat limits 4K recording on your model. Both resolutions carry the film look and 1080p often allows longer takes without overheating.
Pro video mode gives manual control over frame rate and shutter and ISO on many Android phones. Switch to pro mode when the standard mode locks frame rate at 30fps. Set frame rate to 24 and leave other controls automatic at first while you learn the look. Manual control comes later once the basic film motion feels familiar in your footage.
Check that your chosen frame rate survives when you switch lenses because some phones reset to 30fps on the ultra wide lens. Test each lens with a short clip and note which lenses keep 24fps. Use only the lenses that maintain the rate for a consistent project. Mixed frame rates in one edit create a jarring change that viewers notice even when they cannot name it.
Set shutter speed for natural motion blur
The classic film rule sets shutter speed near double the frame rate so 24fps pairs with a shutter near one fiftieth of a second. That shutter creates the motion blur that makes film movement feel smooth. A much faster shutter freezes each frame and creates a choppy documentary look that suits action but not drama. A much slower shutter smears movement into mush and loses detail.
Bright daylight makes a one fiftieth shutter overexpose badly without help because that shutter stays open relatively long. A neutral density filter for phones solves the problem by cutting light before it reaches the sensor. Clip on filters cost little and they let you keep the film shutter even under harsh sun. Without a filter you must raise shutter speed and lose some film smoothness on bright days.
Indoor light usually allows the film shutter without a filter because light levels stay moderate. Watch for flicker from artificial lights at certain shutter speeds because mains frequency can clash with 24fps. Adjust shutter slightly when flicker bands appear across the frame. A small shutter change often removes flicker while keeping most of the film look intact.
Move the camera slowly and deliberately
Slow pans suit 24fps because the frame rate needs time to render movement smoothly. Pan so slowly that it feels almost too slow while you record because playback will feel natural. Count seconds for a pan across a scene and aim for at least seven seconds for a wide sweep. Faster pans create strobing where objects jump between positions instead of gliding.
Walk with bent knees and short steps when filming while moving because that gait absorbs bounce. Hold the phone close to your body and use both hands for stability. Plan the start and end of each move before you press record so the movement has a purpose. Aimless wandering looks amateur at any frame rate and it looks worse at 24fps.
Use a tripod or a rest for static scenes because even tiny hand tremor shows in cinematic footage. A still frame with a moving subject inside it feels profoundly cinematic and it needs no camera movement at all. Let people and water and clouds move through a locked frame and the film look emerges naturally. Stillness is a powerful tool that beginners often overlook in favour of constant motion.
Colour and sound for a film feel
Colour grading completes the cinematic look after frame rate sets the motion. Shoot in a flat or log profile when your phone offers one because flat footage keeps more highlight and shadow detail for grading. Apply a gentle film look with slightly lifted blacks and restrained saturation rather than a heavy preset. Heavy presets crush the detail that 24fps footage needs to feel rich.
Sound matters as much as picture because bad audio breaks immersion faster than any visual flaw. Record in a quiet spot and keep the phone microphone clear of wind and handling noise. A simple wind cover over the microphone improves outdoor audio dramatically. Plan to add music and natural sound in editing rather than relying on raw phone audio alone.
ffmpeg -i input.mp4 -vf fps=24 -c:v libx264 -crf 18 output24.mp4
ffprobe -v error -select_streams v:0 -show_entries stream=r_frame_rate -of default=noprint_wrappers=1 input.mp4
adb shell dumpsys media.camera | grep -i fps
The commands above follow the standard Android developer workflow for converting and checking video frame rates from a computer. Credit for this method belongs to the wider Android developer community that describes these tools for everyday frame rate conversion and checking.
Edit 24fps without breaking the look
Edit on a 24fps timeline so the software does not convert your footage back to 30fps silently. A timeline mismatch causes judder that ruins the film motion you worked to capture. Export at 24fps as well and check the final file frame rate before sharing. Many editors default to 30fps and that default quietly destroys cinematic footage.
Cut on movement rather than on static pauses because movement carries the viewer through a cut smoothly. Keep shots a little longer than you would for social video because film pacing breathes more slowly. Short rapid cuts fight the gentle motion of 24fps and feel restless. Let each shot establish its scene before you move to the next one.
Stabilisation in editing can help minor shake but it cannot rescue violent movement at 24fps. Apply gentle stabilisation only and accept a little natural movement as part of the film feel. Over stabilised footage warps edges and looks digital in a way that breaks immersion. Shoot steadily first and edit lightly second for the best result.
Plan shots like a short film
Planning turns random clips into a coherent sequence because each shot earns a place in the story. List the wide shot and the medium shot and the close detail before you start filming. Shoot them in any order and assemble them later into a sequence that guides the viewer. That simple shot list elevates travel video from a diary to a film.
Establishing shots set location and mood at the start of a sequence. A wide landscape or a street sign tells viewers where the story happens. Follow with closer shots that reveal people and details within that place. That progression from wide to close feels natural because it mirrors how humans explore a new location.
Detail shots add texture that wide shots miss such as hands and food and signs and shadows. Insert a detail shot between wider shots to keep the sequence lively. Viewers remember details long after they forget generic wide views. Collect details deliberately rather than hoping they appear by accident.
Common mistakes
The biggest mistake is panning fast at 24fps because the low rate cannot render fast movement smoothly. Slow every camera move down until it feels deliberate and test pans on a large screen. Fast pans that look fine in the phone preview often judder badly on a television.
Another mistake is shooting 24fps in flickering artificial light without checking for bands. Test a few seconds under each new light source before a full take. A quick test saves a whole scene from unusable flicker that editing cannot fully remove.
People also mix 24fps and 30fps clips in one timeline without converting properly. That mix creates uneven motion that viewers feel even when they cannot explain it. Keep one frame rate for a whole project and convert any exception footage carefully before editing.
Frequently asked questions
Does 24fps work for sports video?
Sports usually suit higher frame rates because fast action needs crisp frames. Reserve 24fps for drama and travel and portraits where mood matters more than motion clarity.
Will 24fps save storage space?
24fps uses slightly less data than 30fps at the same quality because it records fewer frames. The saving is modest and it should not drive the choice alone.
Can I convert 30fps footage to 24fps later?
Conversion is possible but it rarely looks as smooth as native 24fps capture. Shoot at 24fps from the start when the film look matters to your project.
Conclusion
Cinematic 24fps video on Android starts with the frame rate setting and continues through shutter speed and slow movement and careful editing. Each element supports the film look and missing one weakens the whole result. Practice slow pans and test your lenses and check your timeline before a real project.
Your concrete next step is to shoot a one minute 24fps test clip today with a slow pan across a familiar scene. Keep the pan slow enough to feel almost too slow while recording and watch it tonight on a large screen carefully. Watch it on a large screen tonight and compare it with a 30fps version of the same scene. Readers ready for colour work will enjoy colour grading mobile footage with custom LUTs and smooth handheld video without expensive gimbals as natural follow-ups. As a related next step, explore shooting incredible time-lapse videos on mobile devices to extend what you set up here.

