

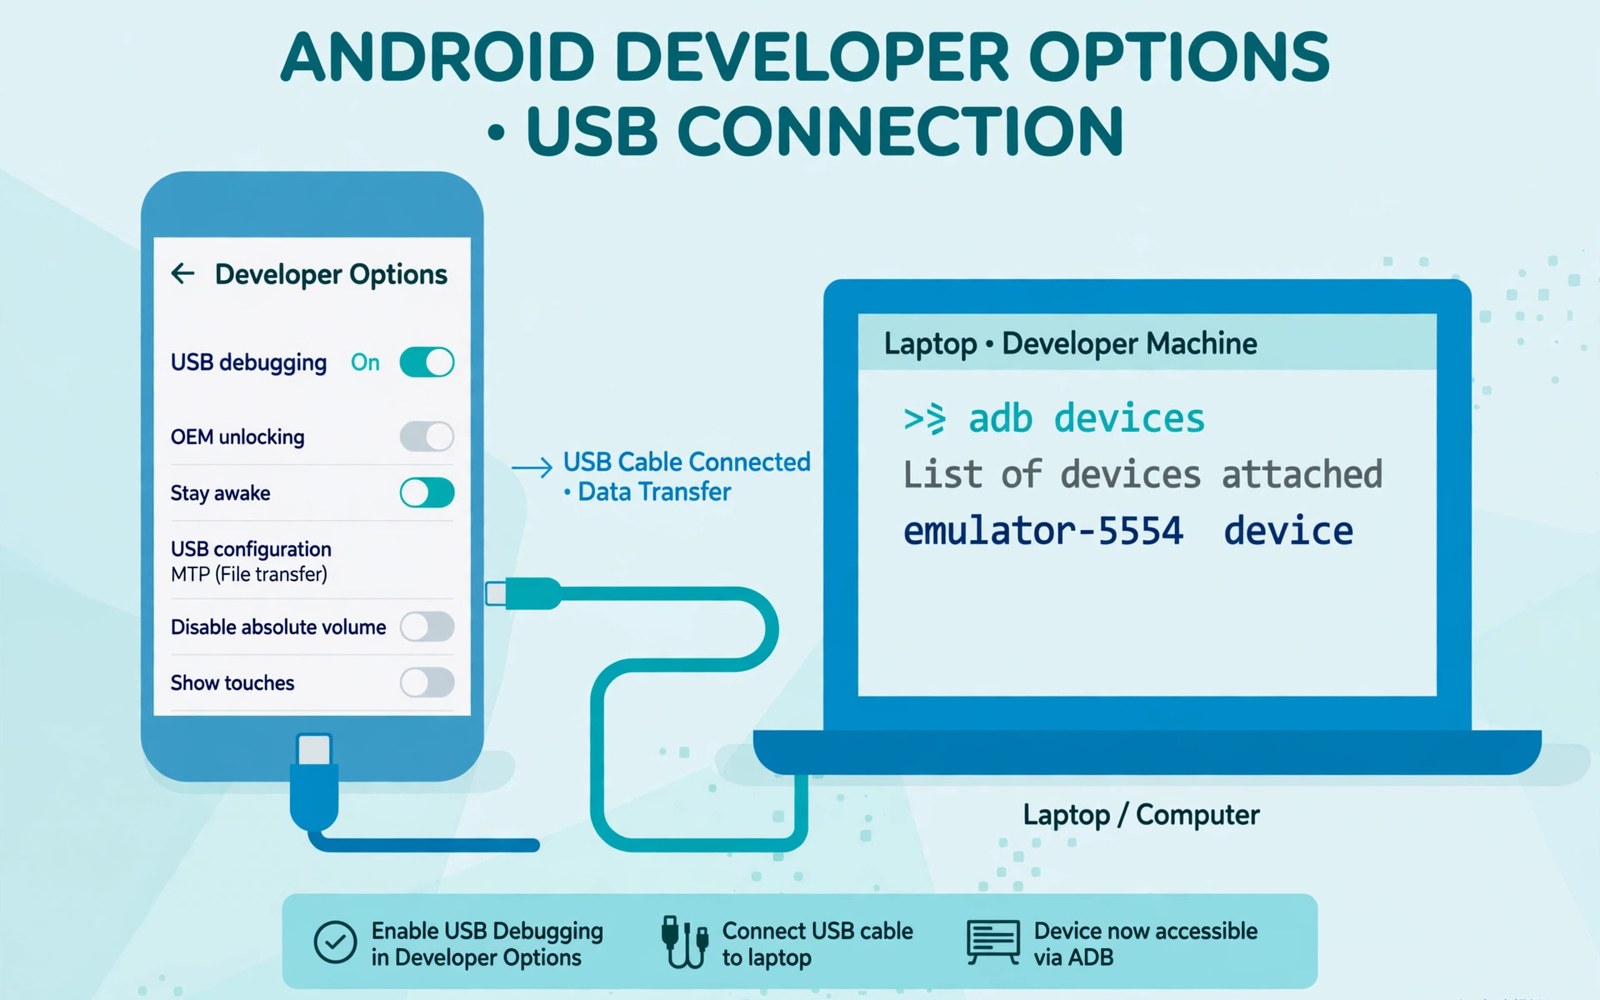
Developer options unlock a hidden settings menu on Android phones. The menu holds tools for testing apps and changing system behaviour. Most people never need it for daily use. Power users and app testers use it to connect a phone to a computer and inspect problems. This guide shows how to open the menu safely on any brand.
Every Android phone hides developer options behind a simple tap sequence. You tap the build number several times until the phone confirms the change. The exact menu names differ slightly between brands. Samsung calls one screen Software information while other phones use About phone. The core idea stays the same across all of them.
USB debugging is the best known setting inside developer options. It lets a computer send commands to your phone over a cable. App developers use it to test software and read error logs. You should turn it on only when you need it and only on a computer you trust. This guide covers setup and safe cleanup.
What Developer Options Really Do
Developer options change how Android behaves during testing and development. The menu includes animation speeds and background process limits. It also includes USB debugging and wireless debugging controls. Some settings affect how apps draw screens and handle memory. Others control how the phone talks to a computer.
These settings do not make your phone faster by magic. Changing animation scale only changes how fast transitions appear. Limiting background processes can break notifications and music playback. You should change one setting at a time and note what you changed. That habit makes it easy to undo a change that causes trouble.
Find Your Build Number on Any Phone
Open the Settings app on your phone and scroll to the bottom. Look for About phone on most Android phones. On Samsung phones open About phone and then tap Software information. The build number sits on that screen. Some phones place it under Device information instead.
If you cannot find it then use the search box at the top of Settings. Type build number and tap the result that appears. The search shortcut saves time on heavily customised phones. It also helps when a brand renames a menu. Once you see the build number you are ready for the next step.
adb devices
adb shell settings get global adb_enabled
Unlock Developer Options Step by Step
Tap the build number seven times in a row. After a few taps the phone shows a countdown message. The message tells you how many taps remain. On a phone with a lock screen you may need to enter your PIN or pattern. This check stops a stranger from unlocking the menu without your permission.
When the countdown ends the phone shows a short success message. Developer options now appear in Settings. On many phones the new menu sits under System. Samsung places it at the bottom of the main Settings list. Open it and you will see a long list of switches and values.
Turn On USB Debugging Safely
Open developer options and scroll to the Debugging section. Turn on USB debugging with the switch at the top of that section. Connect your phone to your computer with a good data cable. A prompt appears on the phone asking you to allow USB debugging. Check the computer fingerprint shown in the prompt before you accept.
Only allow debugging on a computer you own or fully trust. A public computer could read data from your phone through this channel. If you tap allow by mistake then revoke the permission later. Developer options include a control to revoke all USB debugging authorisations. Use it after a shared computer session ends.
Useful Settings Worth Knowing
Animation scale settings sit near the top of developer options. Window animation scale and transition animation scale control visual speed. Setting them to 0.5x makes the phone feel snappier. Setting them off removes animations entirely. The change is cosmetic and it does not affect app speed or battery in a major way.
Stay awake keeps the screen on while the phone charges. It helps during long testing sessions at a desk. Show taps draws a dot where you touch the screen. That feature helps when you record a tutorial or show a bug to a developer. Both settings are easy to turn off when you finish.
Settings You Should Leave Alone
Some developer options can break apps or drain the battery fast. Do not change the background process limit unless you understand the trade-off. A strict limit kills apps in the background and stops notifications. Do not force GPU rendering for every app without a reason. It can cause visual glitches in older apps.
Never turn on settings that wipe data or change the bootloader state unless you follow a trusted guide. OEM unlocking can affect warranty and device security. It is not needed for normal USB debugging. If a setting description confuses you then leave it at its default value. Defaults exist to keep the phone stable.
Connect to a Computer for the First Time
Use a cable that supports data transfer and not only charging. Some cheap cables charge the phone but never show a debugging prompt. Try another cable if the phone only charges. On the computer you may need a driver for older Windows systems. Modern systems usually detect Android phones without extra software.
After you allow the computer the phone appears as a debugging device. You can run test commands and copy logs from the phone. Keep the phone unlocked during the first authorisation. Locking the screen can hide the prompt. Once authorised the computer stays trusted until you revoke it manually.
Turn Developer Options Off Again
When you finish testing you can hide developer options again. Open developer options and turn off the master switch at the top. This step disables USB debugging at the same time. Your phone returns to normal behaviour for daily use. Hiding the menu does not delete your apps or files.
Some phones also let you reset developer options from the same screen. Resetting restores every developer setting to its default value. Use reset if you changed several settings and lost track of them. After a reset you can unlock the menu again later with the same tap sequence. The process takes less than a minute.
Why Brands Hide Developer Options
Brands hide developer options to protect casual users from risky changes. A single wrong toggle can break notifications or drain battery. Hiding the menu keeps daily use simple and stable. Power users can still unlock it with the tap sequence. This balance serves both groups well.
Hidden menus also reduce support calls for manufacturers. Support teams deal with fewer accidental changes. Users who unlock the menu accept more responsibility for settings. That trade-off is fair for a testing tool. It keeps the main settings clean for everyone else.
Developer Options After a System Update
System updates sometimes reset developer settings to defaults. Check USB debugging after a major update. Re-enable only the settings you still need. A reset is not a fault in most cases. It reflects a fresh system state after upgrade.
Updates can also move developer options to a new menu location. Search Settings for developer options when it seems missing. The tap sequence still unlocks it on most phones. Note the new location for future reference. A short search saves a long hunt through menus.
Wireless Debugging Explained
Wireless debugging connects a computer without a cable. It suits testing when the phone sits across the room. Turn it on in developer options and pair with a code. The computer and phone must share the same network. Pairing codes expire quickly for safety.
Wireless debugging is slower than a cable for large file transfers. It works well for log reading and small tests. Turn it off after a testing session ends. An open wireless debug channel invites unwanted connections. Cable debugging remains the safer default for most users.
Reading Logs Without Getting Lost
Logs record app activity in real time. A log flood can overwhelm a beginner fast. Filter logs by the app package name when possible. Focus on error lines near the time of a crash. Ignore routine info lines that appear constantly.
Save a log snippet before reporting a bug to a developer. A short snippet with the error helps more than a huge file. Note the steps that triggered the error. Clear steps plus a log snippet make a strong bug report. Developers fix clear reports faster.
Developer Options and Battery Life
Some developer settings increase battery use noticeably. Stay awake keeps the screen on while charging. Show layout bounds adds drawing work for every screen. Turn off visual aids after testing ends. A clean developer menu protects battery life.
Background process limits can also affect battery in surprising ways. Killing apps forces them to restart often. Restarts use more power than steady background running. Leave process limits at default for daily use. Change them only for a short controlled test.
When to Ask for Help
Ask a developer forum for help when a setting confuses you. Describe your phone model and system version clearly. List the settings you changed already. Screenshots of the menu help helpers understand the state. Clear details get faster answers.
Avoid following random setting lists from unknown videos. A list meant for one phone model may harm another. Stick to official documentation for core settings. Test one change at a time. Caution protects your phone better than speed.
OEM Unlocking Is Not USB Debugging
Newcomers often confuse OEM unlocking with USB debugging. USB debugging only allows computer commands for testing. OEM unlocking allows bootloader changes and custom software. OEM unlocking carries far greater risk than debugging. It can void warranty and weaken device security permanently in some cases.
Never enable OEM unlocking for ordinary app testing. Normal debugging work never needs it. Guides that demand OEM unlocking usually target custom ROM installation. That is a separate project with its own risks. Keep OEM unlocking off unless you fully understand that project.
ADB Basics for Curious Beginners
Android Debug Bridge is the tool behind USB debugging. It runs on a computer and talks to the phone. Simple commands list devices and copy files. Beginners can learn a handful of commands safely. Reading device info and logs covers most beginner needs.
Practice ADB commands on a spare or old phone first. A spare phone removes fear of breaking a daily device. Learn how to disconnect and revoke authorisation cleanly. Revoking after practice restores normal security. Curiosity plus caution makes ADB learning enjoyable rather than stressful.
Quick Checklist Before You Start
Work through this short checklist so the setup goes smoothly on the first try.
- Charge your phone to at least half so it does not shut down during setup.
- Use a data cable you know works for file transfer.
- Know your lock screen PIN or pattern for the confirmation step.
- Use only a computer you trust for USB debugging.
- Write down any setting you change so you can undo it later.
- Turn USB debugging off when you finish testing.
This checklist takes a minute to review. It prevents the most common setup problems. Keep it in mind each time you repeat the process on a new phone.
Once debugging works you can move files and test other features with confidence. A related task is learning how to transfer files between Android and PC wirelessly when you do not want to use a cable at all.
Developers also benefit from screen sharing and problem solving on the same phone. You can read how to mirror your Android display to a PC or TV and how to fix app crashes by clearing cache and storage for two common follow-up tasks.
The steps above follow the approach described in the official developer documentation for Android devices. The documentation explains the build number sequence and the USB debugging authorisation prompt in plain terms. Brand menus differ in wording but the core flow stays consistent across devices.
Developer options look technical at first glance. The unlock sequence is simple once you know where to tap. Keep USB debugging off when you do not need it. Change one setting at a time and reset the menu if anything feels wrong. With those habits you can test apps safely without harming your daily phone use.

