

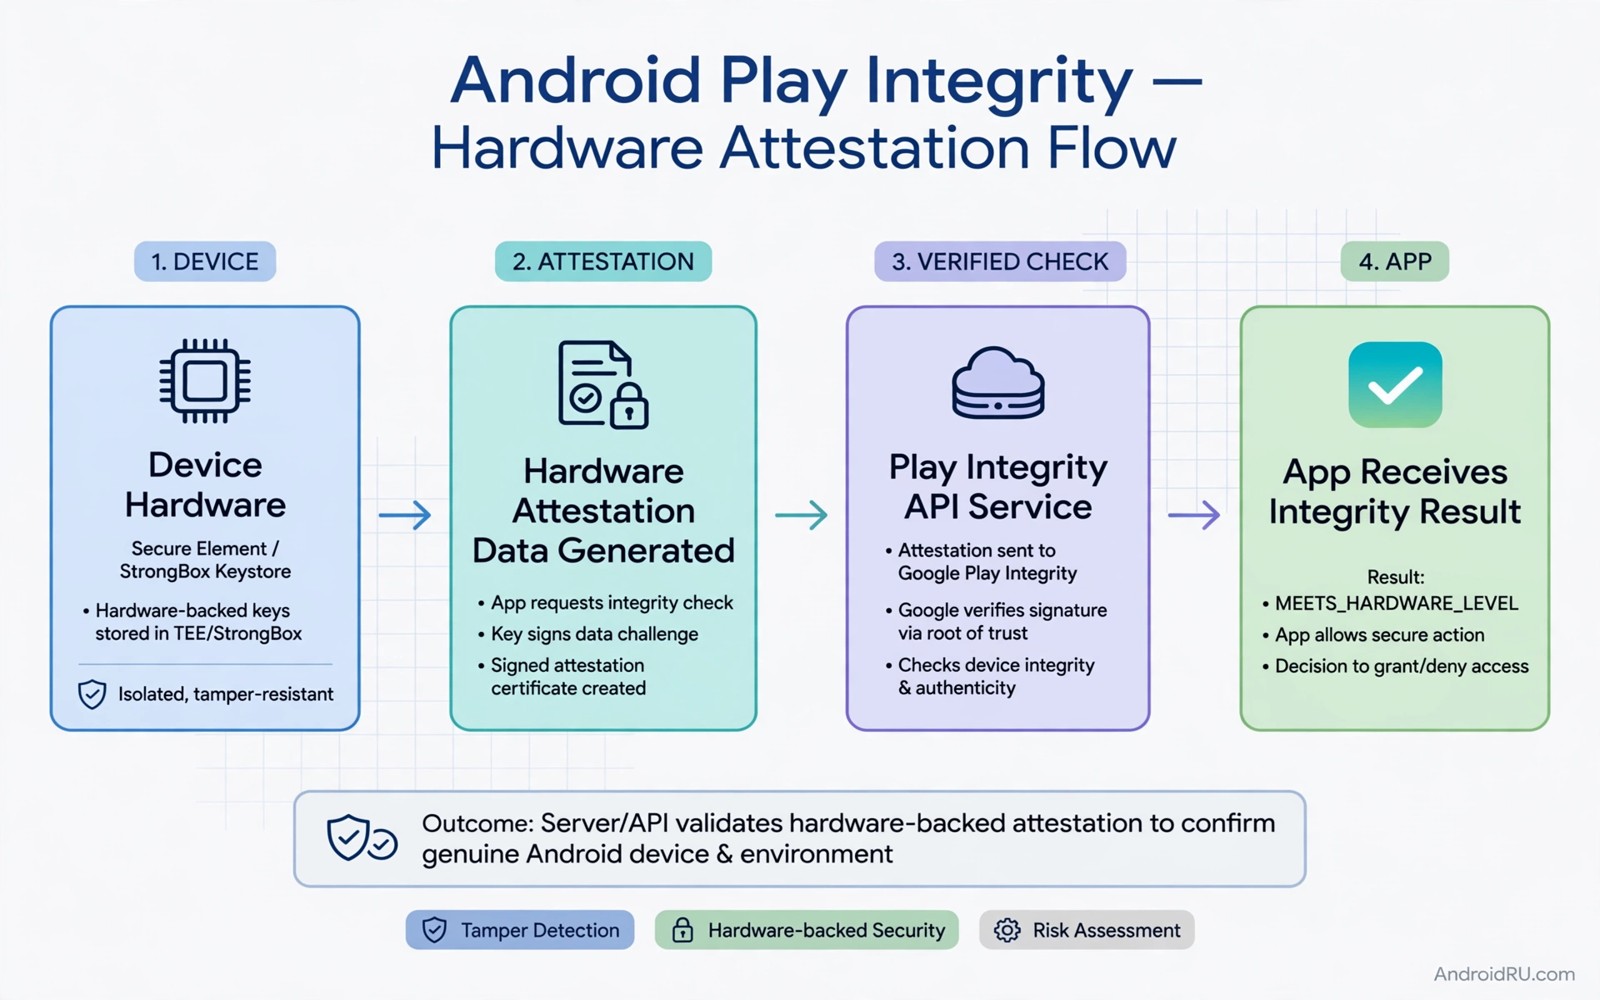
Play Integrity is a check that helps an app judge whether a device and an app installation look trustworthy. It does not prove that a user is honest. It gives verdicts about device integrity and app integrity and account details. Developers use those verdicts to decide what an app should allow. A banking app may require a strong verdict while a simple content app may accept a weaker one.
Many failures happen for legitimate reasons. A device may run a custom build that lacks a required attestation key. A device may have an unlocked bootloader that changes the verdict. An app may be installed from an unofficial source that breaks the app integrity check. Each cause needs a different fix and a generic retry will not help.
This guide explains how hardware attestation checks work and how to fix failures that belong to your own app and your own test devices. It does not teach how to fake a verdict for an app that you do not own. Faking attestation undermines trust for everyone and it can break in a later update without warning. Focus on building an app that passes honestly.
The three verdict layers in plain terms
Device integrity asks whether the device runs a recognised Android build with compatible hardware. Hardware attestation uses a key that lives in secure hardware on modern devices. That key can prove that the device model and bootloader state match what the maker shipped. A device with a locked bootloader and a stock build usually passes this layer more easily than a modified device.
App integrity asks whether the app package matches the version that the developer published. It checks the signing certificate and the package name and the installation source. An app that was modified after signing will fail this check. An app installed from a store that the developer did not use may also fail depending on the policy that the developer set.
Account details add a third layer for some use cases. They can show whether the account has a history of abuse or whether it looks risky. Developers should not treat an account verdict as a verdict about a person. Use it as one signal among several signals and keep the user experience fair when a verdict is weak or missing.
Why hardware attestation fails on test devices
Test devices often fail because they are rooted or unlocked for development. Those states are useful for testing but they change the attestation result. A developer should expect a weaker verdict on a development device and plan tests around that fact. Use a stock device for a final integrity test and use a development device for feature tests that do not need a strong verdict.
Custom ROMs can fail even when they work well in daily use. A custom build may lack the certified attestation key for that model. It may also report a build fingerprint that does not match a recognised release. That mismatch is not a bug in your app. It is a result of the device state. Document that result for your team so support staff do not chase a fix that does not exist.
Emulators also give different verdicts. An emulator is a useful test tool but it is not a real device with secure hardware. Do not judge a production integrity policy from emulator results alone. Run the final check on a real stock phone with the production signing key and the production package name.
Reading a verdict without overreacting
A verdict is a set of labels and not a simple pass or fail. Read each label separately. A device may meet basic integrity but not device integrity. That split tells you that the device runs Android but lacks strong hardware proof. Your app can allow basic features in that case and restrict sensitive actions such as large payments or account changes.
Log verdicts in a safe way during testing. Record the device model and the Android version and the bootloader state and the verdict labels. Do not log the full attestation token in a public log. Tokens are sensitive and they expire. A short summary of labels is enough for debugging and it is safer to store.
Check the request itself before you blame the device. A request with a wrong package name or a wrong signing setup can fail even on a good device. Confirm that the production app uses the same signing key that the console expects. Confirm that the API is enabled for the correct project. Those simple checks solve a surprising number of failures.
Fixing legitimate failures step by step
Start by reproducing the failure on a device that you control. Note the exact verdict labels and the app version and the device state. Change one factor at a time. Lock the bootloader on a test device or install the app from the official store or use a stock build. Each change tells you which factor caused the failure.
Review your server logic after you fix the device side. A server should handle a missing verdict gracefully. It should not crash and it should not lock a user out forever because of one weak check. Offer a clear message that explains what happened and what the user can do. A vague error message frustrates honest users and increases support load.
Test the full flow after a fix. Request a new verdict and check the server decision and the app behaviour. Test on a stock device and on a development device so you know both outcomes. Keep a record of the expected behaviour for each verdict level. That record helps future developers avoid changing the policy by accident.
- Reproduce the failure on a device that you control.
- Record the exact verdict labels and device state.
- Change one factor at a time during testing.
- Test the full flow on a stock device after a fix.
Code you can adapt
// Request a Play Integrity verdict and handle labels separately
IntegrityManager manager = IntegrityManagerFactory.create(context);
IntegrityTokenRequest request = IntegrityTokenRequest.builder()
    .setCloudProjectNumber(123456789L)
    .build();
manager.requestIntegrityToken(request)
    .addOnSuccessListener(response -> {
        String token = response.token();
        // Send token to your server for verification.
        // Never trust a verdict that only the client checked.
    });
The snippet above is an original example written for this guide. It shows the client side request pattern and it reminds developers that verdict verification must happen on a server.
Server verification matters because client code can be changed. A server checks the token signature and the verdict labels and the expiry time. It then makes a decision based on policy that the user cannot edit in the app. That design keeps the check meaningful even when someone inspects the app code.
Keep the policy simple at first. Allow basic use for weaker verdicts and restrict only the actions that truly need strong trust. A policy that blocks everything for a weak verdict will annoy users on legitimate devices that lack hardware attestation. A graded policy protects sensitive actions without punishing ordinary use.
How this topic connects to nearby work
Device trust starts with the isolation model explained in the guide to Android application sandboxing.
Root state is one factor behind many verdicts and it is explored in the guide to bypass Android root detection for testing.
Verdict handling belongs in a wider routine described in the guide to application security audits.
Putting it into practice
Nonce handling is a detail that many first implementations get wrong. A nonce is a single use value that links a verdict request to a server session. Reusing a nonce lets an old verdict be replayed for a new session. Generate a fresh nonce for each sensitive action and check it on the server when the verdict arrives. Store the nonce only for the short time that the action needs it. That small habit closes a replay hole that a verdict alone cannot close.
Verdict caching on the server needs a clear lifetime policy. A verdict for a low risk action such as viewing content can live longer than a verdict for a payment. Set a short lifetime for sensitive decisions and a longer lifetime for harmless decisions. Log the verdict age with each decision so an audit can tell whether a decision used a fresh check. A graded lifetime policy balances user convenience with security in a way that a single lifetime cannot.
A final integrity check should test the user message that appears when a verdict is weak. Show the app to a tester who has never seen the message and ask them to explain what it means. A message that confuses a first time tester will confuse real users as well. Rewrite the message in plain language and test it again with a different tester. A clear message reduces support tickets and it helps honest users understand what they can do next. That user test takes an hour and it improves the whole integrity flow.
Common mistakes
A common mistake is to require the strongest verdict for every feature. That policy blocks users on older devices that lack modern secure hardware. It also blocks users on devices that are legitimate but uncertified in a region. Grade your policy by risk and reserve the strongest check for money and account security.
Another mistake is to trust a verdict only on the client. Client checks can be bypassed by modifying the app. Always verify the token on a server that you control. Log the server decision and not just the client result so you can audit what happened.
A third mistake is to cache a verdict for too long. Device state can change and a token expires for a reason. Request a fresh verdict for sensitive actions rather than reusing an old one. A short lifetime for sensitive decisions keeps the check relevant.
Frequently asked questions
Why does my app pass on my phone but fail on a tester phone?
The tester phone may have an unlocked bootloader or a custom build or a different installation source. Compare device state and installation source between the two phones. The verdict labels will usually show which factor differs.
Does rooting always cause a Play Integrity failure?
Rooting often weakens the verdict but the exact result depends on device and build and attestation support. Do not assume one rule for all devices. Test on the exact device state that your users will have and record the labels.
Can I fix a failure by changing the app code alone?
Only when the failure comes from the request or the signing setup or the server logic. A device state failure needs a device side change such as a stock build or a locked bootloader. App code cannot honestly change hardware attestation.
Conclusion
Hardware attestation gives developers a useful signal about device trust. It works best when developers read verdict labels separately and grade access by risk. Legitimate failures have clear causes such as bootloader state or signing setup or installation source. Fix the cause that the evidence points to and verify the result on a server.
Your concrete next step is to run an integrity request on a stock test device today and record the verdict labels in a private test note. Compare those labels with the labels from your development device. That comparison will clarify your policy for every later release.

