

How Focus Peaking Apps Help You Achieve Crisp Manual Focus
Many Android users discover focus peaking apps only after a disappointing shot: a portrait where the eyes are soft, a landscape where the foreground blurs, or a video where the subject drifts out of focus at the worst moment. Focus peaking fixes that by painting a bright colour over the parts of the image that are in sharp focus, so you can see focus with your eyes instead of guessing it.
I learned this the hard way shooting a friend’s portrait with a manual lens on a phone. The screen looked sharp, the photo did not. The next time I turned on peaking, set the colour to red, and watched the highlights snap onto the eyes before I pressed the shutter. The shot came out crisp. That is the whole promise of focus peaking: it turns a vague feeling into a visible fact.
This guide explains how focus peaking works, names seven apps that do it well, and shows you the settings and workflow that produce crisp manual focus every time. You will learn which colour to pick, how much magnification to use, and how to build a repeatable routine you can trust on your next shoot.
How focus peaking actually works on Android
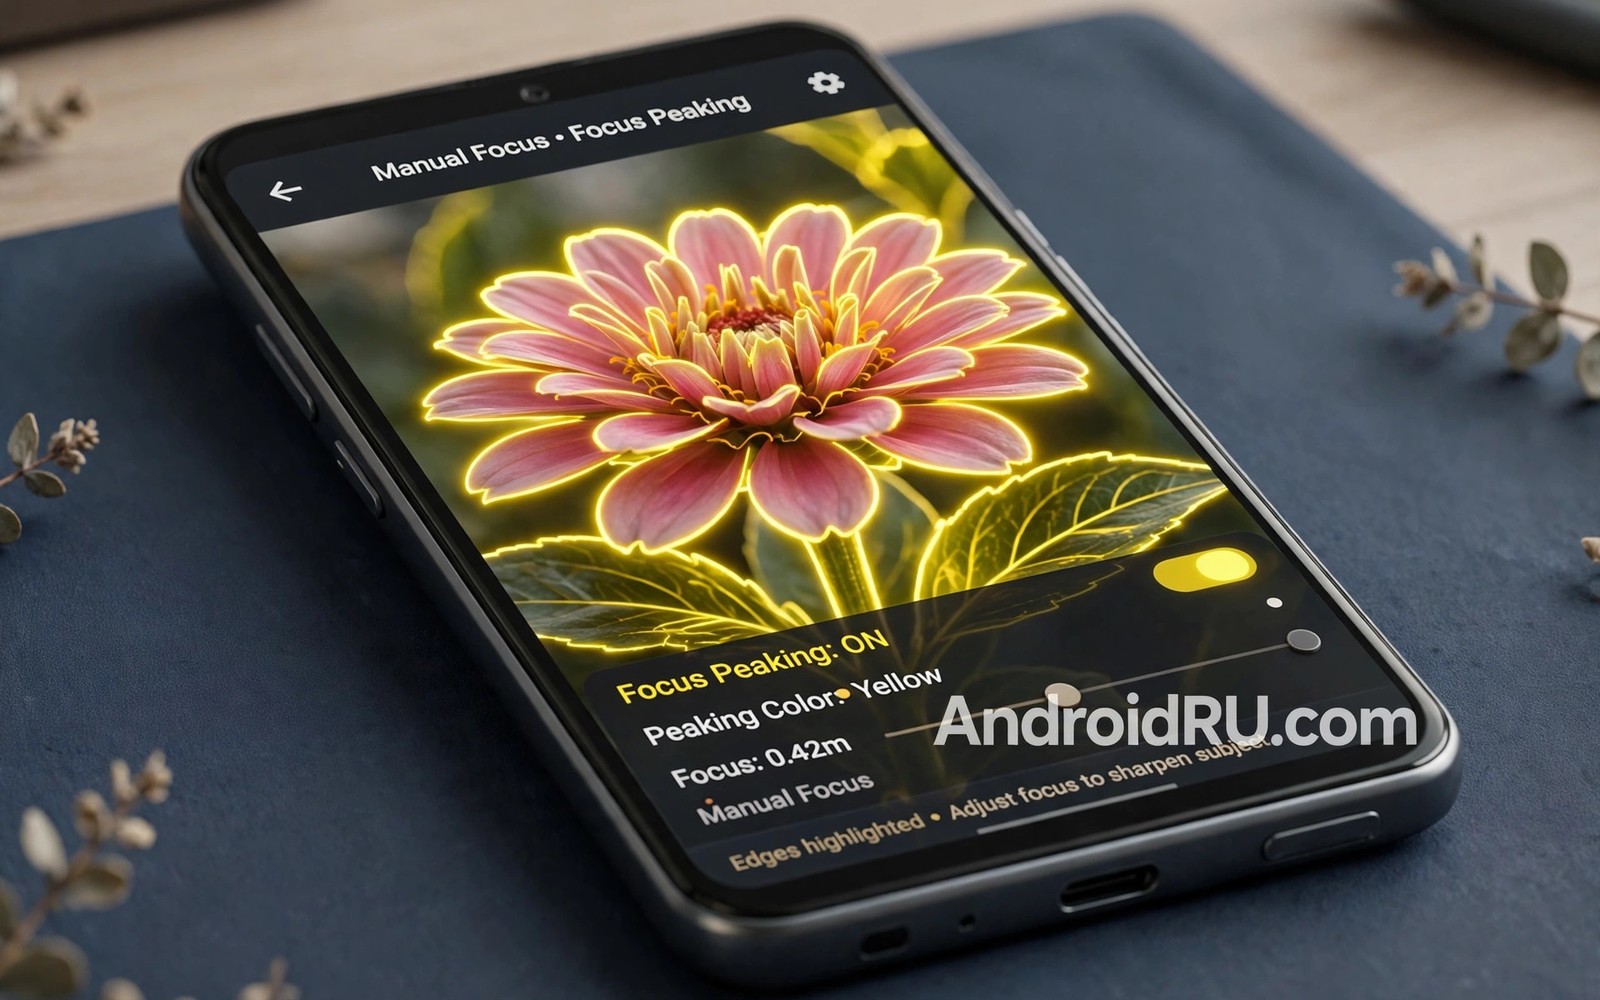
Focus peaking analyses the live camera image for high-contrast edges. The parts of the scene with the sharpest edges get overlaid with a bright colour, usually red, yellow, or white. As you turn the focus ring or drag the focus slider, the coloured highlights move across the image, showing you exactly which plane is sharp right now. When the colour sits on your subject, the subject is in focus.
Peaking is a guide, not a guarantee. It reacts to contrast, so a high-contrast texture can show peaking even when it is slightly soft, and a low-contrast subject may show little peaking even when it is sharp. That is why experienced photographers combine peaking with magnification: they zoom the preview to four times, check the detail, and only then take the shot. Peaking tells you where to look. Magnification tells you whether it is truly sharp.
Most focus peaking apps also respect your existing photos and videos. They import without mangling quality and export without surprise compression, so check import and export behaviour early in any trial. A beautiful preview means little when the saved file looks worse. Start by naming the job you want done before you open any app, because a clear job makes comparison easy and prevents feature chasing.
Settings that matter most for crisp manual focus
Three settings decide whether peaking helps or distracts: colour, level, and magnification. Colour is personal, but red stands out on most scenes. The catch is that red vanishes against red subjects, like autumn leaves or a brick wall, so switch to yellow or white when the scene fights your colour. Level controls how sensitive the highlight is. A medium level suits most scenes, while a high level paints everything and tells you nothing.
Magnification is the setting beginners skip and experts never do. A 4x magnified preview lets you see fine detail like eyelashes or leaf edges, and it confirms what peaking suggests. Use it for still subjects, and use a lower magnification for moving subjects, because too much zoom makes tracking hard.
A clear peaking setup for still subjects
Start with this baseline and adjust it to your phone: peaking colour red, peaking level medium, magnification 4x, and focus step fine. Test it on a still subject in good light, and watch how the highlights behave as you move focus slowly through the scene. Change one setting at a time when results look wrong, because changing three controls at once hides the cause of the problem.
When to switch peaking colour
Switch colour when the highlights blend into the scene. Red fails against red and warm subjects. Yellow fails against bright sand and skin tones. White fails against bright skies. Keep two colours you trust and switch between them as the scene changes. A short note with your winning combination saves a long search next time, because memory fades fast and settings screens rarely show history.
Focus step size and why fine beats fast
Fine focus steps move the focus plane in small increments, which suits portraits and close work where a millimetre matters. Coarse steps suit landscapes, where the depth of field is wide and small errors vanish. Set the step to fine for people and products, and to normal for landscapes and street scenes. The right step size turns a frustrating hunt into a smooth sweep.
7 focus peaking apps that deliver crisp manual focus
These seven apps offer real focus peaking, not a filter that pretends to. Each one includes what it does well, where it falls short, and who should use it.
1. Filmic Pro
Filmic Pro is the professional standard for manual video on Android, and its focus peaking is the best in this list. It offers adjustable peaking colour and intensity, a magnified focus assist, zebras for exposure, and full manual control over focus, exposure, ISO, shutter speed, and white balance. The peaking overlay is clear even in bright light, and it works smoothly during video recording.
Pros: the clearest peaking overlay available, professional manual controls, and reliable performance during long takes. Cons: a subscription price that puts off casual users, and a learning curve that takes a weekend to climb. Verdict: the best choice for serious video work and the app to beat for peaking quality.
Who it is for
Video creators who shoot manual focus regularly and want the most reliable peaking on Android.
2. Cinema FV-5
Cinema FV-5 brings DSLR-style manual video controls to Android, with focus peaking, manual exposure, and audio level meters. Its peaking is accurate and responsive, and the app lets you adjust focus with an on-screen slider or a connected Bluetooth controller. It records in high bitrates and supports long takes without overheating warnings on most phones.
Pros: strong manual video controls, accurate peaking, and a one-time purchase instead of a subscription. Cons: the interface looks dated, and photo mode is basic. Verdict: the best value for manual video, especially for users who dislike subscriptions.
Who it is for
Video shooters who want manual control and peaking without a monthly fee.
3. ProShot
ProShot is a polished camera app for both photo and video, with focus peaking, manual controls, and a clean interface that beginners can learn fast. Its peaking colour and level are adjustable, and the app pairs peaking with a focus magnifier that opens with one tap. ProShot also offers RAW capture, timelapse, and light painting modes.
Pros: the easiest interface in this list, peaking for both photo and video, and RAW support. Cons: video features are thinner than Filmic Pro, and some advanced modes need a modern phone. Verdict: the best all-rounder for photographers who want peaking without a steep learning curve.
Who it is for
Photographers who shoot both stills and video and want peaking in one friendly app.
4. Open Camera
Open Camera is free and open-source, and it includes focus peaking among a huge set of manual controls. It supports Camera2 API features, RAW capture, and remote control, and it costs nothing. The peaking overlay is functional rather than beautiful, but it is accurate, and the app never shows ads or asks for an account.
Pros: completely free, open-source, no ads, and peaking included with full manual controls. Cons: the interface is plain, and peaking is less refined than paid rivals. Verdict: the best free option, and the right first step for anyone curious about manual focus.
Who it is for
Beginners and budget shooters who want real peaking without paying anything.
5. HedgeCam 2
HedgeCam 2 is a fork of Open Camera with a friendlier interface and extra features, including focus peaking with adjustable colour. It keeps the open-source spirit while adding conveniences like better HDR handling and a cleaner settings layout. It is free, has no ads, and works well on older phones.
Pros: free and open-source, friendlier than Open Camera, and good on older hardware. Cons: updates are slower than commercial apps, and video features are basic. Verdict: the best free alternative when Open Camera feels too plain.
Who it is for
Users who want a free, clean peaking app and like open-source software.
6. Manual Camera DSLR
Manual Camera DSLR focuses on still photography with full manual control and a clear focus peaking overlay. It offers focus peaking colour choices, a magnification loupe, and manual ISO, shutter, and white balance. The app suits photographers who shoot with clip-on lenses or adapters, where autofocus cannot help at all.
Pros: peaking designed for stills, a useful magnification loupe, and a simple interface. Cons: video features are minimal, and the app has not been updated as often as rivals. Verdict: a solid pick for stills photographers, especially those using manual lenses.
Who it is for
Still photographers who use manual lenses and need peaking for every shot.
7. Moment Pro Camera
Moment Pro Camera is built for photographers who use Moment lenses, and its focus peaking is tuned for that workflow. It offers manual focus with peaking, RAW capture, and an anamorphic mode for cinematic video. The interface is clean and fast, and the app pairs well with Moment hardware, though it works fine without it.
Pros: clean interface, peaking tuned for lens work, and good RAW support. Cons: the full feature set needs a purchase, and it is less strong for video than Filmic Pro. Verdict: the best pick for Moment lens owners and photographers who value a clean, fast camera.
Who it is for
Moment lens owners and photographers who want a fast, clean manual camera with reliable peaking.
A practical workflow that holds up on real shoots
A strong workflow has a clear order and a clear stopping point. Capture with care, select ruthlessly, and edit only the keepers. Many people edit everything and finish nothing. A smaller set of strong files beats a large set of half-finished edits. Begin with a small test project instead of your most important photos, and run five varied shots through the full workflow from import to export.
Set up your phone before you shoot. Free up storage, charge the battery, and close heavy background apps. These steps sound dull and they prevent most mid-project failures. Import a small test set and check that colours and detail survive import. Try the main controls on one file before you apply them to a whole set, and export a short sample to view on a larger screen at full size.
Organise files as you go rather than at the end of a project. Name folders by date and subject and keep originals untouched. This habit pays off when you revisit a project months later. Back up project files at natural break points rather than only at the end. Save a copy after selection and another after the main edit, because if an app crashes or a file corrupts, you lose minutes instead of hours.
Review your work on more than one screen when the result matters. A phone screen flatters small flaws and hides colour shifts, while a larger screen reveals problems while you can still fix them. You can borrow ideas from travel video editing to sharpen this review habit, and you can explore batch photo processing when you want a related technique for your next project. For motion work, compare the habit with slow motion recording before you commit to one workflow.
Testing your results before you share them
A finished edit deserves a proper test before it reaches an audience. Export a full-quality sample and open it on a different device when possible. Phones differ in brightness, colour, and sharpness, and a file that looks great on your phone may look dull elsewhere. Ask one honest friend to view the result without any explanation from you. Fresh eyes catch problems that familiarity hides.
Check sound and motion together for video projects. Silent playback hides audio flaws and audio-only review hides visual flaws. Watch the whole piece once without pausing, note every moment where attention drops, and fix the weakest moment first. Fix exposure and framing before fine polish, and fix audio levels before adding music. This order prevents wasted effort on details that a larger fix would have changed anyway.
Focus peaking works best when you test it on purpose. Pick five test photos or clips and run them through the workflow in this guide from import to export. Save the settings that worked and delete the test exports. Then start your real project with confidence and a proven setup.
Common mistakes with focus peaking apps
The most common mistake is trusting a preview instead of the exported file. Previews often use lower resolution and smoother rendering than exports, so always judge the final file on the device where your audience will see it. Another mistake is stacking too many effects in one pass. Each effect adds its own artefacts, and the combination can look muddy fast. Build the look in layers and step back between changes.
Applying strong filters before fixing exposure and white balance wastes effort, and exporting at low quality to save space loses detail forever. Ignoring backups and keeping only one copy of an important project risks everything on a single file. Judging colour under warm indoor light instead of neutral daylight misleads your eye, and skipping a test export means discovering problems after sharing widely.
A final trap is editing while tired or rushed. Fatigue dulls colour judgment and patience alike. Step away for an hour when edits stop improving, because fresh eyes often solve in minutes what tired eyes missed for hours. Manual focus rewards patience, and the best results come from small decisions that stack in your favour.
Frequently asked questions about focus peaking apps
Do focus peaking apps work well on older Android phones?
Older phones can still produce good results when you keep projects small and expectations realistic. Close other apps and work on fewer files at once. Heavy effects and high-resolution exports strain old hardware most, so test with a short project before you commit to a large one.
How much storage should I reserve for manual focus projects?
Reserve at least several gigabytes of free space for any serious project. High-resolution files and project caches grow faster than people expect. Move finished exports to external storage or cloud backup promptly, because free space also keeps the phone responsive during long edits.
Can beginners get good results with focus peaking quickly?
Beginners can get good results fast by following one simple workflow and repeating it. Start with automatic modes and learn one manual control at a time. Compare before and after versions so your eye learns what improvement looks like, because progress comes from repetition rather than from buying more apps.
Which peaking colour should I start with?
Start with red at a medium level and 4x magnification. Red stands out on most scenes, and medium sensitivity avoids painting everything. Switch to yellow when the scene is red or warm, and switch to white when the scene is bright. Test your colour on a still subject first, then trust it on moving ones.
Your next step: test peaking on five shots today
Pick five test photos or clips and run them through the workflow in this guide, from import to export, with peaking turned on. Save the settings that worked and delete the test exports. Then start your real project with confidence and a proven setup. Strong results come from clear goals, careful capture, and restrained editing, and the tools matter less than the habits around them.

