

Best Apps to Create High-Quality Time-Lapse and Hyperlapse Videos
My first time-lapse was a sunset over a harbour, and it looked wonderful on my phone screen. On a laptop the next day it looked like a flickering slideshow with a wobbling horizon, and I learned the lesson that shapes this guide: the app matters less than the choices you make inside it, but the right app makes the good choices easy and the bad choices hard. A strong time-lapse app gives you control over the interval, locks exposure so the sky does not pulse, steadies the frame while you walk, and exports a file that still looks good on a big screen.
This guide covers eight apps that do that job well on Android, from free capture tools to full editors that turn a long shoot into a finished clip. Each app gets its own section with what it does, who it suits, honest pros and cons, and a verdict, plus a comparison table so you can see price, capture controls, and export quality side by side. You will also get a repeatable shooting workflow, the settings that matter most, and the mistakes that ruin more time-lapse clips than any app ever will.
You do not need a flagship phone or a tripod costing a fortune to start. You need a charged battery, free space, a steady hand or a cheap phone clamp, and one app you understand properly. Pick one app from the list, run the small test shoot in the workflow section, and judge the exported file on a larger screen before you commit to a long project. That test takes thirty minutes and it will save you from the flickering sunset I brought home from the harbour.
How Time-Lapse and Hyperlapse Capture Really Work on Android
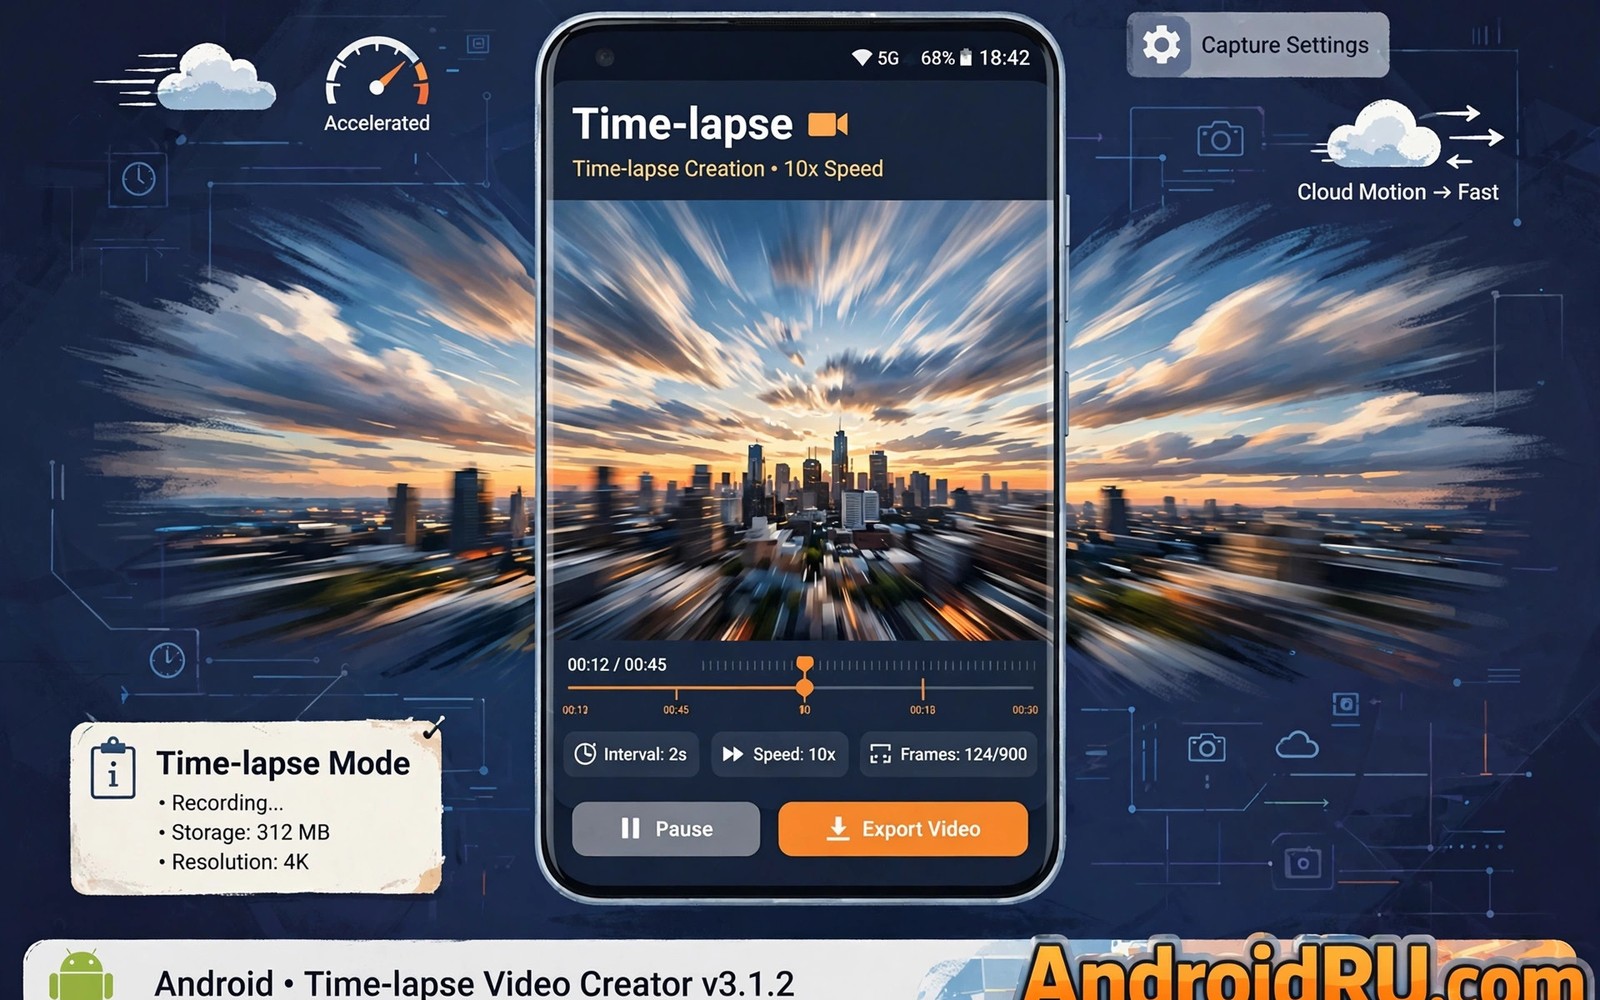
A time-lapse video is a long stretch of real time squeezed into a short clip. The app takes one photo every few seconds, called the interval, and plays those photos back at normal video speed, usually 24 or 30 frames per second. A three-second interval played at 30 frames per second squeezes ninety seconds of real life into one second of video, so clouds race, shadows sweep across a street, and a crowd becomes a flowing river. The magic is arithmetic, not trickery, and once you see the maths you can plan any shoot.
A hyperlapse is the same idea with movement added: you walk, cycle, or drive while the app captures, and software steadies the frames so the journey looks like one smooth glide instead of a shaky walk. Good hyperlapse depends on stabilisation, which crops the edges of each frame slightly and shifts them to cancel your footsteps. That crop costs a little resolution, which is why hyperlapse apps ask you to shoot at the highest resolution your phone offers. A still time-lapse of a sunset needs a tripod or a steady surface. A hyperlapse of a city walk needs stabilisation, and the apps below differ mainly in how well they deliver it.
Interval, frame rate and playback speed
The interval decides how fast the world moves in your finished clip. A one-second interval suits fast subjects like traffic or a busy market. A three to five-second interval suits clouds, sunsets, and construction work. A ten to thirty-second interval suits slow subjects like a plant growing, a building rising, or stars crossing the sky. Playback at 30 frames per second looks smooth for most subjects, while 24 frames per second gives a slightly cinematic feel that suits slow, calm scenes. Keep the frame rate steady for the whole clip, because uneven pacing breaks the illusion of motion faster than any other flaw.
Hyperlapse stabilisation while you walk
Walking adds a bounce to every step, and raw walking footage looks seasick without stabilisation. The best hyperlapse apps analyse the movement between frames and shift each frame to keep the horizon level, which turns a bumpy walk into a floating glide. Walk slowly, hold the phone with both hands close to your body, and take small steps rather than long strides, because stabilisation can fix small bounces but not wild swings. If your phone has optical stabilisation in the camera itself, leave it on, since software stabilisation works best when the hardware has already removed the worst of the shake.
What to Check Before You Pick a Time-Lapse App
Judge an app by the controls it gives you at capture time, because capture decisions cannot be fixed later. Interval control is the first test: an app that only offers fixed speeds is a toy, while an app that lets you set one second, five seconds, or thirty seconds is a tool. Manual exposure lock is the second test: without it, the brightness jumps every time a cloud crosses the sun, and the finished clip flickers. Resolution and export quality are the third test: check whether the app exports at 1080p or 4K, and whether the free version watermarks the result.
Price and popularity mislead buyers in this field. A famous app may suit short social clips while a quiet app suits careful work, so judge tools by your own test files rather than by ratings alone. Check import and export behaviour early in any trial: a beautiful preview means little when the saved file looks worse, and an app that saves smaller files to save space is quietly throwing away detail you cannot recover. Interval shooting is the control that separates a real time-lapse tool from a filter, so if an app hides it or locks it behind a confusing menu, that tells you most of what you need to know.
Capture controls that matter
The controls that earn their place are interval, exposure lock, focus lock, white balance lock, and a maximum clip length you can set before you start. Exposure lock and white balance lock work as a pair: lock both before the first frame, and the light and colour stay steady while the scene changes. Focus lock matters when a person walks past the camera, because an app that refocuses on every passer-by will hunt and blur the whole clip. Test these three locks on a ten-minute shoot before you trust an app with a two-hour sunset.
Export quality and file size
Export at the highest resolution your phone and the app both support, usually 1080p as a minimum and 4K when the app offers it, because a time-lapse throws away most of its frames and every remaining frame needs to be sharp. A one-minute clip at 30 frames per second needs 1,800 frames, and a phone shooting one frame every three seconds needs ninety minutes to collect them. Those frames take space: reserve several gigabytes of free space for any serious project, and move finished exports to backup promptly so a full phone never stops a shoot halfway.
Manual exposure lock
Tap and hold on the brightest part of your scene until the app shows a lock icon, then start capture. The lock stops the camera from brightening the frame every time a dark object crosses the view, which is the single biggest cause of flicker in beginner time-lapse clips. If your scene changes brightness a lot, like a sunset, some apps offer a gradual exposure ramp instead of a hard lock, and that feature is worth paying for when you shoot sunsets often.
Frame rate choices for smooth playback
Thirty frames per second is the safe default for phones, laptops, and social feeds, because every screen plays it smoothly. Twenty-four frames per second suits slow, cinematic scenes and saves a little file size. Sixty frames per second is rarely useful for time-lapse, because the source frames are already sparse and the extra playback frames add nothing but size. Choose the rate before you shoot, keep it the same across every clip in a project, and check the exported file on a larger screen, because a phone screen flatters small flaws and hides flicker.
Time-Lapse Apps Compared: Price, Capture, Export and Stabilisation
The table below compares all eight apps on the same criteria, so you can narrow the list before reading the full reviews. Prices are the typical listing prices at the time of writing and can change, so check the current listing before you pay. Free apps here mean the core capture works without paying, though several add a watermark or cap the resolution until you buy the full version.
| App | Best for | Key capture controls | Max export | Price |
|---|---|---|---|---|
| Lapse It | Full time-lapse projects | Interval, exposure lock, effects | 4K with Pro | Free, Pro paid |
| Framelapse | Simple, quick shoots | Interval, resolution, zoom | 1080p free, higher with Pro | Free, Pro paid |
| Hyperlapse from Instagram | Walking hyperlapse clips | Speed, stabilisation | 1080p | Free |
| Microsoft Hyperlapse Mobile | Smooth moving hyperlapse | Speed up to 32x, stabilisation | 1080p | Free |
| PicPac Stop Motion and Time Lapse | Stop motion plus time-lapse | Interval, manual capture, onion skin | 1080p | Free, Pro paid |
| CapCut | Editing time-lapse clips for social feeds | Speed curves, stabilisation, filters | 4K | Free, Pro paid |
| PowerDirector | Full editing with speed control | Speed adjustment, stabilisation, keyframes | 4K | Free, subscription or paid |
| Filmora | Speed ramping and templates | Speed ramping, templates, stabilisation | 4K | Free, subscription or paid |
Read the table as a shortlist, not a ranking. Lapse It and Framelapse are the purest capture tools, Hyperlapse from Instagram and Microsoft Hyperlapse Mobile are the simplest hyperlapse tools, PicPac is the pick when stop motion shares the project, and CapCut, PowerDirector, and Filmora are editors that make time-lapse from video you already shot. Most people need one capture app and one editor, not eight apps, so pick one from each group and learn them properly.
8 Time-Lapse and Hyperlapse Apps Worth Trying in 2026
Each app below gets the same fair treatment: what it does, who it suits, at least three strengths, at least two weaknesses, and a verdict. I have kept the claims to features these apps are known for, and where a price or a limit can change, I say so rather than inventing a precise number. Start with the app whose strengths match your next shoot, not the one with the longest feature list.
1. Lapse It
Lapse It is the most complete dedicated time-lapse camera on Android, and it has been the default recommendation for years for good reason. It captures with a set interval, applies live effects and filters while it records, lets you trim and add music after capture, and renders the result without leaving the app. The Pro version lifts the resolution cap, removes the watermark, and adds full HD and 4K rendering, which is the version most serious shooters end up buying after a few free projects.
Lapse It suits anyone who wants one app to carry a whole time-lapse project, from the first frame to the finished clip. It is the pick for sunsets, clouds, construction, and city scenes where you set the phone down and let it work for an hour. Beginners can start with the automatic modes and learn one manual control at a time, while experienced shooters will use the interval, exposure, and focus controls from the first shoot.
- Interval shooting with fine control, from fractions of a second to long gaps for slow subjects like plants and stars.
- Live effects, filters, and music that let you preview the finished feel while the capture is still running.
- Built-in trimming and rendering, so a finished clip needs no second app for a simple project.
- Scheduled capture and a clear project list that make repeat shoots, like a building site visited weekly, easy to manage.
Cons:
- The free version caps resolution and adds a watermark, so serious work needs the paid Pro version.
- The interface packs many controls onto small screens, and beginners can feel lost on the first two shoots.
- Long captures keep the screen and camera active, so battery use is heavy and a power bank is nearly essential.
Verdict: the best all-round time-lapse camera for Android when you want capture and finishing in one place. Buy Pro once you have finished two free projects you like, and keep the free version for quick tests.
2. Framelapse
Framelapse does one job and does it cleanly: point the phone, set the interval, and record a time-lapse. The interface is calmer than Lapse It, with large controls, a clear timer, and a simple choice of resolution and frame rate before you start. It supports zoom while recording, lets you set the interval in seconds, and renders the clip at the end with no fuss. The Pro version raises the resolution ceiling and removes ads.
Framelapse suits beginners and anyone who wants a fast, reliable capture without a learning curve. It is the app to hand to a friend for their first sunset, and the app to keep on a second phone as a spare camera on a long shoot. It also suits short social clips, where speed matters more than deep control.
- A clean, simple interface that gets a first shoot running in under a minute.
- Interval and resolution controls that cover the settings most shoots actually need.
- Zoom during recording, which helps when the subject is far away and you cannot move closer.
Cons:
- Fewer manual controls than Lapse It, with no deep exposure ramping for tricky sunsets.
- Editing is minimal, so most finished clips need a second app for trimming, music, or colour work.
Verdict: the easiest way to shoot a good time-lapse on Android. Pick it when simplicity beats depth, and pair it with a proper editor for finished work.
3. Hyperlapse from Instagram
Hyperlapse from Instagram is a free, single-purpose app that turns a walk into a smooth, fast journey. You hold the phone, walk, and the app steadies the footage and speeds it up, with a simple speed slider from 1x to 12x. There are no timelines, no interval menus, and no export settings to argue with, which is the whole point: it removes every decision except walking steadily and choosing a speed.
This app suits travellers, walkers, and social creators who want a moving hyperlapse in minutes. It is the pick for a walk through a market, a stroll along a beach, or a ride through a city, where the journey matters more than fine control. It is less suited to still time-lapse work, since it is built for movement and has no interval capture for a fixed camera.
- Excellent stabilisation for a free app, turning a normal walk into a floating glide.
- A dead-simple speed control that anyone can use without a manual.
- Free with no watermark on the exported clip, which is rare in this category.
Cons:
- No interval capture, so it cannot shoot a still time-lapse of a sunset or a building site.
- No manual exposure or focus lock, so bright scenes can flicker when the light changes.
- Export is capped at 1080p, which is fine for phones but thin for large screens.
Verdict: the best free hyperlapse app for walking shots. Keep it for movement, and keep a proper interval app for still scenes.
4. Microsoft Hyperlapse Mobile
Microsoft Hyperlapse Mobile is an older free tool built around one idea: smooth hyperlapse from a moving camera, with speeds from 1x to 32x. Its stabilisation was ahead of its time, and it still produces remarkably steady walking and driving clips when you can get it running. Availability varies by region and by device, so check the current listing before you plan a project around it, and treat it as a bonus tool rather than your only hyperlapse app.
It suits shooters who already have it installed or who find it in their region and want fast, stable hyperlapse without paying. It is a good fit for cycling, driving, and walking tours, where the high speed range turns a long route into a short, watchable clip. It is not a still time-lapse camera, and it is not a good first choice for anyone who needs a tool they can rely on being available next year.
- Strong stabilisation that handles walking and cycling footage well.
- A wide speed range up to 32x, which suits long journeys compressed into short clips.
- Free, with a simple interface focused on one job.
Cons:
- Availability varies and the app is no longer actively developed, so future Android versions may break it.
- No interval capture for still time-lapse, and no modern editing features.
Verdict: a fine free hyperlapse tool when you can get it, but do not build your workflow on it alone. Pair it with a current capture app as your main tool.
5. PicPac Stop Motion and Time Lapse
PicPac covers the overlap between stop motion and time-lapse, which makes it the odd one out in this list and the most useful app for makers who do both. It captures frames manually or on an interval, shows an onion-skin overlay of the previous frame so you can line up the next one, and renders the frames into a video. That overlay is the feature that matters: it turns careful, frame-by-frame work from guesswork into craft.
PicPac suits stop-motion makers, teachers, and anyone animating objects, drawings, or clay on a phone. It also suits time-lapse shooters who want manual control over each frame, like a plant study where you capture one frame a day by hand. It is less suited to long automatic captures, where a dedicated interval app with scheduling does the job better.
- Onion-skin overlay that shows the previous frame while you line up the next one.
- Manual capture plus interval capture, so it serves both stop motion and time-lapse projects.
- Simple rendering and sharing that keep a classroom or hobby project moving.
Cons:
- The interface feels dated next to modern editors, and the learning curve is steeper than Framelapse.
- Long automatic captures lack the scheduling and exposure tools of dedicated time-lapse cameras.
Verdict: the best pick when stop motion and time-lapse share one project. Buy it for craft work, not for unattended hour-long captures.
6. CapCut
CapCut is a full video editor rather than a capture app, and it earns its place here because most time-lapse clips are made from video you already shot. Import a normal clip, open the speed controls, and use speed curves to ramp the pace up and down, which turns a dull walk into a clip that rushes through the boring parts and slows down for the view. Add stabilisation, filters, text, and music in the same app, and export up to 4K without a watermark on most projects.
CapCut suits social creators and anyone who edits time-lapse for feeds and short video, where the finish matters as much as the capture. It is the pick when your source is a video rather than a stack of still frames, and when you want speed ramping that a capture app cannot offer. It is less suited to unattended interval capture, since it does not shoot a time-lapse by itself. For a related craft, the guide on social media design pairs well with CapCut when your clips need covers and thumbnails too.
- Speed curves that let you ramp time-lapse pace up and down inside one clip.
- Stabilisation, filters, text, and music in a single editor, so most projects finish in one place.
- 4K export and a huge template library for social formats.
Cons:
- It does not capture interval time-lapse itself, so you still need a capture app for still scenes.
- Some effects, templates, and cloud features sit behind a paid Pro plan, and the app asks you to sign in for several of them.
Verdict: the best editor for turning ordinary video into time-lapse. Pair it with Lapse It or Framelapse and you have a complete capture-to-publish kit.
7. PowerDirector
PowerDirector is a full mobile editor with strong speed controls, stabilisation, keyframes, and 4K export, and it treats time-lapse as one speed tool among many rather than a separate mode. Import a clip, set the speed, smooth the result with stabilisation, and layer colour correction, titles, and music on top. The timeline is more capable than CapCut for longer projects, and the keyframe controls let you change speed gradually across a scene instead of in one jump.
PowerDirector suits creators who edit longer time-lapse projects, like travel films and event recaps, where a timeline and precise control beat quick templates. It is the pick when a clip needs colour work, layered audio, and careful pacing in one project. It is heavier than CapCut and asks more of older phones, so test it with a short project before you commit to a long edit.
- Speed adjustment with keyframes, so pace can change gradually across a scene.
- Stabilisation plus colour correction, titles, and layered audio in one timeline.
- 4K export for finished work that will be watched on large screens.
Cons:
- The full feature set sits behind a subscription or paid upgrade, and the free version watermarks some exports.
- The interface is dense, and older or cheaper phones can stutter on long 4K timelines.
Verdict: the strongest editor here for longer, polished time-lapse films. Choose it when the edit is the project, not just the finishing touch.
8. Filmora
Filmora brings speed ramping, ready-made templates, and stabilisation to time-lapse editing, with an interface that sits between CapCut and PowerDirector in depth. Import a clip, apply a speed ramp from a template or build your own, add music and titles, and export up to 4K. The template library is the draw: a travel template or a city template gives a beginner a finished feel in minutes, and the manual controls are there when you outgrow the templates.
Filmora suits beginners who want a polished result fast, and creators who publish often and need a repeatable look. It is the pick for weekly travel clips, event recaps, and social series where the same style repeats. It is less suited to pure capture work, since like CapCut and PowerDirector it edits video rather than shooting interval frames.
- Speed ramping with templates that give a finished look quickly.
- Stabilisation, music, titles, and effects in one editor.
- 4K export and a clear project layout that suits repeat series work.
Cons:
- Key features sit behind a subscription or paid upgrade, and the free version adds a watermark.
- It edits video only, so still time-lapse capture needs a separate app.
Verdict: the friendliest editor for polished, repeatable time-lapse films. Start with a template, learn the manual speed controls, and keep a capture app alongside it.
A Repeatable Shooting Workflow: From Setup to Final Export
A strong workflow has a clear order and a clear stopping point: capture with care, select ruthlessly, and edit only the keepers. Many people edit everything and finish nothing, while a smaller set of strong files beats a large set of half-finished edits. Organise files as you go, name folders by date and subject, and keep originals untouched, because that habit pays off when you revisit a project months later and need the source file fast.
- Charge the phone, free several gigabytes of space, and close heavy background apps before you shoot.
- Fix the phone on a tripod, clamp, or steady surface, frame the shot, and lock exposure, focus, and white balance.
- Choose the interval for your subject: one second for traffic, three to five seconds for clouds, ten seconds or more for slow change.
- Shoot a short test of two minutes, export it, and view it on a larger screen before the real capture.
- Run the full capture, checking the battery and the frame count halfway through long shoots.
- Import the keepers only, trim the weak start and end, and apply colour and stabilisation in that order.
- Export at the highest quality, save the final file in a separate folder from drafts, and back up the originals.
- Applying strong filters before fixing exposure and white balance first, which bakes a colour error into every frame.
- Exporting at low quality to save space, which throws away detail that can never be recovered.
- Ignoring backups and keeping only one copy of an important project, which turns one crash into a lost shoot.
- Judging colour under warm indoor light instead of neutral daylight, which makes every clip look wrong elsewhere.
- Skipping a test export and discovering flicker or wobble only after sharing widely.
- Editing while tired or rushed, when colour judgment and patience both fail and fresh eyes would solve the problem in minutes.
Lock exposure and focus before you start
Locking exposure and focus is the single habit that separates smooth clips from flickering ones. Tap and hold on your subject until the lock icon appears, check that the brightness stays steady when something crosses the frame, and only then start capture. For colour, check your results under neutral daylight rather than warm indoor light, and read the guide on accurate photo colors when your clips look right on the phone but wrong everywhere else. A phone screen flatters small flaws, so judge colour on a second screen whenever the result matters.
Export settings for phones, laptops and social feeds
Export at 1080p as a minimum and 4K when the app and your phone both support it, because time-lapse throws away most frames and every remaining frame must be sharp. Keep the frame rate at 30 frames per second for feeds and laptops, and use the same rate across every clip in a project so cuts never judder. When a project mixes still time-lapse with wide views, the guide on panoramic photography offers a useful companion technique for capturing a whole scene before you compress it into motion.
Picking an interval for clouds, traffic and crowds
Clouds suit three to five seconds, because slower intervals make them jump rather than flow. Traffic suits one to two seconds, because cars move fast and a long interval turns them into streaks of light with gaps. Crowds suit two to three seconds, because people become a flowing river at that pace while still reading as individuals in single frames. When in doubt, shoot a two-minute test at your chosen interval and watch it back before the real capture.
File naming and backup so test clips never mix with finals
Name every export with the date, the subject, and the setting, like 2026-11-07-harbour-3s, so a good test can be traced back to its settings in seconds. Keep drafts and finals in separate folders, because the two look alike in a crowded folder and sharing an unfinished cut is an easy mistake. Back up project files at natural break points, after selection and after the main edit, so a crash costs minutes instead of hours.
Common Mistakes That Ruin Time-Lapse and Hyperlapse Clips
The most common mistake is trusting a preview instead of the exported file. Previews often use lower resolution and smoother rendering than exports, so always judge the final file on the device where your audience will see it. The second mistake is stacking too many effects in one pass: each effect adds its own artefacts, and the combination turns muddy fast, so build the look in layers and step back between changes.
A final trap is shooting without locking anything and hoping the app will fix it later. No app can recover detail that was never captured, and no stabiliser can save a clip that swings wildly. Hyperlapse stabilisation works best when the hardware has already removed the worst shake, and manual exposure lock works best when it is set before the first frame. Get those two right and most other mistakes become easy to fix.
Frequently Asked Questions About Time-Lapse and Hyperlapse Apps
Do time-lapse apps work well on older Android phones?
Older phones can still produce good results when you keep projects small and expectations realistic. Close other apps, work on fewer files at once, and avoid heavy effects and high-resolution exports, which strain old hardware most. Test with a short project before you commit to a large one, and capture at 1080p rather than 4K when the phone stutters. A steady tripod matters more than a new phone for still time-lapse, so spend on support before you spend on hardware.
How much space should I reserve for creating time-lapse and hyperlapse videos?
Reserve at least several gigabytes of free space for any serious project, because high-resolution frames and project caches grow faster than people expect. A one-minute clip at 30 frames per second needs 1,800 frames, and a long capture can fill a phone that looked empty in the morning. Move finished exports to backup promptly, and keep the originals only until the final export is checked on a larger screen. Free space also keeps the phone responsive during long edits.
Can beginners get good results with time-lapse apps quickly?
Beginners can get good results fast by following one simple workflow and repeating it. Start with automatic modes, learn one manual control at a time, and compare before and after versions so your eye learns what improvement looks like. Pick five test shots that include bright light, shade, and motion, run them through the full workflow from import to export, and save the settings that worked. Progress comes from repetition rather than from buying more apps.
Should I shoot time-lapse as video or as still photos?
Shoot as still photos on an interval when you want the highest quality and the most control, because each frame is a full photo you can grade later. Shoot as video and speed it up in an editor when you want speed ramping, stabilisation, and a fast turnaround for social feeds. Many creators do both: still frames for the hero sunset, video speed-up for the walk to the viewpoint. The workflow in this guide works for either source, as long as you lock exposure before the first frame.
Conclusion: Pick One App and Shoot a Test Today
Choose one capture app and one editor from this guide, then run the thirty-minute test: five varied shots, one interval, locked exposure, and an export viewed on a larger screen. Save the settings that worked, delete the test exports, and start your real project with a setup you have already proven. Strong results come from clear goals, careful capture, and restrained editing, and the tools matter less than the habits around them.
Your next shoot will feel easier because the decisions will already be familiar. Keep notes on what worked for your phone, keep your originals backed up, and treat every published clip as a test that informs the next one. The harbour sunset I lost to flicker taught me more than any tutorial, and a single careful test shoot will teach you the same lesson without losing a sunset of your own.

