

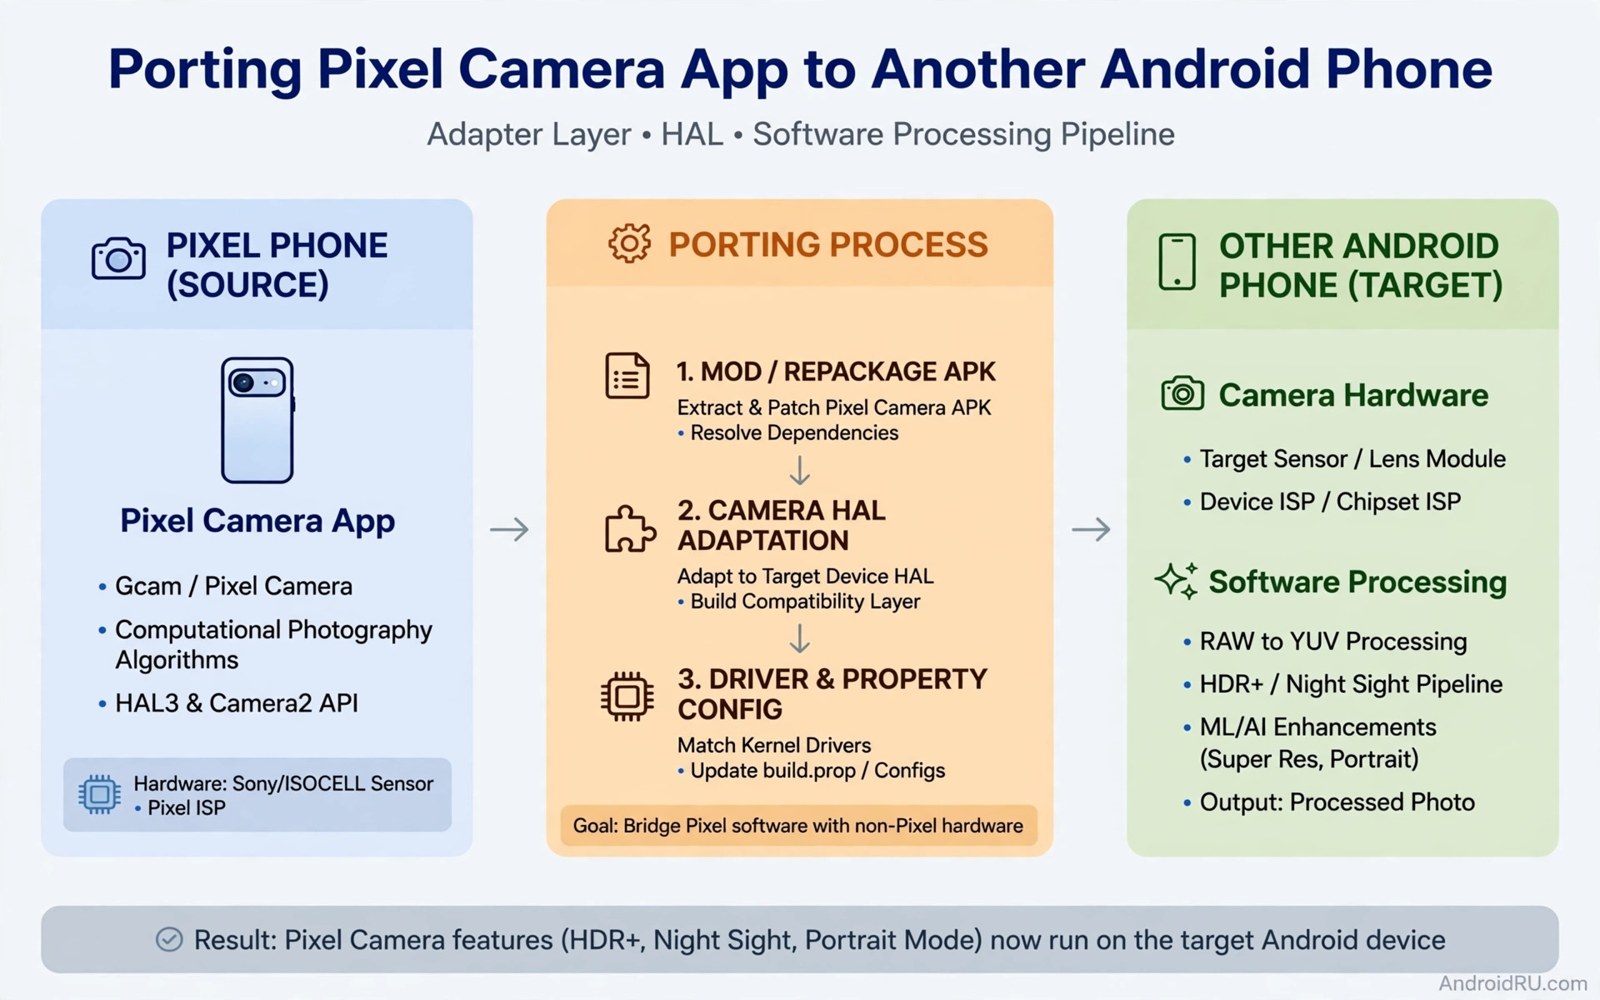
Google Camera (GCam) Porting: Bring Pixel Photography to Any Phone
Pixel phones take photos that punch far above their hardware. The secret is rarely the sensor alone. It is the software that stacks several frames, cleans up noise, and balances light before you ever see the result. A ported version of that same camera app can bring much of that processing to a phone that never shipped with it. That is the whole idea behind a GCam port: the camera app from a Pixel, adapted by independent developers so it runs on other Android phones.
I first tried one on a mid-range phone with a decent sensor and a forgettable stock camera app. Daylight shots looked similar at first glance. The difference showed up at dusk, in a dim restaurant, and in a portrait of a friend against a bright window. The ported app kept detail in shadows, held highlights in check, and produced skin tones that looked like the person in front of me. This guide explains how to get that result on your own phone, what to check before you install anything, and how to fix the problems that show up most often.
This is a practical guide, not a promise that every phone will match a Pixel frame for frame. Results depend on your sensor, your chipset, and the config file you load. Read the compatibility checks first, pick a build made for your exact model, and test it for a few days before you decide it stays.
What Google Camera Porting Actually Does on a Non-Pixel Phone
Google Camera was built for Pixel hardware, so it expects certain camera features to be present. A port is a modified copy of that app, rebuilt by a developer so it can talk to other phones. The developer adjusts which camera libraries the app calls, which sensors it recognises, and which features it exposes. The core processing stays close to the original: HDR+ photo stacking merges a burst of underexposed frames into one clean image, Night Sight extends that idea for very dark scenes, and Portrait mode builds a depth map to separate a subject from the background.
The appeal goes beyond one clever mode. A port often replaces a stock camera app that over-sharpens edges, blows out skies, and turns low light into a smear of noise. On many phones the ported app produces calmer colours and more usable detail, especially indoors. That said, a port cannot add hardware your phone lacks. It cannot give you a larger sensor, a better lens, or optical zoom you do not have. What it can do is squeeze more out of the hardware already in your hand, and on some models the jump is large enough to change which camera app you open every day.
Part of the draw is how little the rest of the phone has to change. You do not need to replace your whole system to try a better camera. The experience stays close to a clean software experience, because you are swapping one app, not rebuilding the phone. If the port misbehaves, you uninstall it and the stock camera is still there.
How HDR+ photo stacking changes a normal shot
HDR+ takes several frames the moment you press the shutter, aligns them, and averages out random noise. Bright areas keep detail instead of turning white, and dark areas lift without turning grainy. On a phone with a small sensor, this stacking does more for image quality than any single hardware tweak. Try it on a scene with a bright sky and a shaded subject, then compare the same scene with your stock app. The stacked file usually holds both ends of the light range.
Why Night Sight works when a flash would ruin the shot
Night Sight lengthens the exposure and stacks frames while you hold the phone still, so it gathers light a single quick shot cannot. A flash would flatten faces and kill the mood of a room. Night Sight keeps the warm light of a lamp or a street scene and still shows faces clearly. It needs a steady hand or a surface to rest the phone on, and it takes a few seconds, so it suits still scenes rather than moving pets or children.
What Portrait mode needs from your phone
Portrait mode depends on depth information. On a Pixel that comes from dual-pixel autofocus data and machine learning. On a ported build, the developer has to map that logic onto your sensor. Some phones handle it well, others produce ragged edges around hair or glasses. Test portraits against a plain background first, then try a busier one, and judge the edge detection before you trust the mode for an important occasion.
How to Check Whether Your Phone Can Run a GCam Port
Before you look for a build, check what your phone actually supports. The single most useful check is the Camera2 API level, which describes how much manual control an app gets over the sensor. Phones report one of four levels: Legacy, Limited, Full, or Level 3. A Full or Level 3 phone can usually run a modern port with HDR+ and Night Sight. A Limited phone may run it with some features missing. A Legacy phone will struggle, and the result is rarely worth the effort.
Install a free camera capability checker app and look for the hardware support level for the rear camera. Also check whether RAW capture is listed as supported, since that signals a healthier camera pipeline. While you are there, note your Android version and your chipset. Most current ports target Android 12 and newer, and many are built first for Snapdragon chips, with separate builds for MediaTek, Exynos, and other platforms. Write these three facts down: Android version, chipset, and Camera2 level. Every build choice that follows depends on them.
Check one more thing: whether your phone exposes its auxiliary lenses, such as the ultrawide or telephoto camera, to third-party apps. Some makers lock those lenses to the stock app only. If your phone hides them, a port will still work on the main lens, but you will switch back to the stock app for ultrawide shots. That is a normal trade-off, not a fault in the port.
Reading your Camera2 API level correctly
Open the checker app, tap the rear camera, and find the line labelled hardware level. Full means the app can control exposure time, focus, and frame capture in the way HDR+ expects. Level 3 adds extra capabilities such as reprocessing. Limited means some of those controls are missing, so a port may fall back to simpler processing. Legacy means the phone only offers the old camera interface, and modern ports are unlikely to work well on it.
What to do if your phone reports Legacy or Limited
Do not give up at once, but set your expectations low. Look for an older port version built for your Android generation, and read reports from owners of your exact model before installing. If nobody with your model reports a working build, the stock camera app, plus a good editing app, will serve you better than a port that crashes on launch.
Why the chipset matters as much as the camera
Google Camera processing leans on the image signal processor inside the chipset. Snapdragon chips have the widest port support because developers have spent years tuning for them. MediaTek and Exynos phones have working ports too, but the choice is narrower and the right package name matters more. A build made for a Snapdragon phone will often refuse to install, or crash, on a different chipset. Always match the build to your silicon.
Finding a GCam Port for Your Exact Device Model
Search by your exact model name and codename, not by brand alone. A phone sold under one marketing name can hide several hardware variants, and a port that works on one variant may fail on another. Your codename appears in the settings under About phone, or in the build information. Pair it with the Android version when you search, for example by looking for builds discussed for your model and your Android version together.
Start with the well-known porting communities where developers publish their builds and users report results per device. Look for a thread or page dedicated to your model, and read the last few pages of comments before you pick a file. Recent comments tell you whether the latest version still works after a system update, and whether a specific config file fixes the quirks on your model. A build with a hundred positive reports from your model is a safer bet than a newer build nobody with your phone has tried.
Be wary of re-upload sites that bundle a port with extra apps, ask for payment, or promise a version number far ahead of what the modders have released. A genuine port is free, comes from the modder or a community hub that credits them, and does not ask for unrelated permissions such as access to your contacts or messages. If a file asks for those, delete it.
How to read user reports before you install
Good reports name the device, the Android version, the build version, and which features work. Look for three things: does the viewfinder show a live image, does HDR+ finish processing without a crash, and does the front camera open. If reports say the front camera crashes but the rear works, decide whether that trade is acceptable before you install. Reports that only say “works great” with no detail are weak evidence. Reports that list the config file used and the settings changed are the ones to trust.
When no port exists for your model
Some phones simply have no active port, often because the sensor or chipset is rare. In that case, check whether a generic build for your chipset family runs on your phone, and accept that some modes may stay greyed out. If even the generic builds fail, do not force it by installing random APK files from unknown pages. A camera app that cannot talk to your sensor will not improve your photos, and a file from an untrusted page can carry malware.
Choosing the Right GCam APK: Package, Version, and Chipset
A GCam build is identified by more than its version number. Four details decide whether it fits your phone: the base Google Camera version it was ported from, the package name, the target Android version, and the chipset family it was tuned for. Get any one of these wrong and you get a crash, a black viewfinder, or an app that installs and then refuses to open.
Package names and why there are several
Ports use different package names so several builds can sit side by side on one phone for testing. Common ones end in suffixes such as _snap, _eng, _ruler, or _scan3d, and some use the original Google package name. A build with the original package name may conflict with a Google Camera app already on the phone, while a suffixed build installs alongside it. For a first try, pick the package the modder recommends for your chipset, and keep only one port installed at a time until you know it works. Two ports fighting over the same camera hardware is a classic source of strange crashes.
Matching the base version to your Android version
Newer base versions need newer Android releases. A port based on Google Camera 9.x generally expects Android 12 or newer, while older 8.x ports suit Android 11 and 12 phones. If your phone runs Android 13 or 14, a recent 9.x build is the natural starting point. If you are on Android 11, look for an 8.x build that other owners of your model still recommend. Installing a build that needs a newer Android than you have is the most common reason a port closes the moment it opens.
Snapdragon, MediaTek, Exynos, and other chipsets
BSG and Arnova8G2 builds have long been the first stop for Snapdragon phones, and their packages are labelled accordingly. MediaTek owners often do better with builds tuned for their platform, and some modders publish separate variants per chipset. Exynos phones need builds that account for Samsung sensor quirks. Read the build notes: a good release note says plainly which chipsets it targets and which it does not.
Newest version or proven version
The newest build is not always the best build for your phone. A version that has been out for two months with a config file made for your model will usually beat a version released yesterday with no config yet. Start with the proven one. Once it works and you have a config you like, you can test a newer build on the side and compare the same scenes before you switch.
Installing the APK and Loading an XML Config File
Installation itself is simple, and the config file is where the real tuning happens. Follow the steps in order, and change only one thing at a time so you can tell what helped and what broke.
Step 1: Allow installation and install the APK
Transfer the APK to your phone, open it, and allow installation from that source when Android asks. The prompt appears because the file did not come from Google Play, and it is normal. Install the app, then open it once and grant only the permissions a camera app needs: camera, microphone for video, and storage or photos access so it can save shots. Deny anything unrelated. If the app asks for contacts, messages, or location beyond what you expect, stop and check that you have a genuine build.
Step 2: Create the config folder on your phone
Many ports read XML config files from a folder on internal storage. The folder name depends on the port, and the common pattern is a GCam folder with a Configs subfolder, sometimes versioned such as Configs8 or Configs9. Open your file manager, check whether the port created the folder when it first launched, and create it yourself if it did not appear. Place the XML config file for your exact model inside that folder, not in the Downloads folder, or the app will not see it.
Step 3: Load the config from inside the app
Open the ported camera app, tap twice on the empty black area next to the shutter button, and a small dialog should appear listing the config files in the folder. Pick the one made for your model and confirm. The app restarts with the new settings applied. If double-tapping does nothing, your build may load configs from its settings menu instead, under an entry labelled Configs or Settings import. Check the settings menu before you assume the file is broken.
Step 4: Take test shots in three kinds of light
Photograph the same subject in daylight, in a dim room, and outdoors at dusk. Compare each result with the stock camera app shooting the same scene. Look at shadow detail, highlight control, and colour rather than judging on the small screen alone. Zoom in on faces and text at full size on a larger screen if you can. Keep the config that wins on two of the three scenes, and note which scene still needs work.
Where a good XML config comes from
The best config is one made for your exact model by someone who owns it and has tuned the noise model, the saturation, and the lens settings for its sensor. Community threads for your model usually link one or two configs that most owners use. A generic config can work as a starting point, but it will not know your sensor, so treat it as temporary. Never pay for a config file; the community shares them freely.
What to do when double-tap does not open the config dialog
Some builds need the config folder created before first launch, and some need a restart after the file is placed. Close the app fully, check the folder name against the build notes, and try again. If the dialog still does not appear, the build may store configs in a different path, often under Android/data with the app package name. Read the release notes for the exact path rather than guessing.
Turning On Night Sight, Astrophotography, HDR+, and Portrait Mode
Once the port runs and a config is loaded, the headline modes are usually one tap away, but each has settings worth knowing. The defaults are a fine start. The tweaks below are what turn a working port into a camera you reach for at night.
Night Sight: settings that matter
Switch to Night Sight from the mode list, hold the phone steady, and press the shutter. The app captures frames for a few seconds and merges them. In the settings, look for the focus and timer options. A short timer helps when the phone rests on a wall or a table, because it removes the shake of your tap. If faces look soft, try the focus setting that locks on the nearest face rather than the centre of the frame. That small change fixes most blurry night portraits.
Astrophotography: how to get the mode to appear
Astrophotography is a long-exposure Night Sight variant that appears when the phone is very still and the scene is very dark. Put the phone on a tripod or prop it firmly against something solid, point it at the sky, and wait. The app should switch to Astrophotography on its own after a few seconds, and the capture can run for a minute or more. If the mode never appears, check that the config enables it and that the phone is genuinely still; hand-held attempts rarely trigger it. A clear sky away from street lights gives the best result, and the first attempt is often the weakest, so try again on a darker night before you judge it.
HDR+ Enhanced and frame count
HDR+ Enhanced takes more frames than the standard mode and merges them for cleaner shadows. It is slower, so use it for still scenes and landscapes rather than moving subjects. Some configs expose a frame count setting, often labelled HDR+ frames or similar. Raising the count improves noise at the cost of processing time and heat. On a mid-range phone, a moderate count gives most of the benefit without the long wait. If shots take more than ten seconds to process, lower the count by one step.
Portrait mode and the front camera
Portrait mode on the rear camera is usually the most reliable. The front camera is the fussy one on many ports, because selfie sensors vary widely and the depth logic has to be tuned per sensor. If front portraits crash the app, try a config that other owners of your model use for selfies, or switch the front camera processing to a simpler mode in the settings. Some builds include a separate front-camera fix in the settings under a lib patcher or a front camera entry. Change one of those at a time and test after each change.
GCam Modders Compared: BSG, Arnova8G2, BigKaka, Shamim, and MGC
Five names come up in almost every discussion of ports, and each has a different strength. Knowing who does what saves you from installing a build tuned for a different kind of phone. The table below sums up the reputations these developers have earned over years of releases, based on how their builds behave across many models rather than on any single version.
| Modder | Known for | Best suited to | Notes |
|---|---|---|---|
| BSG | Frequent releases based on the newest Google Camera versions, wide device coverage | Snapdragon phones and users who want the latest base version | Many package variants; read the release notes to pick the right one |
| Arnova8G2 | Long-running stable builds with careful tuning and detailed changelogs | Users who prefer a proven build over the newest release | Releases arrive more slowly, which many owners see as a sign of care |
| BigKaka | Builds tuned for a broad range of chipsets, including MediaTek devices | Phones that other modders cover less well, including some budget models | Check the variant label, since several chipset-specific packages exist |
| Shamim | Stable builds with a large following and strong config support from the community | Users who want a dependable daily camera with a matching config file | Configs made for Shamim builds are widely shared per device model |
| MGC (BSG builds labelled MGC) | BSG releases packaged under the MGC name, often the first port of a new base version | Early adopters testing a new Google Camera base on Snapdragon phones | Expect rougher edges on the first releases of a new base version |
Beyond those five, smaller developers publish ports for specific brands or chipsets, and some of them are the best choice for a particular model. A developer who owns your phone and tunes for its sensor can beat a famous name with a generic build. Judge by reports from your model, not by fame alone. And remember that the Pixel look extends past the camera: if you like the wider Pixel feel, Pixel launcher options are worth a look once the camera is settled, since the launcher shapes the home screen the camera sits on.
Which modder should a first-time user pick
Start with the modder whose thread for your model has the most recent working reports and a config file attached. For many Snapdragon phones that is BSG or Shamim. For a phone with a MediaTek chip, BigKaka is often the better first try. If you value stability over new features, Arnova8G2 is a solid pick. There is no single right answer, and trying two builds in turn, with the same test scenes, tells you more than any recommendation.
Fixing Common GCam Problems: Crashes, Black Viewfinder, and Slow Shots
Most port problems fall into a short list, and most have a fix that does not need a new phone. Work through them one at a time, and test after each change so you know which fix worked.
The app crashes on launch
A crash at launch usually means the build does not match your Android version or chipset. Clear the app data, uninstall it, and try the package variant recommended for your chipset. If it still crashes, step back to an older base version, such as an 8.x build for an older Android release. Also check that no other camera port is installed at the same time, since two ports can clash over camera access.
Black viewfinder but the app stays open
A black viewfinder with working menus points at a camera permission or a lens access problem. First, check the app permissions and make sure camera access is allowed. Then try switching between the rear and front cameras, and between lenses if your build exposes a lens switcher. If the rear camera stays black while the front works, your phone may block third-party access to the main sensor in a way this build cannot work around. Try a different package variant, and read reports from your model to see whether others hit the same wall.
Photos take very long to process
Slow processing is often a frame count or HDR+ Enhanced setting that is too ambitious for the chipset. Lower the HDR+ frame count, turn off HDR+ Enhanced for everyday shots, and close heavy apps before a photo session. A warm phone also processes more slowly, so let it cool after gaming or charging. If processing stays slow after those changes, the build may be too new for the hardware, and an older base version will feel faster.
Front camera crashes or shows a green tint
Front camera trouble is the most common complaint on ports, and it is usually a sensor tuning issue rather than a broken phone. Try a config made for your model that other owners confirm fixes the front camera. If the image has a green or pink tint, look for a colour correction or white balance setting in the lib patcher section, and adjust it in small steps. If nothing helps, use the stock app for selfies and keep the port for rear camera shots; that split is common and perfectly workable.
Video stutters or stabilisation looks wrong
Video is where ports vary most, because stabilisation depends on the chipset and the sensor. If video stutters, lower the recording resolution one step and turn off the most aggressive stabilisation mode. Test a short clip while walking before you record anything important. Some owners keep the stock app for video and the port for photos, which plays to the strength of each.
When to clear data and start again
If several settings changes have piled up and the app behaves oddly, clear the app data, reload the config, and test again from a clean state. This takes two minutes and fixes a surprising number of tangled problems. Keep a copy of the config file you liked, so a fresh start costs nothing.
When to accept that a port is not for your phone
After two builds and two configs, if the app still crashes on launch or the viewfinder stays black, the honest answer is that your phone is not a good match for current ports. That is not a failure on your part. Use the stock camera, keep an eye on community threads for your model, and try again after a major system update, when support sometimes appears.
Frequently Asked Questions About Google Camera Ports
Does a GCam port work on every Android phone?
No. It needs a compatible chipset, a Camera2 API level of Limited or better, and a sensor the port can talk to. Snapdragon phones have the widest choice, while some budget and rare models have no working build at all. Check your Camera2 level and search for reports from your exact model before you install anything.
Is installing a GCam port safe?
A genuine port from a known modder is a normal APK install and does not need root access. The risk comes from fake copies on shady pages that bundle extra software or ask for unrelated permissions. Get the file from a community hub that credits the modder, scan it before installing, and deny any permission a camera app has no reason to request.
Do I need root access to use a GCam port?
No. Ports install like any other APK and run without root. Root can expose auxiliary lenses on some phones, but it is not required for the main camera, Night Sight, or Portrait mode. Plenty of owners run ports for years on phones that have never been rooted, and customization without root covers much of what most people want from a Pixel-style setup.
Why do two GCam builds look different on the same phone?
Each build carries different tuning for noise reduction, saturation, sharpness, and the sensor model. A config file adds another layer of tuning on top. Two builds with two configs can produce visibly different photos from the same scene, which is why testing with your own test shots matters more than reading opinions. Keep the combination that looks right to you, not the one with the most votes.
Will a GCam port make my photos identical to a Pixel phone?
Close, but not identical. The processing is similar, yet the sensor, lens, and image processor in your phone are different from a Pixel, and those differences show up in fine detail and in very low light. On many phones the port closes most of the gap, and in good light the difference is hard to spot. Treat the port as a large upgrade for your phone, not as a Pixel transplant.
Your Next Step With a GCam Port
Check your Camera2 API level and chipset today, then find one build and one config made for your exact model. Install them, shoot the same three scenes with the port and the stock app, and keep the winner. A proven build with a matching XML config beats a newer build with no config every time, and a few evenings of testing will tell you whether the port earns a place on your home screen. If it does, your phone keeps its own hardware and gains the photo processing that made Pixel cameras famous.

